


Table of Contents
- Why Kitchen Cabinet Painting Beats Full Replacement
- Cabinet Painting vs Replacement Cost: What Homeowners Actually Spend
- Best Paint for Kitchen Cabinets: Chemistry That Actually Holds Up
- How to Prep Cabinets for Painting: The Step That Makes or Breaks Results
- DIY Cabinet Painting Supplies: What to Buy and What to Skip
- Step-by-Step Kitchen Cabinet Painting Process
- Common Mistakes That Ruin Cabinet Finishes (And How to Avoid Them)
- When to Call a Professional Instead of Going DIY
- Conclusion: Transform Your Kitchen Without the Remodel Price Tag
Last Updated: May 10, 2026
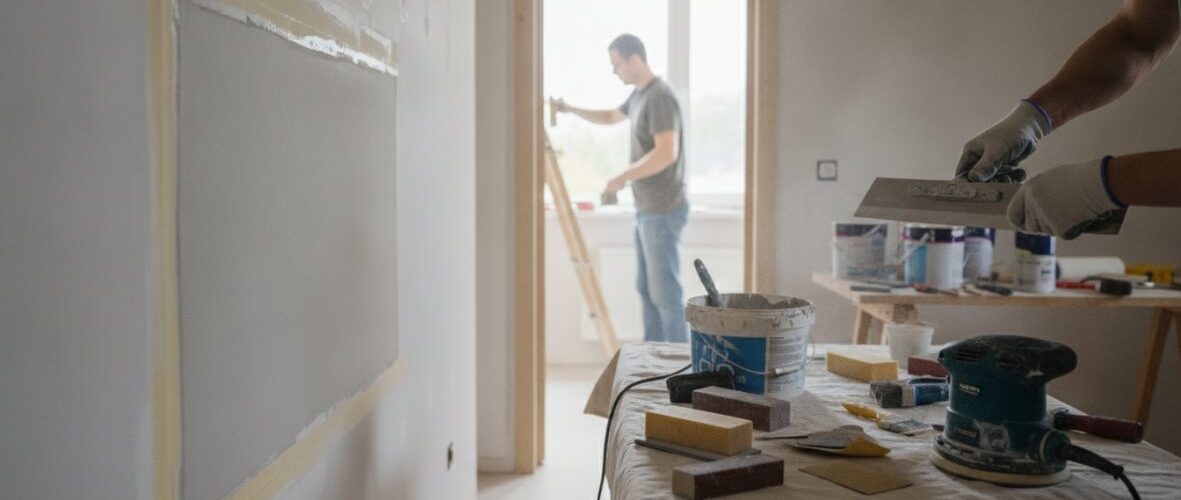
Replacing your kitchen cabinets costs more than most homeowners expect, and kitchen cabinet painting offers a fraction of that price for a result that can look just as good. Denver Cabinet Painting Colorado has helped hundreds of Colorado homeowners transform tired kitchens without the disruption of a full remodel. Below, we’ll show you exactly how to choose the right paint, prep your surfaces properly, and decide when to call a pro instead of going DIY. The five steps we cover are the same ones separating a finish that chips in six months from one that holds up for years.
Here’s what most guides get wrong: they jump straight to color selection and skip the prep work. A beautiful paint color on a poorly prepared surface will fail. Every time. The chemistry, the sanding, the priming, these are not optional steps you can rush through on a Saturday morning.
Why Kitchen Cabinet Painting Beats Full Replacement
Full cabinet replacement is one of the most disruptive kitchen projects you can take on. You’re looking at weeks of downtime, contractor scheduling, and a kitchen that’s essentially unusable during the process.
Cabinet painting sidesteps all of that. The basic case is simple:
- Cabinets are structurally sound in most homes, just visually outdated
- Paint and primer adhere well to wood, MDF, and even thermofoil with proper prep
- The kitchen stays functional throughout most of the painting process
- You can update hardware at the same time for a complete refresh
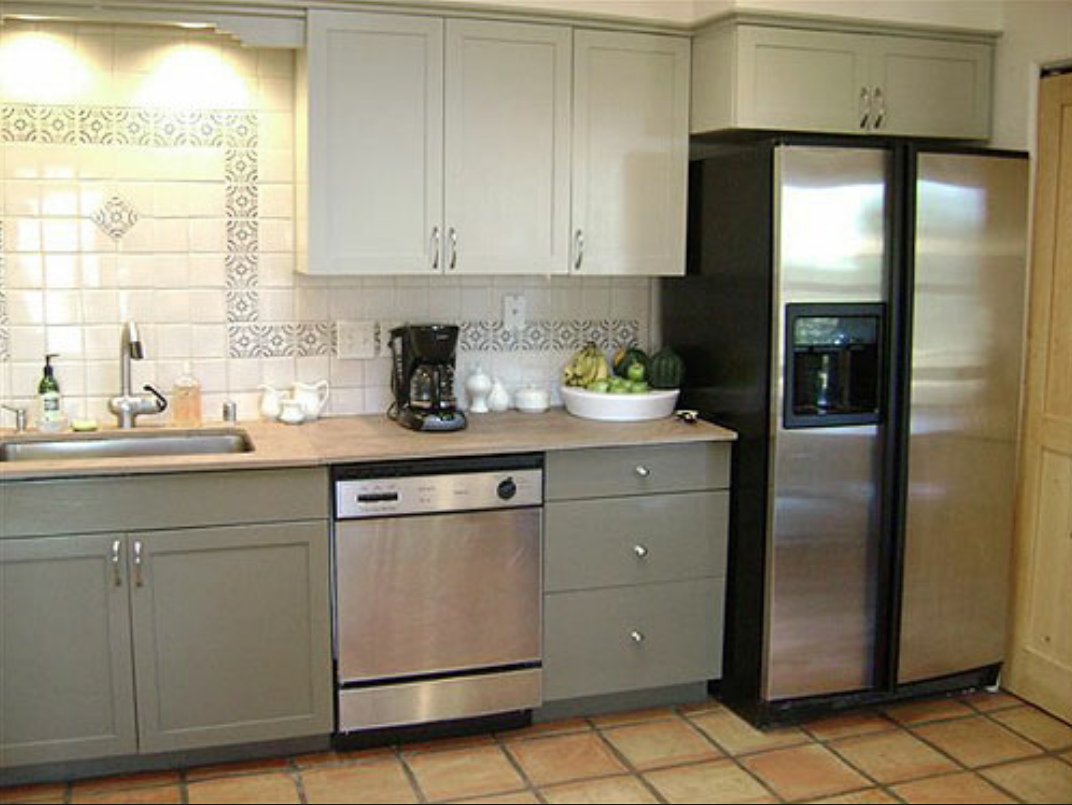
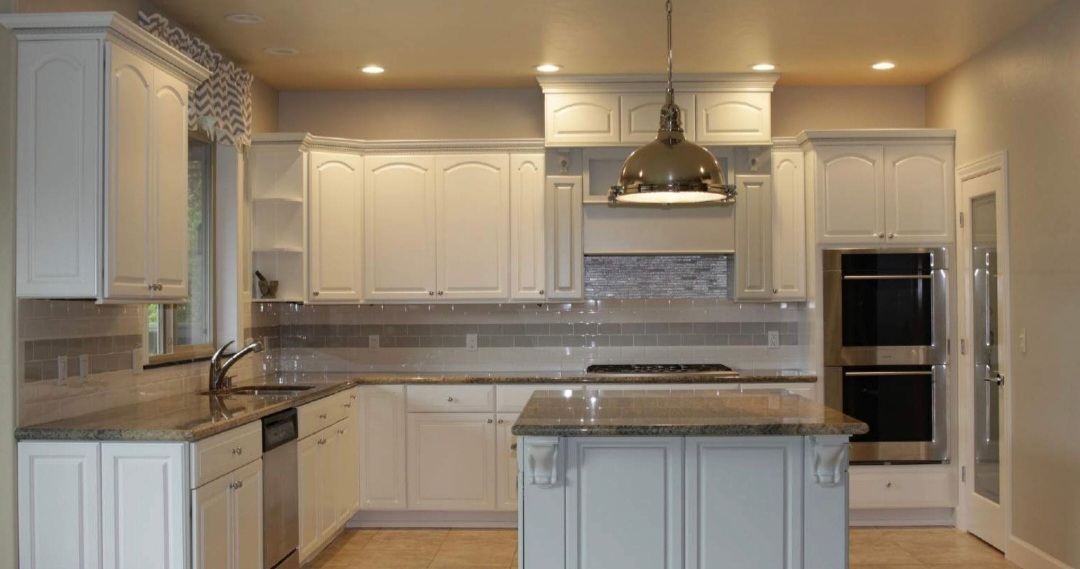
Kitchen cabinet painting is a surface-level transformation that preserves your existing cabinet boxes, hinges, and drawer fronts while completely changing the look of your space. The result is a kitchen that feels new without the cost or timeline of a remodel.
The one honest caveat: if your cabinet boxes are warped, water-damaged, or structurally compromised, paint won’t fix that. But for the vast majority of kitchens, the bones are fine. The finish is the problem.
Cabinet painting works best when the cabinet structure is sound. If your doors close properly and the boxes are solid, painting is almost always the smarter choice over replacement.
Cabinet Painting vs Replacement Cost: What Homeowners Actually Spend
Cost is where the argument for painting becomes impossible to ignore. According to HomeAdvisor’s cost guide for kitchen remodeling, full kitchen cabinet replacement typically runs into the tens of thousands of dollars when you factor in materials, labor, and installation. Painting comes in well below that, whether you go DIY or hire a professional.
DIY Cost Breakdown
A DIY cabinet painting project for an average kitchen typically includes:
- Degreaser or TSP (trisodium phosphate): Low cost, often under $20
- Sandpaper and sanding blocks: $15-30 depending on grit variety
- Bonding primer (1-2 gallons): $40-80
- Cabinet-specific paint (2-3 gallons): $60-150
- Foam rollers, brushes, tack cloth: $30-50
- Paint sprayer rental (optional): $50-80 per day
Total DIY cost for most kitchens lands in a range that’s dramatically lower than replacement. The trade-off is time, skill, and the risk of mistakes that are expensive to fix.
Professional Service Cost Breakdown
Professional kitchen cabinet painting costs more than DIY but still represents strong value compared to replacement. Professionals bring spray equipment, proper ventilation setups, and the experience to avoid the common failures that plague DIY attempts.
What you’re paying for with a professional:
- Proper surface prep (the part most DIYers cut short)
- Commercial-grade bonding primer and topcoat
- Spray finish with no brush marks
- Consistent sheen across all cabinet doors and drawer fronts
- Curing time management so cabinets go back up correctly
For Colorado homeowners, Denver Cabinet Painting Colorado offers free quotes so you can compare the professional cost against your DIY estimate before committing either way.
Best Paint for Kitchen Cabinets: Chemistry That Actually Holds Up
Paint chemistry matters more for cabinets than for walls. Cabinets face grease, moisture, repeated touching, and constant opening and closing. The wrong paint fails fast. Choosing the best paint for kitchen cabinets starts with understanding what you’re actually buying.

Acrylic Latex vs Waterborne Alkyd
Two paint types dominate the cabinet painting market, and they behave very differently.
Acrylic latex dries fast, cleans up with water, and has low VOC options. The downside is block resistance, meaning cabinets can stick together if they’re closed before the paint fully cures. This is a real problem in kitchens where cabinet doors touch each other.
Waterborne alkyd is the better choice for most cabinet projects. It combines the cleanup convenience of water-based paint with the hard, enamel-like finish of traditional oil-based paint. It levels beautifully, meaning brush marks largely disappear as it dries. Curing time is longer (typically 7-14 days for full hardness), but the resulting finish is far more durable.
As noted in The Paint Quality Institute’s guidance on cabinet coatings, waterborne alkyd formulas have largely replaced oil-based alkyd for interior cabinet work because they offer comparable durability with much lower VOC levels.
Finish Sheen: Satin Enamel Is Usually the Right Call
Flat and eggshell finishes are wrong for cabinets. Full stop. They absorb grease, don’t clean well, and show every fingerprint.
The right choices are:
- Satin enamel: The sweet spot for most kitchens. Slight sheen, easy to wipe clean, doesn’t highlight surface imperfections as aggressively as semi-gloss.
- Semi-gloss: More durable and easier to clean, but shows every scratch and surface flaw. Best for high-traffic kitchens or commercial applications.
- High-gloss: Reserved for modern, European-style kitchens where the reflective finish is intentional. Extremely unforgiving of prep imperfections.
For most homeowners, satin enamel in a waterborne alkyd formula is the answer.
Buy a small sample of your chosen paint and apply it to a spare cabinet door before committing. Let it cure for a full week, then test it by cleaning with a damp cloth. You’ll know immediately whether the finish holds up.
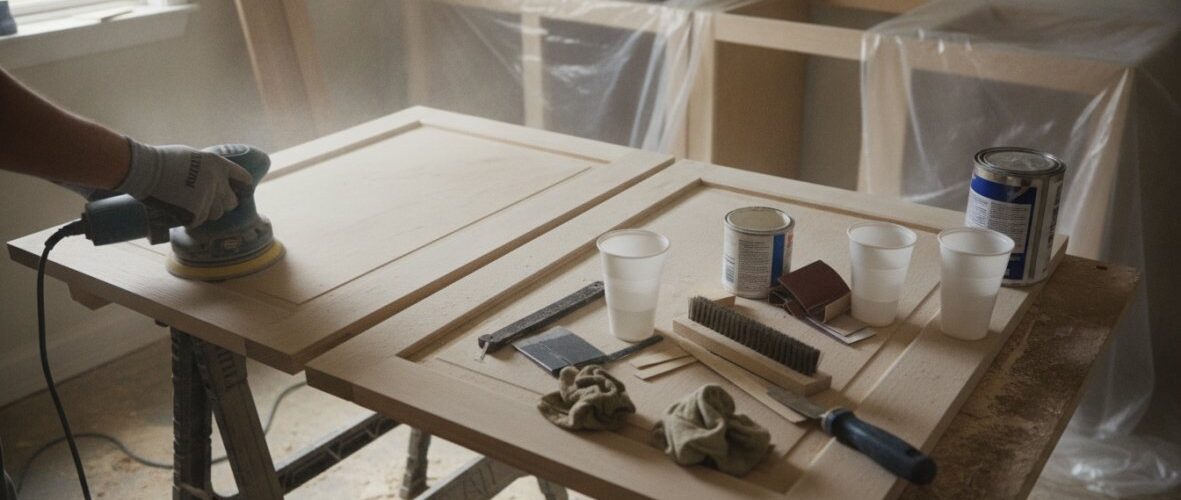
How to Prep Cabinets for Painting: The Step That Makes or Breaks Results
Prep work is where kitchen cabinet painting projects succeed or fail. A professional finish on top of poor prep will peel, chip, and look worse than what you started with within a year. This is the part most guides rush through, and it’s the biggest reason DIY cabinet jobs disappoint.
Degreasing and Deglossing
Kitchen cabinets accumulate years of grease, cooking oils, and cleaning product residue. Paint will not bond to a greasy surface, no matter how good the primer is.
Start with a proper degreaser. Trisodium phosphate (TSP) is the professional standard. It cuts through grease effectively and etches the surface slightly to improve adhesion. Mix it according to the package directions, wipe down every surface you plan to paint, and rinse thoroughly. Allow surfaces to dry completely before moving on.
After degreasing, deglossing is your next step. Most factory cabinet finishes have a sheen that resists paint adhesion. A liquid deglosser or a light sanding with 120-grit sandpaper breaks that sheen and gives the primer something to grip.
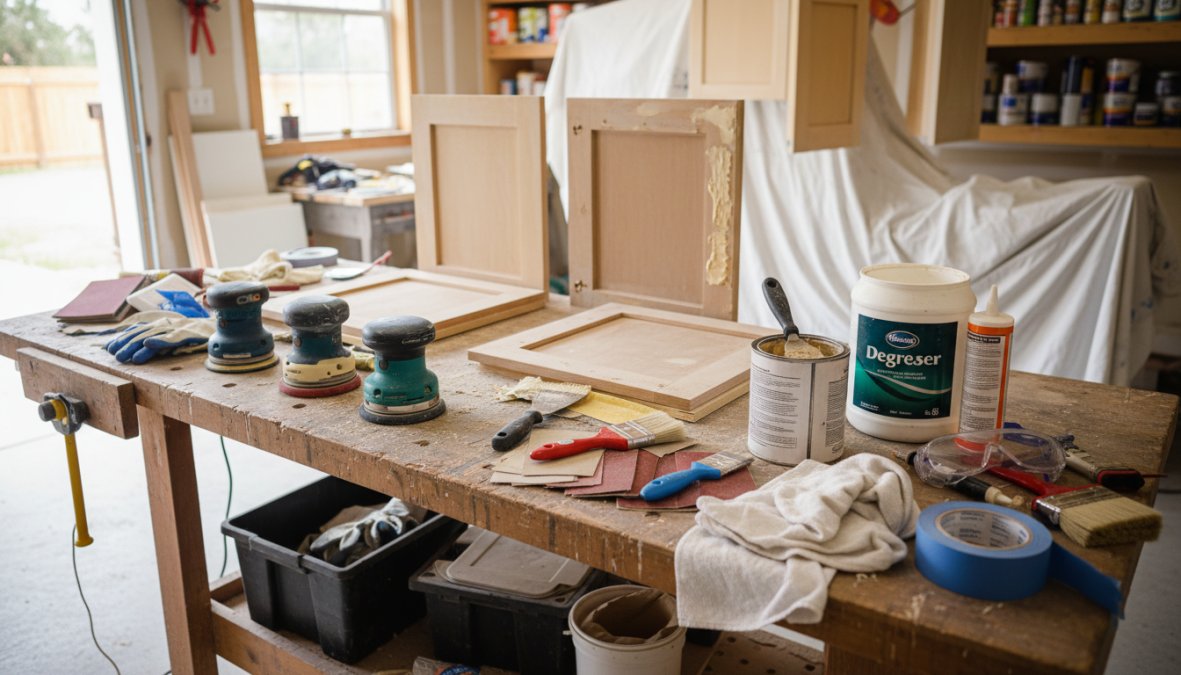
Sanding, Priming, and Tack Cloth
After deglossing, sand all surfaces with 120-grit sandpaper using a sanding block for flat areas and folded sandpaper for profiles and edges. Sand with the wood grain, not against it. You’re not trying to remove the existing finish entirely, just scuff it enough for the primer to bond.
Once sanded, wipe every surface with a tack cloth. This step removes fine dust particles that would otherwise get trapped under your primer and create a rough, gritty texture in your final finish.
Primer application comes next. Use a bonding primer specifically formulated for cabinets. Standard wall primer is not the same thing. Apply a thin, even coat, let it dry fully, then lightly sand again with 220-grit paper. Wipe with a tack cloth again before applying your topcoat.
Skipping the second tack cloth wipe after priming is one of the most common prep mistakes. Sanding primer creates fine dust that settles back onto the surface. If you paint over it, you’ll get a rough, sandpaper-like texture in your finished coat that no amount of topcoating will fix.
DIY Cabinet Painting Supplies: What to Buy and What to Skip
Getting your supply list right before you start saves time and prevents mid-project hardware store runs. Here’s what actually matters for DIY cabinet painting supplies.
Buy these:
- TSP or cabinet-specific degreaser
- 120-grit and 220-grit sandpaper plus a sanding block
- Bonding primer (not standard wall primer)
- Waterborne alkyd cabinet paint in satin enamel
- Tack cloths (buy more than you think you need)
- High-density foam rollers (4-inch for flat surfaces)
- Quality angled brush for profiles and edges
- Painter’s tape and plastic sheeting for masking
Skip these:
- Cheap foam rollers that leave texture in the finish
- Standard latex wall paint (wrong chemistry for cabinets)
- Spray paint cans (inconsistent coverage, poor durability)
- Oil-based alkyd paint unless you have proper ventilation and disposal options
Worth renting:
- An airless sprayer or HVLP paint sprayer for a professional-level finish. The learning curve is real, but spray application eliminates brush marks entirely and produces a far more consistent coat than rolling.
According to Consumer Reports’ guide to paint sprayers, HVLP sprayers produce less overspray than airless models, making them better suited for indoor cabinet work where masking is critical.
Step-by-Step Kitchen Cabinet Painting Process
The kitchen cabinet painting process has a specific sequence. Skipping steps or changing the order causes problems that are hard to fix after the fact.
Total Time: 2-4 days (including drying and curing)
Difficulty: Intermediate
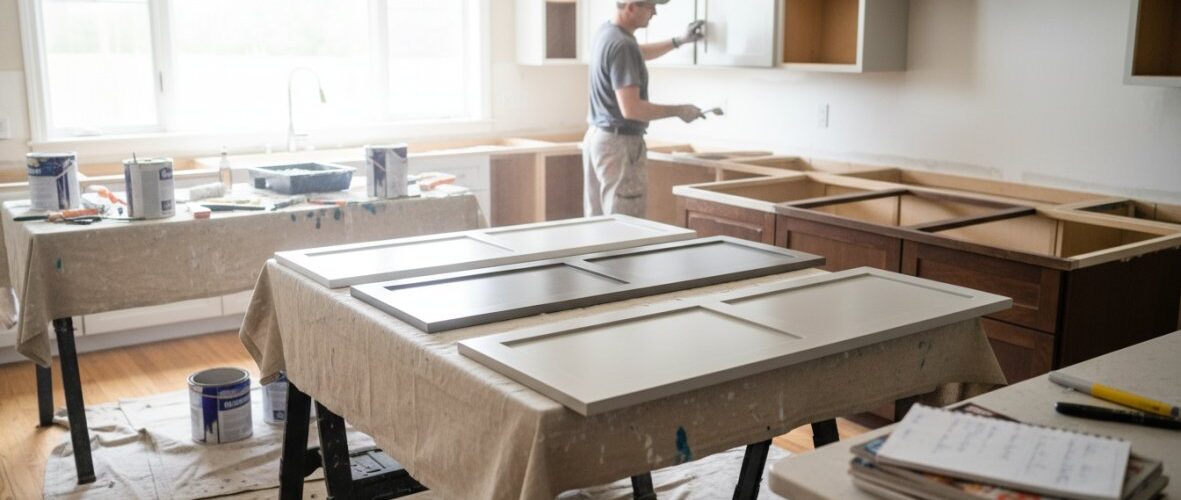
- Remove all cabinet doors and drawer fronts. Label each door with a pencil mark inside the hinge area so you know exactly where it goes back.
- Remove all hinges and hardware. Set them aside in labeled bags. Paint over hardware is a telltale sign of an amateur job.
- Clean all surfaces with TSP degreaser. Rinse and dry completely.
- Degloss and sand with 120-grit. Work with the wood grain.
- Wipe with tack cloth. Remove all dust.
- Apply bonding primer. Thin coat, full coverage. Let dry per manufacturer instructions.
- Sand primer with 220-grit. Light pass only.
- Wipe with tack cloth again.
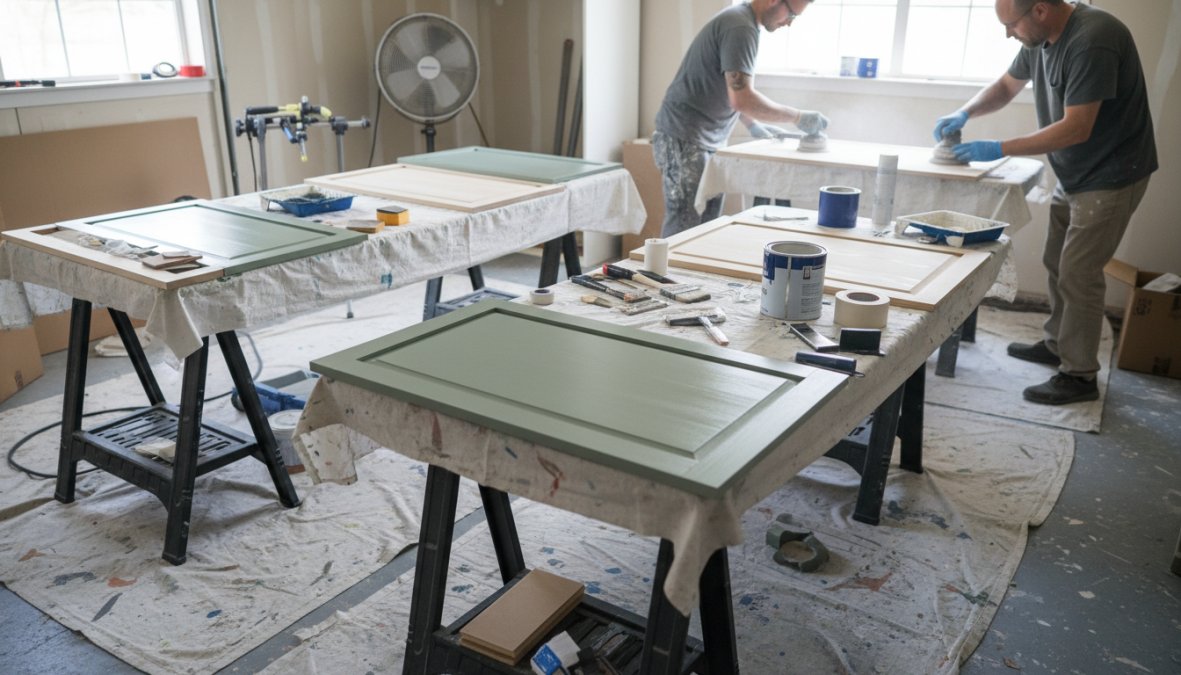
- Apply first coat of cabinet paint. Foam roller for flat areas, brush for profiles.
- Allow full drying time between coats. Don’t rush this. Minimum 4 hours, overnight is better.
- Apply second coat. Evaluate whether a third coat is needed.
- Allow full curing time before reinstalling doors. Waterborne alkyd needs 7-14 days to reach full hardness.

Managing Small-Space Logistics and Downtime
Small kitchens present a real logistical challenge. With all the doors off and surfaces drying, your kitchen becomes a maze of wet paint and drying hardware.
A few practical approaches:
- Paint cabinet doors in a separate space (garage, basement) so the kitchen stays usable
- Stage your work so you always have one area dry and functional
- Plan the project around a long weekend when kitchen downtime is least disruptive
- Keep one cabinet door area clear so you can access dishes and essentials
The curing time issue is real. Many homeowners put doors back on too early and end up with doors that stick together or surfaces that dent from the hinges. Patience during the curing phase is what separates a lasting finish from one that fails in the first month.
Common Mistakes That Ruin Cabinet Finishes (And How to Avoid Them)
Most failed DIY cabinet paint jobs trace back to the same handful of mistakes. Here’s what to watch for.
| Mistake | Why It Happens | How to Avoid It |
|---|---|---|
| Skipping TSP degreasing | Seems unnecessary | Always degrease before sanding |
| Using wall primer | Cheaper and easier to find | Buy bonding primer specifically for cabinets |
| Painting over hardware | Saves time | Always remove hinges and hardware first |
| Rushing between coats | Impatience | Follow manufacturer dry times strictly |
| Reinstalling doors before full cure | Eager to finish | Wait 7-14 days for waterborne alkyd to cure |
| Skipping tack cloth | Seems minor | Wipe after every sanding step |
A common mistake is using the wrong roller. Thick-nap rollers designed for textured walls leave a stippled texture on cabinet surfaces. Use high-density foam rollers only for flat cabinet faces.
What most guides miss is the leveling issue with brush application. Even a quality brush leaves marks in cabinet paint. The solution is to tip off your brushed areas with a dry foam roller immediately after brushing, which smooths the texture before it dries.
When to Call a Professional Instead of Going DIY
DIY kitchen cabinet painting is genuinely achievable for patient, detail-oriented homeowners. But there are situations where professional results are worth the investment.
Call a professional when:
- Your kitchen has more than 20 cabinet doors (the project scope becomes difficult to manage)
- You want a spray finish without brush marks or roller texture
- Your cabinets have complex profiles, raised panels, or decorative details
- You’ve attempted DIY cabinet painting before and weren’t happy with the results
- You want a warranty on the work
The real difference between professional and DIY results often comes down to spray equipment and prep discipline. Professionals use commercial-grade airless sprayers that produce a factory-smooth finish. They also spend more time on prep than most DIYers are willing to invest.
Denver Cabinet Painting Colorado brings 40 years of experience to every project, with an emphasis on meticulous preparation and professional spray application. For Colorado homeowners who want guaranteed results without the trial and error of DIY, that track record matters.
As the National Association of the Remodeling Industry’s guidance on cabinet refinishing notes, professional refinishing services typically include surface warranties that DIY projects cannot offer, which adds long-term value beyond the cosmetic result.
Outdated cabinets are one of the fastest ways to make a kitchen feel tired, and replacement isn’t the only answer. Denver Cabinet Painting Colorado specializes in exactly this transformation, with 40 years of experience delivering smooth, consistent finishes for both residential and commercial clients across the Denver metro area. Their team prioritizes prep work above everything else, which is what makes the difference between a finish that lasts and one that fails. Get a free quote from Denver Cabinet Painting Colorado and find out what your kitchen could look like without the cost of a full remodel.
Frequently Asked Questions
Is it worth painting kitchen cabinets yourself?
DIY kitchen cabinet painting can be worth it if you have patience, the right supplies, and are willing to invest serious time in prep work. The savings over professional services or full replacement are significant. However, achieving a smooth, brush-mark-free finish with good adhesion and block resistance is genuinely difficult. Many homeowners underestimate the curing time and multi-step process involved. If your cabinets have complex profiles or you want a truly durable finish, professional results are hard to replicate without experience.
What is the best type of paint for kitchen cabinets?
Waterborne alkyd and high-quality acrylic latex paints formulated for cabinets are generally the best choices. These offer excellent adhesion, leveling, and block resistance, meaning surfaces won’t stick together when closed. A satin enamel finish is typically recommended for cabinet doors and drawer fronts because it’s easy to clean and hides minor imperfections. Always pair your topcoat with a bonding primer for maximum adhesion, especially over previously painted or glossy surfaces.
Do you need to sand cabinets before painting?
Yes, sanding is a critical part of how to prep cabinets for painting. Light sanding with a sanding block scuffs the existing surface so the bonding primer and paint can grip properly. After sanding, always wipe surfaces with a tack cloth to remove all dust before priming. Skipping this step is one of the most common reasons paint peels or chips prematurely. If you use a liquid deglosser instead, you still need to wipe thoroughly and allow full drying time before applying primer.
How long does it take to paint kitchen cabinets?
A full kitchen cabinet painting project typically takes 3 to 5 days when accounting for proper prep work, priming, multiple paint coats, and curing time between coats. Removing cabinet doors, drawer fronts, and hardware adds time upfront but makes application far easier. Curing time is often overlooked, even after paint feels dry to the touch, most cabinet paints need 2 to 4 weeks to fully harden. Avoid heavy use of cabinet doors and drawers during this period to prevent damage to the finish.
How much does professional kitchen cabinet painting cost compared to replacement?
Professional kitchen cabinet painting typically costs a fraction of full cabinet replacement. New custom cabinetry can run into tens of thousands of dollars, while a professional cabinet painting service generally costs significantly less, depending on kitchen size, cabinet condition, and finish type. DIY cabinet painting supplies can bring costs down further, though results vary. For most homeowners considering a kitchen remodel on a budget, cabinet painting vs replacement cost comparisons almost always favor painting as the smarter investment.
Can you paint kitchen cabinets without removing the doors?
Technically yes, but removing cabinet doors and drawer fronts produces far better results. Painting doors in place makes it nearly impossible to coat edges evenly, increases the risk of brush marks and drips, and makes it harder to remove hinges and hardware properly. If you use a paint sprayer or airless sprayer, doors must be removed to avoid overspray inside the cabinet boxes. For professional results, always remove doors, label them for reinstallation, and paint them flat on a stable work surface.
This article was written using GrandRanker