Table of Contents
- How Kitchen Cabinet Painting Services Near Me Actually Work
- Kitchen Cabinet Painting Cost: What to Expect in 2026
- Cabinet Painting vs Refacing: Which Option Wins?
- How Long Does Cabinet Painting Take From Start to Finish?
- Best Paint for Kitchen Cabinets: Durability and Chemical Safety
- Cabinet Hardware, Hinges, and Color Consultation
- DIY vs Professional Cabinet Painting: An Honest Risk Assessment
- Finding Kitchen Cabinet Painting Services Near Me: What to Look For
- Conclusion
Last Updated: May 31, 2026
Searching for kitchen cabinet painting services near me is one of the most practical home improvement decisions you can make in 2026. At Denver Cabinet Painting Colorado, we’ve spent 40 years watching homeowners transform dated kitchens without the cost or disruption of full cabinet replacement. Below, we’ll show you exactly how the process works, what it costs, how to find a qualified local contractor, and the two angles most guides completely ignore: paint durability and chemical safety, and the honest risks of going DIY. The 8 sections we cover answer every question we hear from homeowners before they commit to a project.
Here’s what most guides get wrong: they treat cabinet painting as a simple cosmetic fix. It isn’t. Done correctly, it’s a multi-stage finishing process that rivals factory production. Done poorly, it peels within 18 months and costs more to fix than it would have to replace the cabinets outright.
How Kitchen Cabinet Painting Services Near Me Actually Work
Cabinet painting is a systematic refinishing process that involves surface preparation, primer application, spray-applied topcoats, and reassembly. The quality of the result depends almost entirely on the preparation phase, not the paint itself.
Professional cabinet painting services follow a defined sequence. Understanding that sequence helps you evaluate whether a contractor is cutting corners before you hand over a deposit.
Surface Preparation and Degreasing
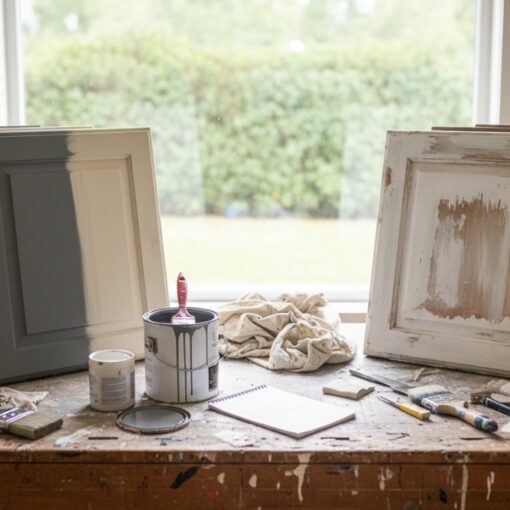
Preparation is where most DIY projects and budget contractors fail. Kitchen cabinet surfaces accumulate years of grease, cooking oils, and cleaning product residue. If that layer isn’t fully removed, paint adhesion fails. Period.
A proper degreasing process uses a dedicated degreaser applied to all cabinet boxes, doors, and drawer fronts. After degreasing, surfaces are sanded to create mechanical adhesion for the primer. Sanding also removes minor surface imperfections that would telegraph through a finish coat.
The specific steps in a professional prep sequence:
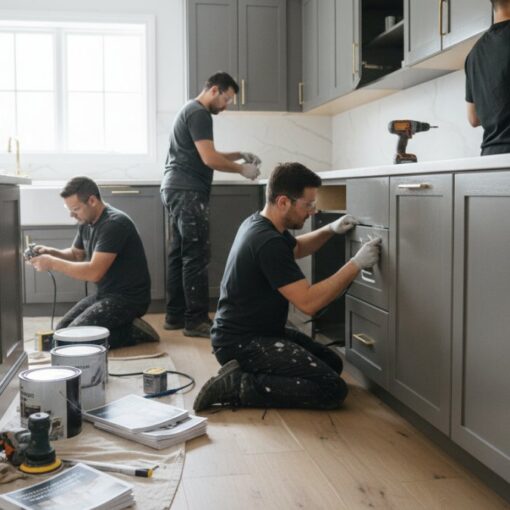
- Remove all cabinet doors, drawers, and hardware
- Label each door for accurate reinstallation
- Apply degreaser to all surfaces
- Sand with appropriate grit for the material (wood, MDF, laminate)
- Wipe down with a tack cloth to remove all dust
- Inspect for damage, fill imperfections with wood filler, and sand again
Skipping the degreasing step is the single most common cause of cabinet paint failure. Even surfaces that look clean carry invisible grease films. Contractors who skip this step to save time will deliver a finish that starts lifting at the edges within months.
Primer, Spray Application, and Top Coat
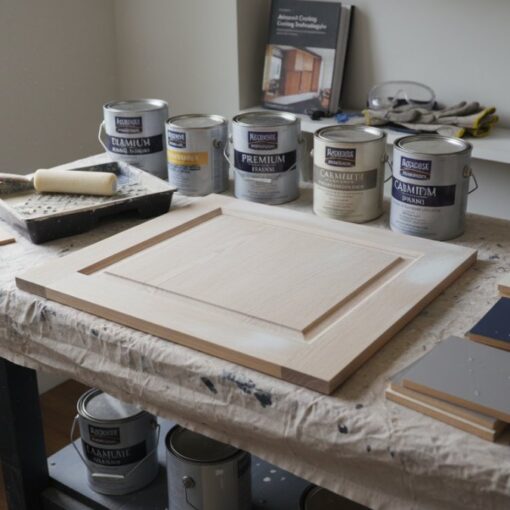
After prep, a bonding primer is applied to all surfaces. Primer creates the adhesion layer that prevents topcoat peeling and blocks tannins in wood from bleeding through light-colored paints. Skipping primer is a shortcut that always shows up later.
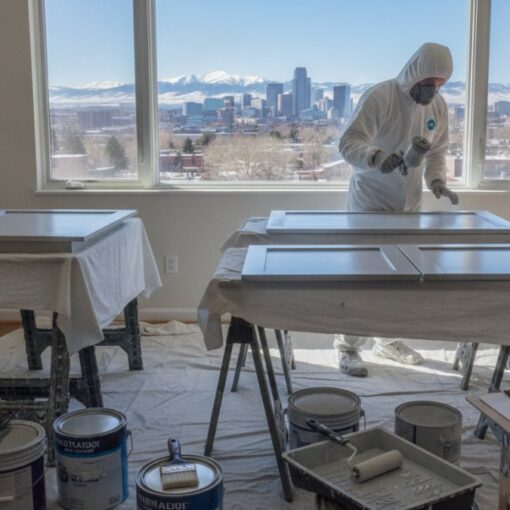
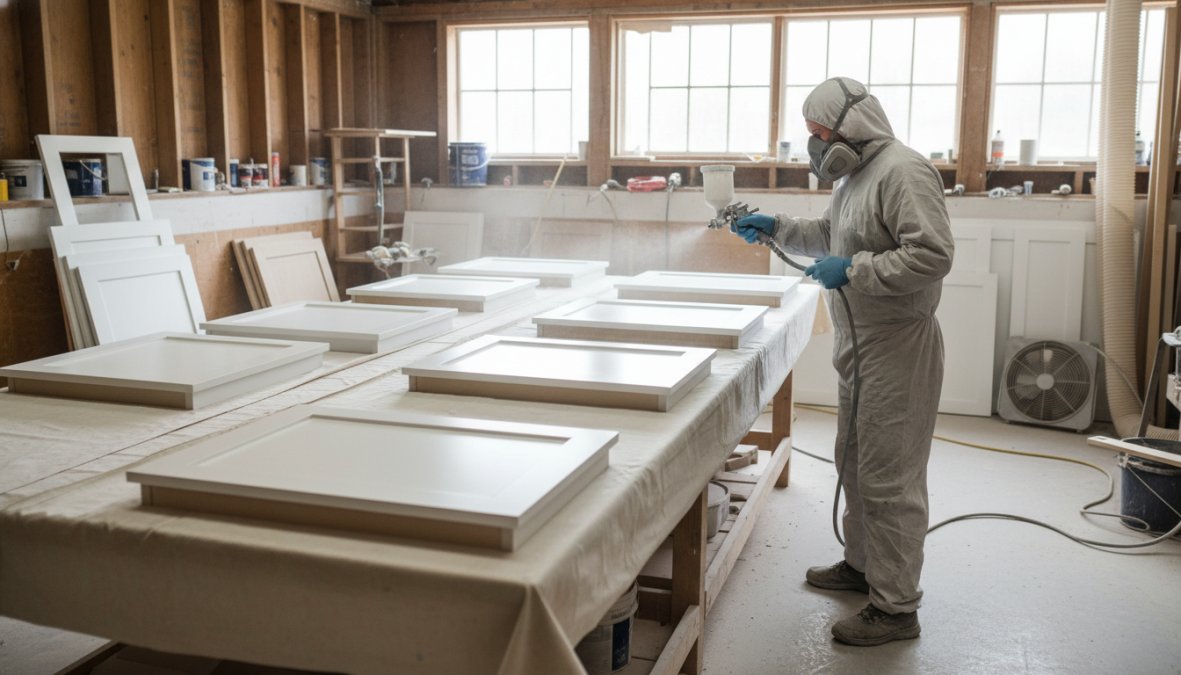
Spray application produces a smoother, more consistent finish than brush or roller work. Professional cabinet painters use HVLP (high-volume, low-pressure) spray systems that minimize overspray and deliver an even film thickness across flat cabinet doors. Cabinet boxes, which stay in place, are typically hand-finished with a small roller or brush, then back-rolled for consistency.
The topcoat is where durability is determined. Most professional services apply two finish coats with a light scuff sand between coats. This builds film thickness and eliminates any surface texture from the first coat.
Kitchen Cabinet Painting Cost: What to Expect in 2026
Kitchen cabinet painting cost varies based on kitchen size, cabinet material, finish type, and local labor rates. For most mid-sized kitchens, professional cabinet painting services represent a fraction of the cost of full cabinet replacement, but understanding how contractors structure their pricing helps you evaluate whether a quote is reasonable before you sign anything.
Most professional cabinet painting contractors price jobs using one of three models: per door, per linear foot of cabinetry, or as a flat project rate. Each model has implications for how your final number is calculated.
How Contractors Price Cabinet Painting Jobs
Per-door pricing is the most transparent model. Each cabinet door and drawer front is counted individually, and a rate is applied based on size and material. This model makes it easy to compare quotes across contractors because the unit of measurement is consistent.
Per-linear-foot pricing measures the total run of cabinetry along the wall. This model is common with larger contractors and franchise operations. It can obscure the actual scope of work if your kitchen has a mix of tall pantry cabinets and short upper cabinets that don’t translate evenly to linear footage.
Flat project rates are quoted after an in-home assessment. For complex kitchens with unusual layouts, island cabinetry, or significant prep work required, a flat rate protects both the homeowner and the contractor from scope creep.
Be cautious of any quote delivered over the phone or based solely on photos. Cabinet painting pricing is highly sensitive to the actual condition of the surfaces, the number of doors, and the finish system specified. A quote without an in-home visit is almost always an underestimate that gets revised upward once work begins.
Factors That Affect Your Final Price
Several variables move the final price significantly:
- Number of doors and drawers: The single largest driver of cost. A small kitchen with 15 doors costs meaningfully less than a large kitchen with 40 doors, even if the square footage difference seems modest.
- Cabinet material: MDF and thermofoil require different prep than solid wood or oak. Thermofoil must be delaminated or replaced before painting, a step that adds both labor time and material cost. Solid wood with open grain requires grain filler for a smooth finish.
- Current condition: Heavily damaged surfaces, previously painted cabinets with peeling or chipping, or cabinets with grease buildup that has penetrated the substrate all require additional prep time. Contractors who don’t account for this in their quote will either cut corners or come back with a change order.
- Color choice: Moving from a medium wood tone to a bright white or deep navy requires more coats to achieve full opacity. Dark-to-light color changes are the most demanding. Expect additional coat charges for dramatic color shifts.
- Hardware replacement: Upgrading hinges and pulls adds cost but is often bundled into the project at a better rate than sourcing hardware separately. Soft-close hinge upgrades, in particular, add labor time for adjustment.
- Finish type: This is where the cost range widens most significantly. Standard waterborne acrylic finishes sit at the lower end of the cost spectrum. Waterborne alkyds cost more but cure harder. Catalyzed lacquers and conversion varnishes, the most durable options, require specialized spray equipment and longer cure management, and are priced accordingly.
- On-site vs. off-site spraying: Contractors who transport doors to a spray booth deliver a cleaner finish with no overspray risk in your kitchen. This adds logistics cost but is worth it for quality-conscious homeowners.
| Factor | Cost Impact | Notes |
|---|---|---|
| Small kitchen (under 20 doors) | Lower end of range | Fewer doors, less labor, faster project |
| Large kitchen (30+ doors) | Higher end of range | More doors, longer timeline, more product |
| Thermofoil or laminate cabinets | Moderate increase | Delamination or adhesion prep required |
| Dark-to-light color change | Moderate increase | Additional coats for full opacity |
| Heavily damaged or previously painted surfaces | Moderate to significant increase | Extra prep time, possible filler work |
| Hardware replacement (pulls and hinges) | Variable | Depends on hardware selected and quantity |
| Catalyzed lacquer or conversion varnish finish | Higher | More durable, longer cure, specialized equipment |
| Off-site door spraying | Slight increase | Better finish quality, no kitchen overspray |
How Cabinet Painting Compares to Replacement
The cost advantage of cabinet painting over full replacement is real and consistent. New semi-custom cabinetry for a mid-sized kitchen, including materials, delivery, and installation, represents a substantially larger investment than refinishing the existing boxes and doors. Professional cabinet painting typically costs between one-fifth and one-third of full replacement for the same kitchen, depending on the finish system and scope of work.
That ratio holds across most markets, though labor rates vary by region. In higher cost-of-living metro areas, both painting and replacement costs rise, but the proportional gap between the two options remains similar.
The more useful comparison is return on investment. Kitchen updates that preserve existing cabinet structures consistently outperform full replacements in cost-recovery terms, according to the National Association of the Remodeling Industry’s cost vs. value research. A refinishing project that restores the visual quality of the kitchen without altering the layout or structure captures most of the aesthetic benefit at a fraction of the replacement cost.
What a Quote Should Include
A professional cabinet painting quote should itemize the following. If any of these are missing, ask for them explicitly before signing:
- Total number of doors and drawer fronts included in scope
- Cabinet box painting included or excluded (and at what additional cost)
- Specific paint system and product names being used
- Number of coats of primer and finish coat
- Hardware removal and reinstallation included or billed separately
- Hardware replacement scope if applicable
- Project timeline from start to completion
- Cure time and any care instructions for the post-cure period
- Warranty terms and what they cover
Request an in-home estimate from any contractor you’re evaluating. Quotes based on photos or square footage alone are rarely accurate, and the gap between a phone quote and the final invoice is where most homeowner frustrations originate.
Cabinet Painting vs Refacing: Which Option Wins?
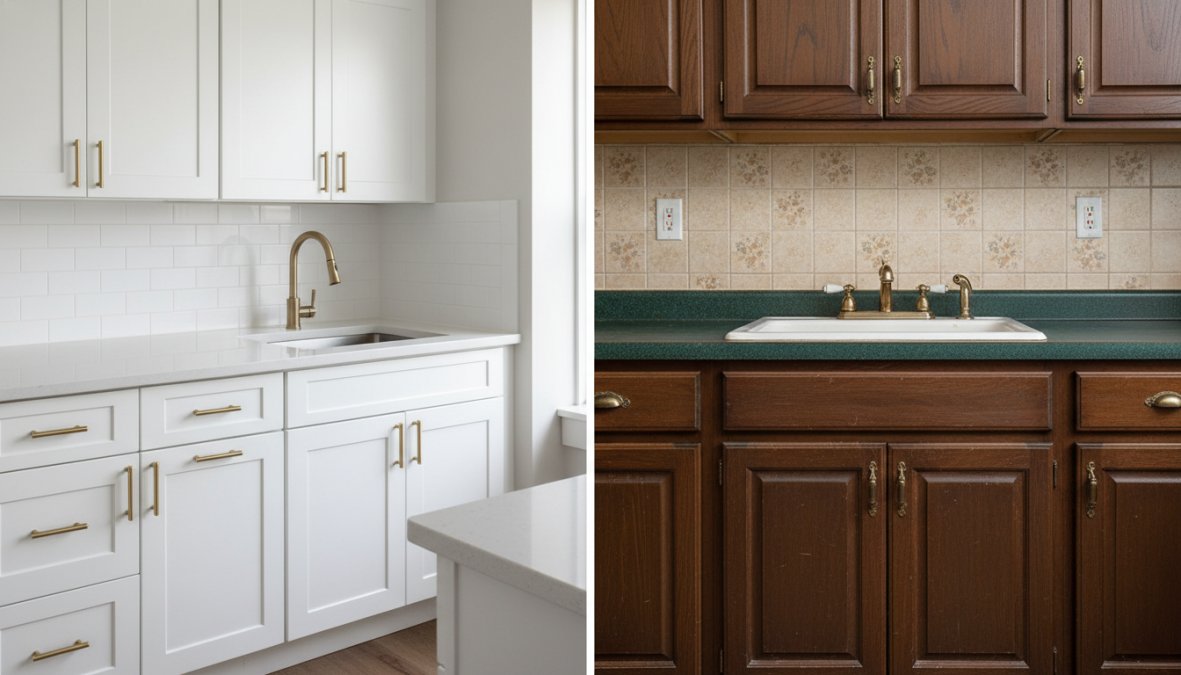
Cabinet painting and cabinet refacing are frequently presented as interchangeable options. They aren’t. They solve different problems, involve different scopes of work, and produce different results. Understanding the structural difference between the two helps you avoid paying for a service that doesn’t match what your cabinets actually need.
What Each Option Actually Does
Cabinet painting refinishes the existing surfaces, doors, drawer fronts, and cabinet boxes, without replacing any components. The physical structure of the cabinet remains entirely intact. The transformation is cosmetic: color, sheen, and surface quality change; the cabinet itself does not.
Cabinet refacing replaces the visible surfaces while keeping the existing box structure. New door and drawer front panels are installed, and the exposed face frames and cabinet box sides are covered with a matching veneer or laminate. Refacing changes the door style and profile, which painting cannot do. A flat-panel door cannot become a shaker door through painting; it requires refacing or replacement.
This distinction matters because contractors sometimes recommend refacing when painting would achieve the same result at lower cost, or recommend painting when the door style is the actual problem the homeowner wants to solve.
The Structural Condition Test
The most reliable way to choose between painting and refacing is to assess the structural condition of your cabinet boxes and the door style separately.
Assess the cabinet boxes first:
Open every cabinet and inspect the box interior. Look for:
- Soft spots, swelling, or delamination in the box panels (common in cabinets exposed to under-sink moisture)
- Drawer glide failures or damaged drawer boxes
- Face frame damage or separation from the box
- Evidence of past water damage at the base of lower cabinets
If the boxes are structurally sound, no soft spots, no delamination, no frame separation, then the box structure is a candidate for preservation. Both painting and refacing are viable.
If the boxes show structural damage, neither painting nor refacing addresses the underlying problem. Replacement becomes the correct answer for the damaged sections, even if the rest of the kitchen can be refinished.
Assess the door style second:
Stand back and look at the door profile. Ask honestly: is the door style itself the problem, or is it the color and surface condition?
- If the door style works for your kitchen and the issue is dated color or worn finish, painting solves the problem completely.
- If the door style is significantly dated, heavy ornate raised panels in a kitchen moving toward a clean, modern aesthetic, refacing or replacement is the only way to change the profile.
- If some doors are warped, bowed, or damaged beyond what paint can conceal, those specific doors can be replaced individually while the rest of the kitchen is painted. This hybrid approach is underused and often the most cost-effective solution.
A simple test for door warping: remove the door and lay it flat on a level surface. If it rocks or shows a visible gap at any corner, the door is warped. Mild warping (under 3mm) is often manageable; significant warping means the door should be replaced before painting.
Side-by-Side Comparison
| Consideration | Cabinet Painting | Cabinet Refacing |
|---|---|---|
| Changes door style/profile | No | Yes |
| Changes cabinet color | Yes | Yes |
| Preserves existing box structure | Yes | Yes |
| Addresses structural box damage | No | No |
| Typical project timeline | 2-5 days | 1-2 weeks |
| Relative cost | Lower | Moderate to high |
| Best for | Sound cabinets, color/finish update | Sound cabinets, door style change |
| Disruption to kitchen use | Moderate (2-5 days) | Higher (longer timeline) |
When Cabinet Replacement Is Actually the Right Answer
Both painting and refacing preserve the existing box structure. If the boxes themselves are failing, neither option is appropriate. Replacement becomes necessary when:
- Box panels are soft, swollen, or delaminating from water damage
- The kitchen layout needs to change (adding an island, relocating the sink, changing the run of upper cabinets)
- The existing cabinet depth or height doesn’t meet current functional needs
- Pest damage has compromised the structural integrity of the boxes
According to the National Association of the Remodeling Industry’s cost vs. value data, kitchen updates that preserve existing structures consistently outperform full replacements in return on investment. Full replacement is the highest-cost option and rarely the highest-return one unless structural failure or layout change makes it unavoidable.
The Honest Contractor Recommendation Test
A contractor who recommends refacing for a kitchen where painting would achieve the same result is either upselling or doesn’t specialize in painting. A contractor who recommends painting for a kitchen where the door style is the core problem is underselling the scope of what the homeowner actually wants.
The clearest signal of a trustworthy contractor: they ask about the door style before recommending a service. If a contractor quotes painting without looking at the door profile and asking whether you’re happy with it, they haven’t done the diagnostic work that separates a good recommendation from a generic one.
Choose cabinet painting when:
- Your cabinet boxes are structurally sound and undamaged
- You are satisfied with your current door style and profile
- You want the most cost-effective transformation
- You want a fast project timeline with minimal kitchen disruption
Choose cabinet refacing when:
- Your door style is significantly dated or mismatched with your design direction
- You want new door profiles without full replacement
- Some doors or drawer fronts are warped or damaged and need replacement anyway
Choose cabinet replacement when:
- The box structure itself is failing
- The kitchen layout needs to change
- The existing cabinetry depth, height, or configuration no longer meets your functional needs
How Long Does Cabinet Painting Take From Start to Finish?
Cabinet painting for a standard kitchen takes 2 to 5 days from start to finish, depending on kitchen size, number of cabinet doors, and the finish system used. This timeline assumes doors are removed and sprayed off-site or in a contained area, with boxes painted on-site.

The typical project timeline breaks down as:
- Day 1: Hardware removal, door labeling, degreasing, and sanding
- Day 2: Primer application and first finish coat on doors
- Day 3: Second finish coat on doors, painting cabinet boxes
- Day 4: Final inspection, touch-ups, hardware reinstallation
- Day 5 (if needed): Full cure inspection and any remaining touch-up work
Paint cure time is separate from dry time. Most professional-grade paints are dry to the touch within hours but reach full hardness over 2 to 4 weeks. During the cure period, treat cabinet surfaces gently and avoid harsh cleaners.
Ask your contractor what paint system they use and what the full cure time is. A contractor who can’t answer that question hasn’t thought carefully about the product they’re applying to your cabinets.
Best Paint for Kitchen Cabinets: Durability and Chemical Safety
The best paint for kitchen cabinets is a waterborne alkyd or a catalyzed lacquer, both of which cure to a hard, scrubbable finish that resists moisture, grease, and the daily abuse a kitchen generates. Standard latex wall paint is not appropriate for cabinet surfaces, regardless of what some budget contractors use.
This is the angle most cabinet painting guides skip entirely: chemical safety and VOC content matter, especially in a kitchen where food is prepared.
What to look for in a cabinet-grade finish:
- Low or zero VOC formulation: Volatile organic compounds off-gas during and after application. Lower VOC products are safer for household occupants, especially children and pets.
- Hardness rating: Cabinet finishes are rated by pencil hardness. Look for products that cure to at least an H rating.
- Moisture resistance: Kitchen environments expose cabinets to steam and humidity. The finish must handle repeated moisture exposure without softening.
- Adhesion to substrate: The finish system must be matched to the cabinet material. A finish that bonds well to solid wood may not adhere properly to MDF without a specific primer.
According to the Environmental Protection Agency’s indoor air quality guidance, VOC emissions from paints and coatings are a significant contributor to indoor air pollution. Choosing a professional who uses low-VOC products isn’t just a preference; it’s a meaningful health decision.
Cabinet Hardware, Hinges, and Color Consultation
Hardware replacement is one of the highest-impact upgrades you can make alongside a cabinet painting project, and it’s almost always underestimated. New pulls and hinges on freshly painted cabinets complete the transformation in a way that paint alone cannot.
Most professional cabinet painting services offer hardware consultation as part of the project. The practical considerations:
- Hinge type: Soft-close hinges add function and feel. If your existing hinges are surface-mounted and dated, replacing them with concealed European hinges dramatically updates the look.
- Pull sizing: Cabinet pull sizing has shifted toward longer bar pulls (6-12 inches) on larger doors. Matching pull size to door size is a detail that separates a professional result from an amateur one.
- Finish coordination: Hardware finish should coordinate with faucets and appliances. Mixing matte black hardware with chrome appliances works for some design directions but not others.
Color consultation is equally important. Denver Cabinet Painting Colorado offers free quotes that include color guidance, helping homeowners choose shades that work with their countertops, flooring, and lighting conditions rather than selecting from a paint chip in isolation.
The color that looks perfect on a paint chip under store lighting will look different in your kitchen under incandescent or natural light. Always request a sample application on an actual cabinet door before committing to a full project.
DIY vs Professional Cabinet Painting: An Honest Risk Assessment
DIY cabinet painting is possible. It is also, for most homeowners, a project that takes three times longer than expected, produces a finish that looks noticeably different from professional work, and occasionally creates a situation that costs more to fix than hiring a professional would have.
That’s not a sales pitch. It’s the pattern that emerges after 40 years of seeing both outcomes.
Where DIY works:
- You have prior spray equipment experience
- Your kitchen has fewer than 20 cabinet doors
- You’re comfortable with a multi-day project requiring full kitchen access disruption
- You accept that the finish will show more texture than a spray-applied professional result
Where DIY fails:
- Brush marks and roller texture in the finish coat (nearly impossible to eliminate without spray equipment)
- Inadequate surface preparation leading to adhesion failure
- Runs and sags in finish coats from improper spray technique or product dilution
- Paint not matched to the substrate, leading to peeling at hinge points and edges
According to the Paint Quality Institute’s guidance on surface preparation, surface preparation accounts for the majority of paint job failures in residential applications. This is the step that takes the most time and is most frequently shortcut in DIY projects.
The real cost comparison isn’t paint vs. professional labor. It’s the cost of a DIY attempt that needs to be stripped and redone professionally versus hiring a professional once.
Finding Kitchen Cabinet Painting Services Near Me: What to Look For
Finding reliable kitchen cabinet painting services near me requires more than a zip code search. The local contractor market for cabinet refinishing includes specialists, general painters who occasionally take cabinet jobs, and franchise operations with variable quality control. Knowing the difference matters.
How to Evaluate Local Contractors and Customer Reviews
The evaluation checklist for any cabinet painting contractor:
- Do they specialize in cabinets, or is it a sideline to general painting?
- Can they provide a detailed written scope of work including prep steps?
- Do they offer an in-home estimate rather than a phone quote?
- Can they show photos of completed projects with similar cabinet materials?
- Do they explain what paint system they use and why?
- Are customer reviews specific about the process, not just the result?
- Do they carry liability insurance and workers’ compensation?
- What is their warranty on the work?
Customer reviews are useful but require interpretation. Reviews that mention specific details ("they removed every door and labeled them," "they used a spray booth for the doors") indicate a contractor who follows a professional process. Generic five-star reviews without process details tell you less.
For homeowners in Colorado, Denver Cabinet Painting Colorado brings 40 years of experience and serves both residential and commercial clients across the Denver metro area and surrounding communities, with a documented emphasis on preparation as the foundation of finish quality.
Maintenance and Cleaning Guide After Cabinet Refinishing
A properly applied professional finish is durable, but it still requires appropriate care. Most paint failures after professional cabinet painting trace back to cleaning practices, not the paint itself.
What to do:
- Clean cabinet surfaces with a soft cloth dampened with warm water and a small amount of dish soap
- Wipe dry immediately after cleaning; don’t let moisture sit on surfaces
- Use microfiber cloths rather than abrasive sponges or scrubbing pads
- Address grease buildup promptly; letting it accumulate makes cleaning harder and can degrade the finish over time
What to avoid:
- Bleach-based cleaners, which degrade most paint finishes over time
- Abrasive cleaners or scrubbing pads that scratch the topcoat
- Ammonia-based products (including many glass cleaners) on painted surfaces
- Steam from appliances directed at cabinet surfaces for extended periods
For long-term durability, the American Coatings Association’s guidance on paint maintenance recommends gentle cleaning methods and periodic inspection of high-wear areas like door edges and areas around handles.
Most professional finishes, when properly maintained, hold up well for 8 to 15 years before refinishing becomes worthwhile. That’s a meaningful return on a single project investment.
Outdated kitchen cabinets are one of the most visible and fixable problems in a home, but the quality of the result depends entirely on who does the work and how they approach preparation. Denver Cabinet Painting Colorado has spent 40 years refining a process built on meticulous surface preparation, professional spray application, and smooth, consistent finishes that hold up to daily kitchen use. With free quotes available for residential and commercial clients across Colorado, getting an accurate cost estimate for your kitchen transformation is a straightforward first step. Get started with Denver Cabinet Painting Colorado and see what a professionally refinished kitchen actually looks like.
Frequently Asked Questions
How much does it cost to have kitchen cabinets professionally painted?
Kitchen cabinet painting cost varies based on kitchen size, number of cabinet doors, cabinet boxes, wood type, and labor costs in your area. Smaller kitchens with fewer doors typically cost less, while larger kitchens with complex layouts cost more. National franchise providers like N-Hance often quote $6,000-$10,000 for medium kitchens. Local cabinet painting experts may offer more competitive pricing. Always request an in-home estimate or free consultation to get an accurate cost estimate for your specific project.
Is it better to paint or replace kitchen cabinets?
Cabinet painting and refinishing is almost always more cost-effective than full replacement, often saving homeowners 50-70% compared to new cabinetry. Cabinet restoration preserves your existing cabinet boxes and structure while delivering a fresh, durable finish. Replacement makes sense only when cabinet frames are structurally damaged or warped beyond repair. For most kitchen remodel goals, updated color, improved finish quality, and a modern look, professional cabinet painting services deliver excellent results at a fraction of the replacement cost.
How long do professionally painted kitchen cabinets last?
With proper surface preparation, a quality primer, and a durable top coat applied via spray application, professionally painted kitchen cabinets can last 8-15 years or more. Paint adhesion is the critical factor, poor prep leads to chipping and peeling within a few years. Following a regular maintenance and cleaning guide (avoiding abrasive cleaners, wiping spills promptly) extends finish life significantly. Some local contractors like Walls by Design even offer lifetime warranties, reflecting confidence in their finish quality and preparation process.
What is the best paint finish for kitchen cabinets?
Semi-gloss and satin finishes are widely considered the best paint options for kitchen cabinets because they balance durability, moisture resistance, and ease of cleaning. High-quality alkyd or waterborne alkyd paints offer excellent paint adhesion and a smooth, consistent finish similar to a factory top coat. For cabinet doors and cabinet boxes in high-traffic kitchens, a catalyzed lacquer or waterborne enamel applied via spray application delivers the most durable finish. Always confirm your professional painters use low-VOC or chemical-safe formulas for indoor air quality.
Do I need to remove my cabinet doors to have them painted?
Yes, reputable kitchen cabinet painting services will always remove cabinet doors, drawer fronts, and cabinet hardware before painting. This allows professional painters to apply an even spray application on all surfaces without masking errors or drips. Cabinet doors are typically finished off-site or in a mobile spray booth for a factory-grade result, while cabinet boxes are refinished in place. Skipping door removal is a common shortcut that leads to uneven finish quality and is a red flag when evaluating local contractors.
This article was written using GrandRanker