Table of Contents
- Pros and Cons of Painting Cabinets: What Homeowners Need to Know
- Cost of Painting Kitchen Cabinets vs Replacing: A Step-by-Step Breakdown
- How Long Does It Take to Paint Kitchen Cabinets?
- Cabinet Painting Tools and Supplies You Actually Need
- Common Cabinet Painting Mistakes and How to Avoid Them
- Beyond Paint: Other Ways to Modernize Outdated Cabinets
- Durability, Maintenance, and Eco-Friendly Considerations
- Is Painting Cabinets Right for Your Kitchen? Final Verdict
Last Updated: May 15, 2026
Pros and Cons of Painting Cabinets: What Homeowners Need to Know
Painting cabinets is one of the most searched kitchen renovation topics for a reason: the pros and cons of painting cabinets are genuinely worth debating before committing to a project. Denver Cabinet Painting Colorado has helped hundreds of homeowners across the metro area work through exactly this decision, and the answer is rarely as simple as "just paint them." Below, we’ll walk you through every angle, from cost comparisons to durability tradeoffs, so you can make the call with confidence.
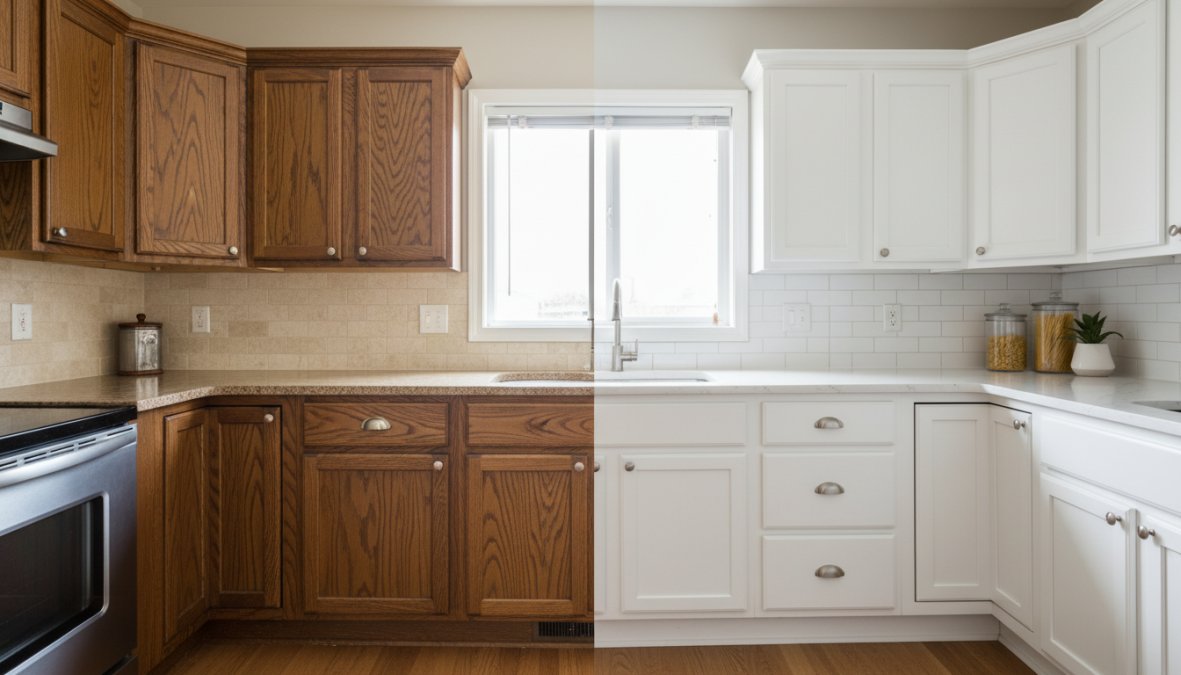
Cabinet painting is the process of applying primer and finish-grade paint to existing cabinet boxes, doors, and drawer fronts to refresh their appearance without full replacement. Done correctly, it produces a smooth, consistent finish that rivals new cabinetry at a fraction of the cost.
Here’s what most guides get wrong: they treat cabinet painting as a purely cosmetic upgrade. The real question is whether the structural integrity and layout of your existing cabinets justifies the investment. If the bones are solid, painting is almost always the smarter move.
The Case For Painting: Key Benefits
The strongest argument for painting cabinets is cost. A full cabinet replacement for an average kitchen runs significantly higher than a professional paint job, making painting the obvious choice for budget-conscious homeowners who want a kitchen makeover without gutting the space.
Beyond cost, here’s what actually tips the scale:
- Aesthetic flexibility: You can shift from builder-grade oak to a monochromatic color scheme in neutral colors or earthy tones without touching the layout.
- Faster turnaround: A professional team can complete most kitchens in two to four days, versus weeks for a full remodel.
- Home value: A refreshed kitchen with a clean, modern finish consistently improves perceived home value during resale.
- Eco-friendly angle: Keeping existing cabinet boxes out of landfills is a meaningful sustainability benefit that rarely gets mentioned.
- Customization: Color options are essentially unlimited, from soft whites to deep navy, which custom kitchen installs can’t always match at this price point.
The case for painting is strongest when your cabinet boxes are structurally sound, your kitchen layout works for you, and you want to modernize the look without a full remodel.
The Case Against Painting: Honest Drawbacks
Painting cabinets isn’t the right answer for every kitchen. The honest drawbacks matter.
Durability is the most common complaint. Paint on cabinets takes more abuse than paint on walls, and lower-quality finishes chip, yellow, or peel within a few years, especially around handles and high-traffic doors. Proper preparation and professional-grade materials close this gap significantly, but a DIY job with budget paint will disappoint.
Prep work is also intensive. Degreasing, sanding, priming, and allowing adequate cure time between coats is non-negotiable for a finish that lasts. Skipping any of these steps is where most DIY cabinet painting projects fail.
Finally, if your cabinets are made from thermofoil, MDF with significant water damage, or particleboard that’s delaminating, paint won’t solve the underlying problem. In those cases, replacement or refacing makes more sense.
Never paint over cabinets with active moisture damage or structural failure. Paint conceals the problem temporarily but accelerates deterioration underneath. The repair cost after that scenario is always higher than addressing it upfront.
Cost of Painting Kitchen Cabinets vs Replacing: A Step-by-Step Breakdown
The cost of painting kitchen cabinets versus replacing them is the central financial question of any cabinet renovation decision, and it’s the question most guides answer with vague ranges that aren’t useful when you’re standing in your kitchen trying to make a real decision. This section breaks the numbers down by line item so you can build a realistic budget before calling a single contractor.
What Actually Drives Cabinet Painting Costs
Three variables account for the majority of price differences between quotes:
- Door and drawer front count. Labor is priced per piece in most professional bids. A kitchen with 20 doors and 6 drawer fronts costs meaningfully more than one with 12 doors and 4 drawer fronts, even if the square footage is similar.
- Existing finish condition. Cabinets with heavy grease buildup, previous paint layers, or stain-grade wood that requires extra sealing coats add prep time, and prep time is where most of the labor hours live.
- Finish type and sheen. A standard satin finish in a single color is the baseline. Two-tone finishes (island a different color than perimeter), glazing, or specialty finishes add cost.
DIY Material Cost Breakdown (Average Kitchen)
If you’re doing the work yourself, here is a realistic line-item material list for an average kitchen of 25-35 cabinet doors and drawer fronts:
| Item | Estimated Cost Range | Notes |
|---|---|---|
| Cabinet degreaser (TSP substitute or dedicated product) | $10-$20 | One bottle typically covers a full kitchen |
| Shellac-based or bonding primer (1-2 quarts) | $25-$50 | Do not substitute standard drywall primer |
| Cabinet-grade waterborne alkyd paint (1-2 quarts) | $40-$80 | Benjamin Moore Advance, Sherwin-Williams Emerald Urethane, or equivalent |
| Sandpaper assortment (120, 150, 220 grit) | $15-$25 | Random orbital pads or sanding blocks |
| Tack cloths (pack of 10-12) | $8-$12 | Use between every coat |
| Painter’s tape (2-3 rolls) | $15-$25 | Blue tape for masking; Frog Tape for crisp lines |
| Synthetic brushes (2-3 quality brushes) | $20-$40 | Purdy or Wooster; do not use cheap foam rollers |
| HVLP sprayer rental (if not purchasing) | $40-$80/day | Most tool rental centers carry these |
| Total DIY materials | $175-$330 | Excludes sprayer purchase (~$150-$400 to buy) |
The single most common DIY cost mistake is buying standard interior latex paint to save money. Standard latex lacks the hardness for cabinet surfaces and will show wear within months. The $20-$40 price difference between standard latex and a cabinet-grade waterborne alkyd is the worst place to cut corners in this entire project.
Professional Cabinet Painting Cost Ranges
Professional cabinet painting is priced by the job, not by the hour, in most markets. The primary cost drivers are door count, finish complexity, and whether the contractor sprays in a controlled shop environment or on-site.
| Kitchen Size | Approximate Door/Drawer Count | Typical Professional Range |
|---|---|---|
| Small (galley, apartment) | 15-20 pieces | Lower end of market |
| Medium (average suburban kitchen) | 25-40 pieces | Mid-range |
| Large (open-concept, island) | 45-60+ pieces | Upper range |
Note: Specific dollar figures vary significantly by region, contractor experience level, and current material costs. Always get a minimum of three written quotes. The gap between the lowest and highest bid for the same kitchen is often 40-60%, and that spread reflects real differences in prep standards and product quality, not just margin.
Cabinet Refacing vs. Replacing vs. Painting: Full Cost Comparison
Cabinet refacing sits between painting and full replacement in both cost and scope. Refacing replaces the visible surfaces, doors, drawer fronts, and veneer on exposed box sides, while keeping the existing cabinet structure. It’s a strong option when you want a new door style but your cabinet layout works well.
| Option | Relative Cost Index | Disruption Level | Lifespan Potential | Best For |
|---|---|---|---|---|
| DIY cabinet painting | Lowest (1×) | Minimal | 3-8 years | Budget-conscious, patient DIYers |
| Professional cabinet painting | Low (2-3×) | Minimal | 8-15 years | Structurally sound cabinets, best ROI |
| Cabinet refacing | Mid (4-6×) | Moderate | 10-20 years | Updated door style, same layout |
| Full replacement (stock cabinets) | High (8-12×) | Major | 15-25 years | Layout changes, severe box damage |
| Full replacement (semi-custom/custom) | Highest (15-25×) | Major | 20-30+ years | Complete kitchen redesign |
Cost index is relative to DIY painting as the baseline. Actual costs vary by market and project scope.
Full replacement makes sense in two scenarios: when the cabinet boxes are structurally compromised, or when the kitchen layout needs to change. If you’re removing a wall, relocating appliances, or adding an island, replacement is the only path. For everyone else, it is the most expensive solution to a problem that painting or refacing can solve.
Step-by-Step: How to Decide Which Option Fits Your Budget
Step 1: Count your cabinet doors and drawer fronts. This is the primary labor driver for any professional painting or refacing quote. Write the number down before you call anyone.
Step 2: Assess your cabinet box condition. Solid wood or plywood boxes in good structural shape are ideal painting candidates. Particleboard with swelling, delaminating thermofoil, or active water damage shifts the math toward replacement.
Step 3: Identify your layout pain points. If your kitchen layout genuinely frustrates you, not enough storage, wrong workflow, outdated footprint, painting won’t fix that. Only replacement will. If the layout works, painting almost always wins on ROI.
Step 4: Factor in ancillary upgrades. Hardware replacement, a new backsplash, and updated lighting alongside a paint job can produce a near-total kitchen transformation for a fraction of replacement cost. Budget these as a package, not in isolation.
Step 5: Get three professional quotes before deciding. The gap between DIY material costs and professional results is wider in cabinet painting than in almost any other home improvement category. A professional quote often reveals that the upgrade to professional application is smaller than expected relative to the quality difference.
According to the National Kitchen and Bath Association’s renovation data, kitchen renovations consistently rank among the highest-ROI home improvement projects, with cabinet updates driving a disproportionate share of that return relative to their cost.
The most important number in any cabinet renovation budget is not the total cost, it is the cost per year of expected lifespan. A professional paint job that lasts 12 years at a given price point almost always outperforms a DIY job at half the price that needs redoing in four years. Run the math before defaulting to the cheapest option.
How Long Does It Take to Paint Kitchen Cabinets?
Painting kitchen cabinets takes between two and five days for a professional crew working on an average-sized kitchen, accounting for removal, prep, priming, painting, and reinstallation. DIY projects typically stretch to one to three weekends when cure times between coats are respected.

The most common mistake homeowners make is underestimating cure time. Paint may feel dry to the touch within hours, but cabinet-grade finishes need 24 to 48 hours between coats and up to two weeks to fully harden before they can withstand daily use without marking.
DIY Timeline vs. Professional Timeline
| Phase | DIY Timeline | Professional Timeline |
|---|---|---|
| Door and hardware removal | 2-4 hours | 1-2 hours |
| Cleaning and degreasing | 2-3 hours | 1-2 hours |
| Sanding and priming | 1-2 days | 4-6 hours |
| Paint coats (with cure time) | 2-3 weekends | 1-2 days |
| Reinstallation | 2-4 hours | 1-2 hours |
| Total | 2-4 weeks | 2-5 days |
The professional advantage isn’t just speed. Spray application in a controlled environment produces a finish that brushes and rollers simply can’t replicate at home. That said, a careful DIYer with the right cabinet painting tools and supplies, patience, and proper prep can achieve solid results on a tighter budget.
Remove all cabinet doors and paint them horizontally on sawhorses or a flat surface. Vertical painting on installed doors causes runs and uneven coverage, which is the single most visible sign of an amateur paint job.
Cabinet Painting Tools and Supplies You Actually Need
The right cabinet painting tools and supplies are the difference between a finish that holds up for a decade and one that starts chipping within a year. This is where most DIY guides undersell the requirements.
Essential tools:
- HVLP spray gun or fine-finish sprayer – produces a factory-smooth finish that brushes can’t match on flat cabinet surfaces
- High-quality synthetic brushes – for edges, corners, and detail areas where a sprayer can’t reach
- Random orbital sander with 120-220 grit paper – for surface preparation and light scuff-sanding between coats
- Tack cloths – removes sanding dust that would otherwise show through the finish coat
- Cabinet-specific degreaser – standard cleaners leave residue; use a product formulated for kitchen grease
- Shellac-based or oil-based primer – bonds to existing finishes and prevents tannin bleed-through on wood species like oak
- Cabinet-grade alkyd or waterborne alkyd paint – significantly more durable than standard interior latex
What you can skip:
- Foam rollers marketed as "cabinet rollers" leave stipple texture that reads as amateur on close inspection
- Cheap brushes shed bristles into wet paint
- Standard interior latex paint lacks the hardness for cabinet surfaces
As documented in Fine Homebuilding’s guide to cabinet refinishing, surface preparation accounts for the majority of a cabinet paint job’s final quality. The paint itself is secondary to what happens before the first coat goes on.
Common Cabinet Painting Mistakes and How to Avoid Them
Most cabinet painting failures trace back to the same handful of mistakes. Knowing them in advance saves significant time and money.
1. Skipping the degreasing step. Kitchen cabinets accumulate years of cooking grease and cleaning product residue. Paint won’t bond to contaminated surfaces. Degrease thoroughly, then wipe with a clean damp cloth before sanding.
2. Using the wrong primer. Standard drywall primer isn’t formulated for cabinetry. Use a shellac-based or bonding primer, especially over previously painted surfaces, laminate, or wood species prone to bleed-through.
3. Painting in the wrong conditions. Temperature and humidity affect how paint flows and cures. Aim for 60-80°F with low humidity. Painting in a cold garage in winter produces a finish that never fully cures.
4. Not sanding between coats. A light scuff-sand with 220-grit paper between coats removes dust nibs and improves adhesion. This step takes 20 minutes but adds years to the finish life.
5. Rushing reinstallation. Reinstalling doors before the paint has cured causes marks, scratches, and adhesion failures at the hinge points. Wait the full cure time, even when it’s inconvenient.
6. Painting cabinet boxes without removing doors. Painting doors in place produces drips, missed edges, and brush marks from awkward angles. Remove every door and drawer front before you start.
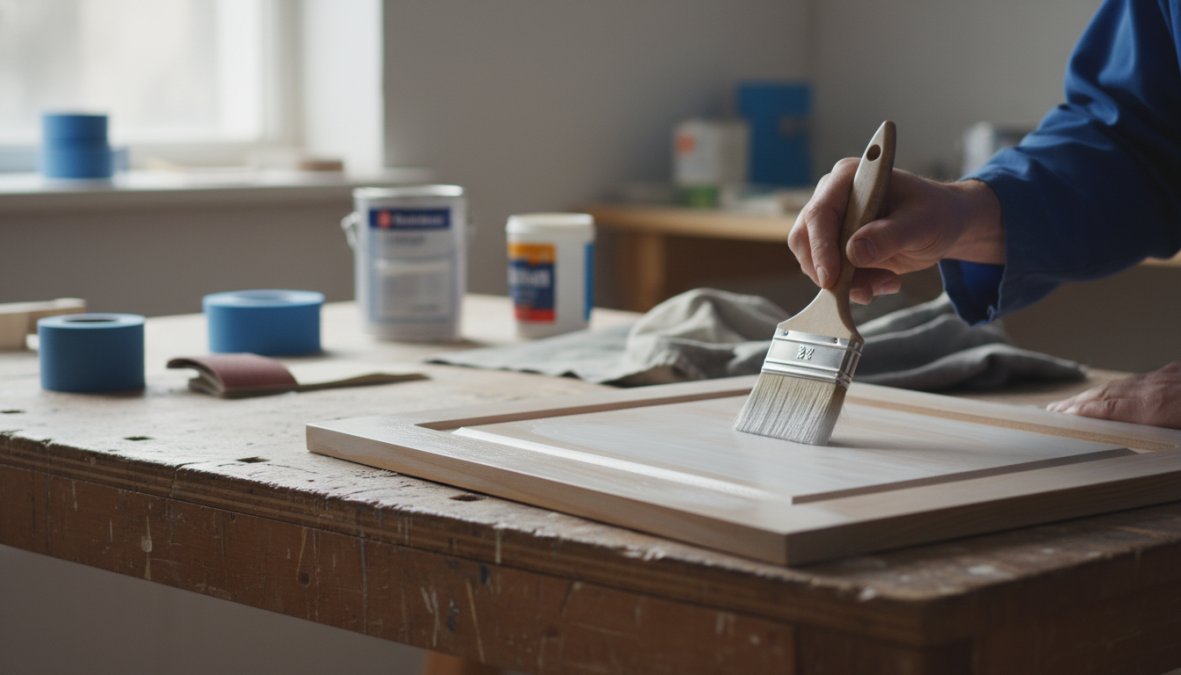
Preparation is the entire job. The actual painting is the easy part. Every hour spent on proper cleaning, sanding, and priming saves two hours of remediation later.
Beyond Paint: Other Ways to Modernize Outdated Cabinets
Painting is the most cost-effective cabinet update, but it works best as part of a broader kitchen interior design refresh. Several complementary upgrades amplify the impact of a fresh paint job without adding significant cost.
Upgrading Cabinet Hardware
Hardware is the fastest, cheapest way to change the personality of a kitchen. Swapping builder-grade knobs for brushed finish bar pulls or matte black hardware takes a few hours and costs a fraction of any other upgrade. The visual impact is disproportionate to the effort.
A few practical notes on hardware upgrades:
- Measure your existing hole spacing before ordering pulls. Standard spacing is 3 or 3.75 inches, but older cabinets vary.
- Brushed nickel and brushed gold finishes hide fingerprints better than polished chrome or brass.
- Consistency matters more than individual piece quality. Matching hardware across all doors and drawers reads as intentional and designed.
Pairing a new hardware finish with a freshly painted cabinet creates a kitchen that genuinely looks custom, even if the boxes themselves are 20 years old.
Adding Crown Molding, Trim, and Glass Inserts
Crown molding at the top of upper cabinets is one of the most underused upgrades in kitchen renovation. It closes the gap between cabinet tops and the ceiling, which is the visual tell of builder-grade installation, and adds a finished, custom look that paint alone can’t achieve.
Cabinet trim, including light rail molding along the bottom of upper cabinets and decorative toe kicks, follows the same logic. These details are inexpensive, available at any home improvement store, and paint to match seamlessly.
Glass door inserts convert solid cabinet doors into display cases, which adds visual depth and breaks up a wall of flat cabinet fronts. Frosted glass hides clutter while still creating that open, airy feel. Clear glass works best when the interior is organized and intentionally styled.
According to This Old House’s kitchen remodeling guides, adding architectural details like crown molding and glass inserts consistently ranks among the highest-perceived-value upgrades relative to their actual cost.
Open Shelving Conversions and Replacing Cabinet Doors
Open shelving is a polarizing choice. It looks clean and modern in the right kitchen, but it requires discipline: everything on those shelves is always on display. The practical reality is that open shelving works best for homeowners who are genuinely organized, not aspirationally organized.
Replacing cabinet doors and drawer fronts, also called cabinet redooring, is a middle path between painting and full replacement. New Shaker-style doors on existing boxes produce a dramatic style change, especially when combined with a fresh paint color on the boxes. This approach modernizes the aesthetic without touching the kitchen layout.
For kitchens with solid box construction but dated door styles, replacing doors and drawer fronts alongside a paint refresh is often the highest-impact combination available at a mid-range budget.
Durability, Maintenance, and Eco-Friendly Considerations
This is the section most cabinet painting guides skip entirely, and it’s the one that determines whether your investment holds up for a decade or starts disappointing you in year three. Durability, long-term maintenance, and sustainability are not afterthoughts. They are the practical payoff of every decision you made during the project.
What Actually Determines How Long Cabinet Paint Lasts
Cabinet paint durability depends on four factors, in order of importance:
- Surface preparation quality. A properly degreased, sanded, and primed surface is the single largest predictor of finish longevity. Paint applied over contaminated or unprimed surfaces will fail regardless of product quality.
- Paint product hardness. Waterborne alkyd and alkyd-urethane hybrid paints cure to a significantly harder film than standard latex. Products like Benjamin Moore Advance and Sherwin-Williams Emerald Urethane Trim Enamel are widely used in professional cabinet finishing specifically because their hardness ratings are appropriate for high-contact surfaces.
- Application method. Spray application produces a more uniform film thickness than brush or roller application, which means more consistent protection across the entire surface. Thin spots from uneven brush application are where chips and wear begin.
- Cure time before use. Paint that feels dry to the touch is not the same as paint that has fully cured. Most cabinet-grade waterborne alkyds reach full hardness in 21-30 days. Using cabinets aggressively before full cure, slamming doors, wiping with wet cloths, creates marks and adhesion failures that are entirely preventable.
Long-Term Maintenance Schedule for Painted Cabinets
Most homeowners treat painted cabinets as maintenance-free until something goes wrong. A simple proactive schedule extends finish life significantly.
Weekly:
- Wipe down high-contact areas (around handles, near the sink, beside the stove) with a soft damp cloth.
- Dry any moisture immediately. Standing water near the sink base cabinet is the most common cause of premature paint failure at the bottom edge of doors.
Monthly:
- Clean all cabinet surfaces with a mild dish soap solution and a microfiber cloth. Avoid spray cleaners with ammonia or bleach, these degrade paint film over time.
- Check hinges for looseness. A door that swings and contacts the frame at an angle creates impact chips at the corner edges.
Annually:
- Inspect the finish around all hardware for early chipping or wear. Catching this early allows for a simple touch-up rather than a full repaint.
- Check caulk lines where cabinets meet the wall or countertop. Failed caulk allows moisture infiltration that damages both the paint and the substrate beneath it.
- Tighten all hinge screws. Loose hinges are a leading cause of edge chipping because they allow door movement that the finish isn’t designed to absorb.
Every 3-5 years:
- Consider a light scuff-sand and topcoat refresh on the highest-wear doors (typically the main sink cabinet, the refrigerator-adjacent cabinet, and any drawer fronts used dozens of times daily). This is far less disruptive and expensive than a full repaint and can extend the original finish life by several years.
Keep a small amount of your original cabinet paint in a labeled, sealed container after the project is complete. Touch-ups done within the first few years are nearly invisible when the same batch of paint is used. Touch-ups done with a new can of the same color are rarely a perfect match due to batch variation and sheen aging.
Troubleshooting Common Painted Cabinet Failures
Even well-executed paint jobs can develop problems. Knowing what caused the failure determines whether you need a spot repair or a full redo.
Peeling or flaking paint:
Cause: Almost always a preparation failure, paint applied over grease, wax, or an incompatible existing finish. Occasionally caused by moisture infiltration from behind the substrate.
Fix: Scrape the affected area back to a stable surface, spot-prime with a shellac-based primer, and repaint. If the peeling is widespread, the entire surface needs to be stripped and restarted.
Chipping at door edges and corners:
Cause: Impact damage from doors contacting the frame, or insufficient film build at edges (edges are the hardest area to coat adequately with a brush).
Fix: Touch up with a fine artist’s brush and the original paint. For recurring impact chips, add soft-close hardware to eliminate the door-frame contact entirely.
Yellowing on white or light-colored cabinets:
Cause: Alkyd-based paints are prone to ambering in low-light areas (inside cabinet runs, areas away from windows). This is a known characteristic of oil-modified formulas.
Fix: For new projects, use a waterborne alkyd or waterborne urethane formula, which resists yellowing significantly better. For existing yellowed cabinets, a light scuff-sand and recoat with a non-yellowing topcoat can restore the original color.
Paint not hardening properly (stays tacky):
Cause: Application in high humidity or low temperature, or incompatible products layered over each other.
Fix: Increase ventilation and temperature if possible. If the surface remains tacky after the manufacturer’s stated cure window, the coat may need to be removed and reapplied under proper conditions.
Hardware holes that don’t align after door replacement or refacing:
Cause: New doors ordered with different boring patterns than the existing hardware, or measurement errors during ordering.
Fix: For pulls with two holes, a drilling jig (available at most hardware stores for under $20) allows precise re-drilling. For knobs with a single hole, a wood filler rated for paint adhesion can fill the original hole flush; once cured and sanded, the new hole is drilled in the correct position and the repair is invisible under paint.
Do not attempt to fill and re-drill hinge cup holes (the large circular recesses for European-style concealed hinges) with standard wood filler. These require a specific repair plug or a new door blank. Attempting to fill and re-bore a hinge cup hole without the correct repair method results in a hinge that won’t hold under daily use.
Sustainability and Eco-Friendly Considerations
Cabinet painting is the most environmentally responsible option in this category, and it’s worth understanding why concretely rather than treating it as a vague benefit.
Full cabinet replacement generates significant construction and demolition waste: the old cabinet boxes, doors, hardware, and packaging materials. Most of this material is not recyclable through standard municipal programs and ends up in landfills. According to the EPA’s Sustainable Materials Management guidelines, construction and demolition debris is one of the largest waste streams in the United States, and kitchen remodels are a meaningful contributor.
Painting keeps the existing cabinet structure, typically the most material-intensive component, in service. This is a concrete, measurable environmental benefit, not a marketing claim.
For homeowners who want to extend the eco-friendly advantage further:
- Low-VOC and zero-VOC cabinet paints have improved dramatically in the past decade. Products like Benjamin Moore Advance and several Sherwin-Williams waterborne formulas carry low-VOC certifications and now match the durability of traditional solvent-based products. Ask your contractor specifically about VOC levels, this matters both for indoor air quality during application and for off-gassing in the weeks after.
- Water-based cleanup products eliminate the need for solvent disposal, which is a meaningful reduction in hazardous waste for DIY projects.
- Salvaged or recycled hardware is increasingly available through architectural salvage retailers and online marketplaces. Pairing reclaimed hardware with freshly painted cabinets is both cost-effective and genuinely sustainable.
Durability Comparison Across All Options
| Finish Type | Expected Lifespan | Maintenance Level | Yellowing Risk | Eco-Friendly? |
|---|---|---|---|---|
| Professional cabinet painting (waterborne alkyd) | 8-15 years | Low-moderate | Low | Yes |
| Professional cabinet painting (oil-based) | 10-15 years | Low-moderate | Moderate-high | Partial |
| Cabinet refacing | 10-20 years | Low | None | Partially |
| Full replacement (stock/semi-custom) | 15-25 years | Low | None | No |
| DIY painting (standard latex) | 2-5 years | High | Low | Yes |
| DIY painting (cabinet-grade waterborne alkyd) | 5-10 years | Moderate | Low | Yes |
The durability gap between a professional cabinet paint job and a DIY attempt using the right products is smaller than most people expect, but the gap between using the right products and the wrong ones is enormous. Product selection and preparation quality matter more than who holds the brush.
Is Painting Cabinets Right for Your Kitchen? Final Verdict
The pros and cons of painting cabinets ultimately resolve into a single practical question: are your cabinet boxes structurally sound, and do you like your kitchen layout? If both answers are yes, painting is almost certainly the right call.
Full replacement makes sense for damaged boxes, layout changes, or when a complete kitchen remodel is already underway. Refacing splits the difference for homeowners who want a new door style without the cost of new boxes. But for the majority of kitchens, especially those with solid wood or plywood construction in good condition, painting delivers the best combination of cost, speed, aesthetic flexibility, and sustainability.
The variable that separates a great outcome from a disappointing one is execution. Specifically, preparation and product quality. This is where the DIY versus professional decision matters most. A professional finish, applied with proper equipment over meticulous prep work, will outlast a DIY attempt by years, sometimes by a decade.
The bottom line: painting cabinets is one of the highest-value kitchen upgrades available, but only when it’s done right.
Choosing between painting, refacing, and replacing cabinets is a decision that deserves more than a quick online search. Denver Cabinet Painting Colorado brings 40 years of experience to exactly this kind of project, specializing in cabinet painting, refinishing, and glazing for residential and commercial clients across the Denver metro area. Their emphasis on meticulous preparation and professional application is what produces the smooth, consistent finishes that hold up over time. Get a free quote from Denver Cabinet Painting Colorado and find out what a professional cabinet transformation looks like for your specific kitchen.
Frequently Asked Questions
Is it better to paint or replace kitchen cabinets?
For most homeowners, painting cabinets is the more cost-effective choice when the cabinet boxes are structurally sound. It can dramatically improve aesthetic appeal and home value at a fraction of the cost of full replacement. However, if your cabinets are warped, water-damaged, or builder-grade particleboard in poor condition, replacement or refacing may deliver better long-term results. Weighing the pros and cons of painting cabinets against your specific situation is the best first step.
How long does a painted cabinet finish last?
A professionally applied cabinet paint finish typically lasts 8 to 15 years with proper care. Durability depends heavily on surface preparation, the quality of primer and paint used, and how well you maintain the cabinets. Wiping down surfaces regularly with a gentle cleaner, avoiding harsh abrasives, and touching up chips early can significantly extend the life of the finish. DIY results tend to have a shorter lifespan due to inconsistent preparation and application.
What are the disadvantages of painting kitchen cabinets?
The main disadvantages include the time required for proper preparation, the risk of brush marks or uneven coverage if done incorrectly, and the fact that paint can chip or yellow over time without proper topcoats. Common cabinet painting mistakes like skipping primer, not sanding between coats, or using the wrong paint type can lead to a finish that peels within a year. Hiring an experienced professional reduces these risks considerably and ensures a smooth, consistent result.
Is it cheaper to paint cabinets or buy new ones?
Painting is almost always cheaper. A full kitchen cabinet replacement can cost several thousand dollars or more depending on the size of your kitchen and materials chosen. Professional cabinet painting typically costs a fraction of that. Even accounting for cabinet painting tools and supplies for a DIY project, the savings are substantial. The cost of painting kitchen cabinets vs replacing makes painting the clear budget-friendly winner for kitchens with solid, well-built cabinet boxes.
Can you paint over laminate cabinets?
Yes, but it requires extra preparation. Laminate surfaces are non-porous and slick, so thorough sanding and a bonding primer are essential before applying paint. Skipping these steps is one of the most common cabinet painting mistakes and leads to peeling. Use a high-adhesion primer specifically formulated for laminate, and finish with a durable cabinet-grade paint. Results can be excellent when done correctly, though laminate cabinets that are already peeling or delaminating may be better candidates for replacement.
This article was written using GrandRanker