Table of Contents
- Why Denver Homeowners Are Choosing Cabinet Painting Over Replacement
- Cabinet Refinishing vs. Painting: What’s the Real Difference?
- Average Cost of Cabinet Painting in Denver: What to Expect
- Kitchen Cabinet Painting Process Steps: From Prep to Final Coat
- How Long Does Cabinet Painting Take? A Realistic Project Timeline
- How to Get a Free Quote for Cabinet Painting in Denver
- Two-Tone Kitchens, Warranty Comparisons, and Maintenance: What Competitors Don’t Tell You
- Get Your Free Cabinet Painting Quote in Denver Today
- Conclusion
Last Updated: June 1, 2026
Ready to get free quote cabinet painting denver and finally stop staring at those dated oak cabinets? Denver Cabinet Painting Colorado has helped hundreds of Front Range homeowners transform their kitchens without the cost and disruption of a full remodel. Below, we’ll show you exactly how to request a no-obligation quote, what the process looks like from prep to final coat, and what most cabinet painting guides won’t tell you about warranties, two-tone trends, and making your finish last.
Here’s what most guides get wrong: they treat cabinet painting as a simple cosmetic fix. It isn’t. The quality of surface preparation, finish type, and application method determine whether your cabinets look factory-fresh in five years or start chipping within eighteen months. That distinction is worth understanding before you hire anyone.
Why Denver Homeowners Are Choosing Cabinet Painting Over Replacement
Full kitchen cabinet replacement is one of the most expensive renovation projects a homeowner can undertake. Cabinet painting, by contrast, delivers a dramatic visual transformation at a fraction of that cost, with far less disruption to daily life. For Denver metro homeowners who want a high-end kitchen remodel result without gutting their existing layout, cabinet refinishing has become the practical default.
The math is straightforward. New custom cabinetry can run into the tens of thousands of dollars once you factor in materials, demolition, and installation. Professional cabinet painting typically costs a fraction of that, depending on kitchen size and finish type. You keep your existing cabinet boxes, update the doors and drawer fronts, and choose a modern color that works with your countertops and hardware.
There’s also a sustainability argument. Replacing structurally sound cabinets generates significant waste. Refinishing extends the life of existing materials, which aligns with how many Colorado homeowners think about their renovation choices.
Cabinet Refinishing vs. Replacement: A Quick Pros and Cons Breakdown
| Factor | Cabinet Painting | Full Replacement |
|---|---|---|
| Cost | Significantly lower | High to very high |
| Timeline | Days, not weeks | 4-8 weeks minimum |
| Disruption | Minimal kitchen downtime | Full kitchen out of service |
| Color options | Unlimited with custom matching | Limited by manufacturer |
| Best for | Structurally sound boxes | Damaged or poorly laid-out cabinets |
| Environmental impact | Low waste | High waste |
Cabinet refinishing is the better choice for most Denver homeowners whose cabinet boxes are structurally intact. If your doors are warped, your box joints are failing, or your layout genuinely doesn’t work for how you cook, replacement makes sense. Otherwise, you’re paying a premium for a problem you don’t have.
Cabinet Refinishing vs. Painting: What’s the Real Difference?
Cabinet refinishing is the process of stripping, sanding, and applying a new topcoat to existing cabinet surfaces, often restoring or altering the original wood grain appearance. Cabinet painting covers the surface with an opaque finish, eliminating the wood grain look in favor of a solid color.
Both approaches require the same rigorous surface preparation. The difference is in the final product. Refinishing suits homeowners who want to preserve the natural character of their wood cabinets, perhaps updating a stain color or adding a glaze. Painting suits homeowners who want a completely fresh aesthetic, typically in whites, grays, navies, or greens that dominate current Front Range design trends.
Cabinet glazing is a third option, layering a translucent tinted coat over a base color to create depth and an antique or custom effect. Denver Cabinet Painting Colorado offers all three services, which matters because the right choice depends on your cabinet material, current condition, and design goals.
A common mistake is assuming that painting over refinished cabinets is straightforward. If the existing surface has been treated with an oil-based stain or wax finish, proper adhesion requires additional prep steps. Skipping them is exactly how you end up with a finish that peels within a year.
Never apply a water-based paint directly over a wax-finished or oil-stained surface without proper deglossing and priming. The finish will appear to adhere initially but will begin separating within months, especially in high-humidity kitchen environments.
Average Cost of Cabinet Painting in Denver: What to Expect
Cabinet painting in the Denver metro area is one of the most cost-effective kitchen renovations available, but vague ranges do homeowners no favors when they are trying to budget. Most competitors publish a single wide range and call it a quote. This section breaks down pricing the way a professional estimator actually thinks about it, by door count, linear footage, finish type, and condition, so you can walk into any consultation with a realistic number already in your head.

How Professional Painters Actually Price a Job
Most reputable Denver cabinet painters price by one of two methods, or a combination of both:
- Per-door pricing: Each cabinet door and drawer front is counted individually. This is the most common method because it directly reflects labor and materials.
- Linear-foot pricing: The total run of upper and lower cabinets is measured. This method is more common for large kitchens with unusual configurations.
Understanding which method your painter uses helps you compare quotes apples-to-apples. A quote of $X per door from one contractor and $Y per linear foot from another are not directly comparable until you do the math for your specific kitchen.
Detailed Cost Breakdown by Kitchen Size and Door Count
The following ranges reflect what most Front Range homeowners encounter when getting quotes from professional cabinet painters. They are practitioner-informed estimates, not guarantees, and your actual quote will depend on condition, finish type, and contractor.
| Kitchen Size | Approx. Door + Drawer Count | Typical Price Range | Notes |
|---|---|---|---|
| Small (under 10 linear ft) | 15-20 doors/drawers | Lower end of market | Faster prep, less masking, fewer coats of material |
| Medium (10-20 linear ft) | 20-35 doors/drawers | Mid-range | Most common Denver metro kitchen; standard two-coat finish |
| Large (20+ linear ft) | 35-50+ doors/drawers | Higher end | Islands, pantry units, and tall cabinets add scope |
| Two-tone kitchen (any size) | Same count, two colors | Add 15-25% to base | Separate masking, prep, and application pass per color |
As a general rule of thumb used by many Denver-area painters, per-door pricing for a standard professional finish, including primer, two topcoats, hardware removal, and reinstallation, tends to fall in a range that makes professional cabinet painting a fraction of the cost of new cabinetry. The moment a quote drops dramatically below what other contractors are offering, it is worth asking which line items have been removed.
What Affects Your Final Price: Finish Type, Prep Work, and More
The finish you choose is one of the biggest cost variables, and it is also where the most confusion lives. Here is how the main finish types compare:
| Finish Type | Durability | Relative Cost | Best For |
|---|---|---|---|
| Premium water-based latex | Good | Lower | Budget-conscious projects, rentals |
| Alkyd-modified waterborne | Very good | Mid | Most residential kitchens |
| Conversion varnish / catalyzed lacquer | Excellent | Higher | High-use kitchens, hardest factory-like finish |
| Two-part epoxy | Excellent | Highest | Commercial kitchens, extreme durability needs |
Conversion varnish and catalyzed lacquer require professional spray equipment and controlled drying conditions. They are not products a DIYer can replicate with a brush and roller, which is a significant part of why professional application costs more, and why the result lasts longer.
Other pricing factors that move the final number:
- Surface condition: Significant chipping, peeling, or water damage requires extra prep labor before a single coat of primer goes on. A painter who does not charge more for damaged surfaces is either skipping the repair work or burying the cost elsewhere.
- Cabinet material: MDF and thermofoil require different primers and handling than solid wood. Thermofoil that is already peeling at the edges may not be a good candidate for painting at all, a reputable painter will tell you this during the consultation rather than after the job starts.
- Hardware: Removal and reinstallation adds time. If you are upgrading hardware simultaneously, factor in the hardware cost separately from the painting quote.
- Number of coats: A quality job includes a bonding primer plus a minimum of two finish coats. Quotes that specify only one finish coat are cutting a corner that will show up within a year or two.
- Low-VOC formulations: Premium low-VOC products cost more per gallon but are worth the premium for indoor air quality, particularly in Colorado’s dry climate where windows are often closed for months at a time.
- Access and complexity: Cabinets above refrigerators, blind corner units, and custom built-ins take longer to mask, prep, and paint. Expect these to add to the scope.
When comparing quotes, ask each painter to itemize: (1) hardware removal and reinstallation, (2) door removal and off-site painting versus on-site painting, and (3) the specific primer and topcoat products they plan to use. These three line items are the most commonly excluded from low-ball estimates and the most common sources of surprise costs or quality shortfalls.
Why Getting a Free In-Home Quote Matters More Than an Online Estimate
Online estimate calculators and phone quotes are useful for ballpark budgeting, but they cannot account for the variables that most affect your final price: the actual condition of your cabinet surfaces, the specific construction of your cabinet boxes, and any repair work that needs to happen before paint goes on. An in-home consultation from a reputable Denver cabinet painter takes thirty to forty-five minutes and produces a quote that reflects your actual kitchen, not an average kitchen.
The free quote is also your first opportunity to evaluate the painter. A contractor who shows up prepared, asks detailed questions about your goals, and explains their process clearly is demonstrating the same professionalism they will bring to the job itself.
Kitchen Cabinet Painting Process Steps: From Prep to Final Coat
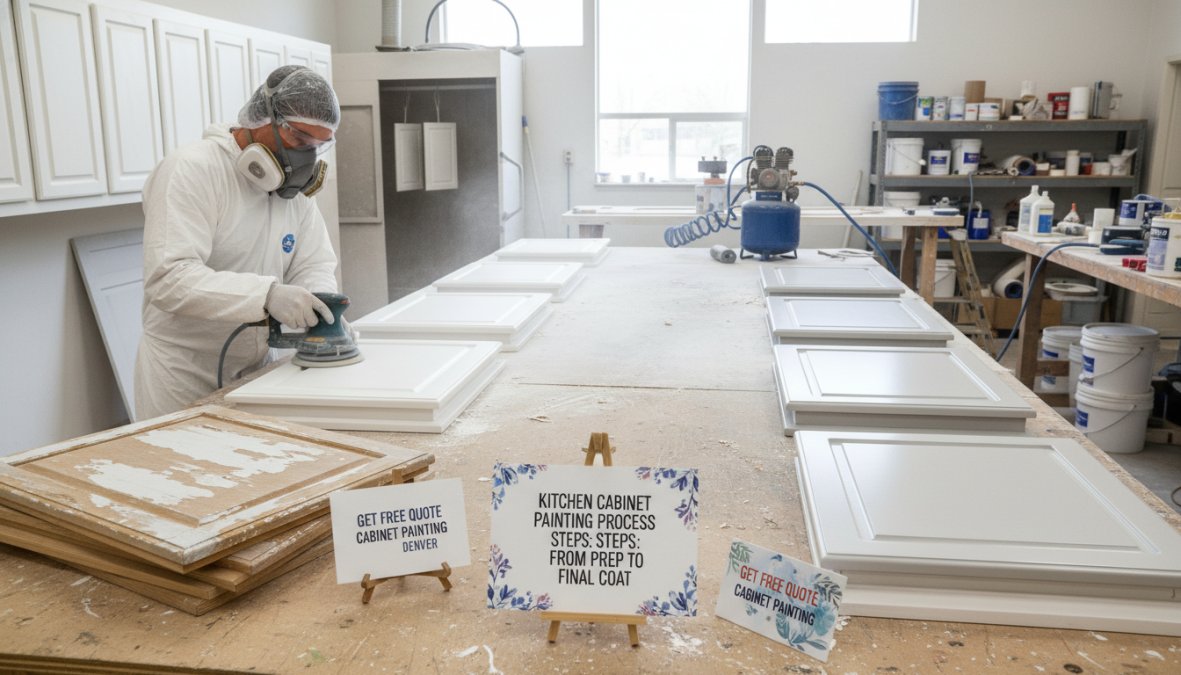
Every cabinet painting guide publishes a step list. Most of them are interchangeable. What they rarely explain is why each step exists, what happens mechanically when it is skipped, and what material choices at each stage determine whether your finish lasts three years or fifteen. This section covers the process the way a professional painter actually thinks about it, with the failure modes included.
The Full Process, Step by Step
Step 1: Disassembly and Labeling
All doors, drawer fronts, and hardware are removed and labeled before any prep work begins. Labeling matters more than most homeowners realize. Cabinet hinges are adjusted to specific tolerances, and reinstalling a door in the wrong position means re-adjusting every hinge, adding time and creating unnecessary stress on the finish at the hinge points. A professional painter uses a consistent labeling system (typically numbered tape on both the door and the corresponding cabinet box) so reassembly is precise.
Step 2: Degreasing
Kitchen cabinet surfaces accumulate years of cooking grease, cleaning product residue, and hand oils, particularly around pulls and handles. This contamination is invisible to the eye but catastrophic for paint adhesion. A thorough degreasing with a TSP substitute or dedicated cabinet cleaner is not optional, it is the foundation that everything else builds on. Surfaces that look clean are often not clean enough for paint.
Step 3: Sanding and Deglossing
This is where most DIY projects and low-quality professional jobs fail. Factory-finished cabinets are coated with catalyzed lacquer or conversion varnish specifically engineered to resist adhesion, that durability is what made them good cabinets in the first place. New paint applied over an intact factory finish without mechanical abrasion will appear to bond initially but will begin separating within months.
Proper sanding creates what painters call mechanical adhesion: microscopic scratches in the surface that give the primer something to grip. The grit used matters. Too coarse and you leave visible scratch marks that telegraph through the topcoat. Too fine and you have not created enough profile for adhesion. Most professionals use 120-150 grit for initial scuffing on factory finishes, followed by 180-220 grit before the final topcoat.
Never apply a water-based paint directly over a wax-finished or oil-stained surface without proper deglossing and priming. The finish will appear to adhere initially but will begin separating within months, especially in high-humidity kitchen environments. If you are unsure what finish is currently on your cabinets, a painter can test it with a solvent wipe before committing to a prep approach.
Step 4: Filling and Repair
Dents, scratches, old hardware holes, and grain telegraphing in open-grain woods like oak all need to be addressed before primer goes on. Grain filling is a step that separates a smooth, furniture-quality finish from one that looks like painted wood. On oak cabinets in particular, the open grain will show through paint unless it is filled with a grain filler or skim-coated with a lightweight spackle and sanded flat. This step adds time and cost, but skipping it is immediately visible in the finished product.
Step 5: Priming
Primer selection is one of the most consequential decisions in the entire project, and it is the step most homeowners know the least about. The wrong primer for the substrate is one of the four primary causes of finish failure.
| Substrate | Recommended Primer Type | Why |
|---|---|---|
| Raw or stained wood | Shellac-based or oil-based bonding primer | Seals tannins that bleed through water-based topcoats |
| Factory-finished (catalyzed lacquer) | Adhesion-promoting bonding primer | Grips slick surfaces that standard primers cannot |
| MDF | Oil-based or high-solids water-based primer | Seals porous edges that absorb water-based products unevenly |
| Thermofoil (intact) | Adhesion primer designed for plastics | Thermofoil is a vinyl film; standard primers do not bond reliably |
| Previously painted (latex) | Water-based bonding primer | Adequate if surface is clean and scuffed |
Using a standard drywall primer on factory-finished cabinets is one of the most common mistakes in the industry. It looks fine on day one. By month six, the finish is lifting at the edges.
Step 6: Finish Coats
Most quality cabinet painting jobs apply a minimum of two finish coats, with light sanding between coats to remove any dust nibs or brush marks. The application method, brush and roller versus spray, has a significant impact on the final appearance. Spray application produces a smoother, more uniform finish that more closely resembles a factory coating. Brush and roller application, done well, can produce excellent results but requires more skill to avoid lap marks and texture variation.
For spray application, doors are typically painted off-site in a controlled environment, a spray booth or dedicated shop space, where dust contamination and temperature can be managed. Cabinet boxes are painted on-site. This split approach is standard practice among professional cabinet painters and is one reason the result looks different from a DIY job.
Step 7: Cure Time
Drying time and cure time are not the same thing. Paint can be dry to the touch in hours but may take days or weeks to reach full hardness, depending on the product. A finish that is reinstalled before it has cured is soft enough to dent and peel at contact points, door edges, hinge locations, and anywhere doors close against the cabinet box. Quality painters build proper cure time into their project schedule. Rushing this step is one of the most common causes of early failure on otherwise well-executed jobs.
Step 8: Reassembly and Final Inspection
Doors and drawer fronts are reinstalled according to the labeling system established in Step 1. Hinges are adjusted for consistent reveal and smooth operation. A final inspection checks for any touch-up needs, hardware alignment issues, and finish consistency across all surfaces.
Failure Analysis: Why Cabinet Finishes Peel or Chip
Most cabinet finish failures are not random. They trace back to one of four specific causes, and understanding them helps you evaluate whether a painter’s process is likely to produce a durable result.
Cause 1: Inadequate surface preparation
Insufficient sanding or skipped deglossing is the single most common cause of peeling. The finish looks fine initially because the paint film is intact. Failure begins at the interface between the new paint and the old surface, where adhesion was never properly established. Peeling typically starts at edges and corners, the areas most subject to impact, and spreads inward.
Cause 2: Wrong primer for the substrate
Using a standard primer on a factory-finished surface, or a water-based primer on a tannin-rich wood like oak or cherry without a sealer coat, creates a weak bond that fails under normal use. Tannin bleed is a separate failure mode: the natural tannins in certain wood species migrate through water-based primers and cause yellow or brown staining in the topcoat, which is not a finish failure per se but is a quality problem that requires stripping and repriming to correct.
Cause 3: Incompatible products
Mixing water-based and oil-based products without proper barrier coats creates adhesion failures at the interface. This is most common when a painter applies a water-based topcoat over an oil-based primer that has not fully cured, or when a homeowner applies a water-based paint over an existing oil-based finish without proper prep. The two product types expand and contract at different rates with temperature and humidity changes, which eventually causes delamination.
Cause 4: Insufficient cure time before reinstallation
A soft, uncured finish dents and peels at every contact point. This failure mode is distinctive: the damage appears in consistent locations, door edges, the face frame where doors close, and hinge areas, rather than randomly across the surface. It is entirely preventable by following the manufacturer’s recommended cure time before reinstallation.
If a painter cannot explain which primer they use on factory-finished cabinets and why, that is a meaningful signal. The primer choice is the single most technically consequential decision in the entire project, and a professional who has thought carefully about their process will have a clear answer.
How Long Does Cabinet Painting Take? A Realistic Project Timeline
How long does cabinet painting take? A professional cabinet painting project typically takes three to five business days for an average-sized kitchen, though larger kitchens or those requiring significant prep work can extend to a week or more.
The project timeline breaks down roughly as follows:
- Day 1: Disassembly, cleaning, and sanding
- Day 2: Priming and first inspection
- Day 3-4: Finish coats (with dry time between coats)
- Day 5: Final inspection, touch-ups, and reinstallation
Many professional painters work off-site on the cabinet doors and drawer fronts, which minimizes disruption in your kitchen. The cabinet boxes remain in place and are painted on-site. This approach means your kitchen is functional throughout most of the project, though you’ll want to plan for limited access during the priming and painting phases.
A common mistake homeowners make is expecting a same-week turnaround without accounting for cure time. Rushing reinstallation before the finish has cured is one of the most frequent causes of early failure. Quality painters build proper cure time into their project timelines.
How to Get a Free Quote for Cabinet Painting in Denver
Getting a free estimate for cabinet painting in Denver is straightforward, but the quality of your request determines the quality of the quote you receive. Vague requests produce vague ballpark estimates. Specific requests produce accurate, comparable quotes you can actually use to make a decision.
Most reputable Denver cabinet painters offer a no-obligation quote either through an in-home consultation or a detailed online request form. In-home consultations are generally more accurate because the painter can assess surface condition, cabinet construction, and any repair needs directly.
As documented in the National Association of the Remodeling Industry’s consumer guidance, getting at least two to three quotes for any painting project is standard practice for homeowners who want to ensure competitive pricing and scope clarity.
What to Include in Your Quote Request: A Homeowner Checklist
Use this checklist when reaching out to cabinet painters for a free estimate:
- Total number of cabinet doors and drawer fronts
- Linear footage of your kitchen cabinets (upper and lower separately)
- Current cabinet material (wood species, MDF, thermofoil, etc.)
- Current finish condition (factory finish, previously painted, stained, glazed)
- Desired finish type (solid color, two-tone, glaze)
- Specific color or color family you’re targeting
- Whether you want hardware replacement included
- Any known damage, peeling, or repair needs
- Your preferred project timeline
The more detail you provide, the more accurate your quote will be. Painters who give you a price without asking most of these questions are estimating loosely.
Questions to Ask Before You Hire a Cabinet Painter
Not all professional painters are equal. Before signing a contract, ask these questions:
- Are you licensed and insured in Colorado?
- What primer and topcoat products do you use, and why?
- Do you paint doors on-site or off-site?
- How many coats are included, and what’s the dry time between coats?
- What does your warranty cover, and for how long?
- Can you provide references from similar kitchen projects in the Denver metro area?
A painter who can’t answer these questions clearly is a painter worth avoiding.
Two-Tone Kitchens, Warranty Comparisons, and Maintenance: What Competitors Don’t Tell You
This is the section most cabinet painting guides skip entirely, which is exactly why it matters. Understanding two-tone design trends, what a warranty actually covers, and how to maintain a painted finish are the three things that separate homeowners who are happy with their cabinets five years later from those who aren’t.
Two-Tone Kitchen Trends on the Front Range
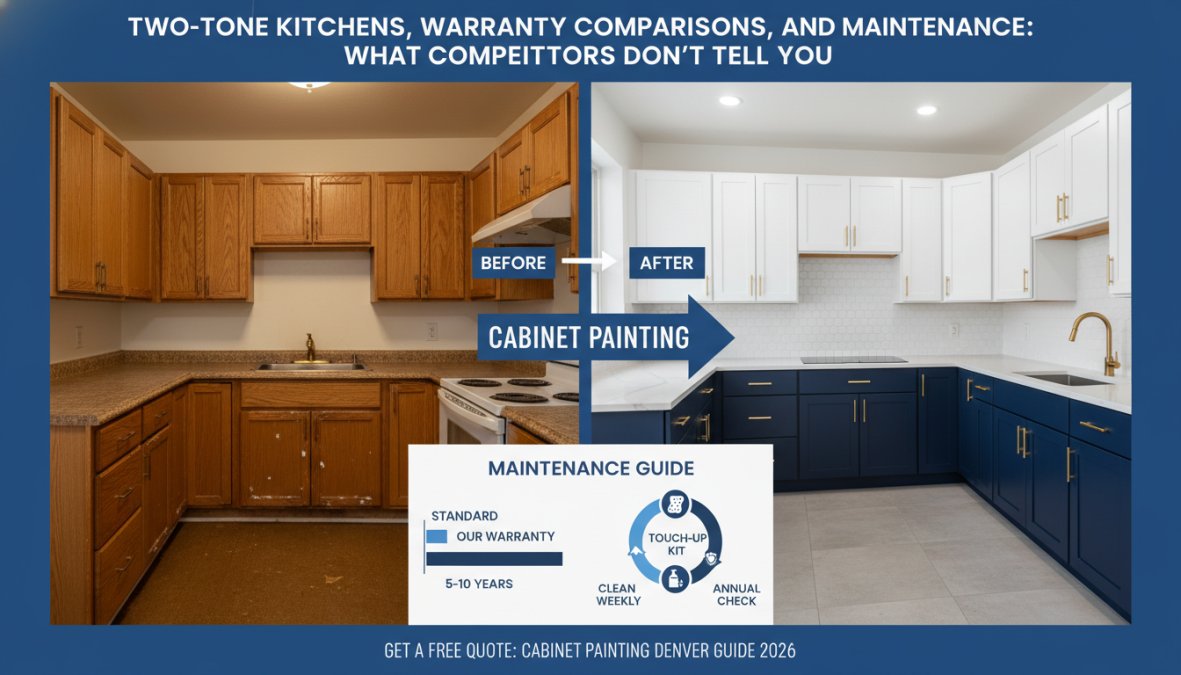
Two-tone kitchens have moved from a niche design choice to a mainstream preference across the Denver metro area. The most popular combination pairs white or off-white upper cabinets with a deeper color on the lower cabinets, most commonly navy, forest green, charcoal, or warm black.
The appeal is practical as well as aesthetic. Upper cabinets in lighter colors keep the kitchen feeling open and bright. Lower cabinets in deeper tones hide wear and scuffs more effectively, which matters in a high-traffic kitchen. Custom color matching allows homeowners to pull accent colors from countertops, backsplash tile, or flooring for a cohesive result.
From a pricing standpoint, two-tone projects do cost more than single-color jobs because each color requires separate masking, prep, and application passes. The additional cost is modest relative to the design impact, and many Front Range homeowners find it worth the investment.
Warranty Comparison: What Leading Denver Cabinet Painters Offer
Warranty terms vary significantly between cabinet painting contractors, and most homeowners don’t ask about them until something goes wrong. Here’s what to look for:
| Warranty Type | What It Covers | What to Watch For |
|---|---|---|
| Labor warranty | Defects in application technique | Exclusions for "normal wear" |
| Materials warranty | Product failure from manufacturer | Requires original product receipts |
| Comprehensive warranty | Both labor and materials | Read the exclusion list carefully |
| Limited warranty | Specific failure types only | May exclude chipping at edges |
A quality cabinet painter should offer at minimum a one-year warranty on labor. Warranties that extend to two or three years signal confidence in the preparation and application process. Be skeptical of any contractor who can’t clearly articulate what their warranty covers and what it excludes.
Maintenance and Care Guide: Making Your Finish Last
A professionally painted cabinet finish is durable, but it isn’t indestructible. The right maintenance habits extend the life of your finish significantly.
Daily habits that protect your finish:
- Wipe spills immediately, especially acidic liquids like citrus juice or vinegar
- Use a soft, damp cloth for cleaning, never abrasive scrubbers
- Avoid cleaning products containing bleach or ammonia on painted surfaces
- Keep cabinet doors and drawers from slamming, which chips edges over time
Seasonal care:
- Inspect hinges and hardware annually and tighten any loose screws
- Check edges and corners for early signs of chipping and address them promptly with touch-up paint
- In Colorado’s dry climate, monitor for any cracking at joints caused by wood movement
According to the Environmental Protection Agency’s guidance on low-VOC interior coatings, low-VOC paint formulations not only improve indoor air quality during application but also tend to maintain flexibility over time, which reduces cracking in climates with significant seasonal humidity variation like Colorado’s.
The single most protective thing you can do for a painted cabinet finish is clean with a soft damp cloth and address chips immediately. A small chip left unattended allows moisture to work under the finish and accelerates peeling across a much larger area.
Get Your Free Cabinet Painting Quote in Denver Today
The fastest way to know what cabinet painting will cost for your specific kitchen is to get free quote cabinet painting denver from a contractor who will actually look at your cabinets, not just give you a generic price over the phone.
Denver Cabinet Painting Colorado offers free, no-obligation quotes for residential and commercial clients across the Denver metro area and throughout Colorado. With 40 years of experience delivering smooth, consistent finishes, the team brings the preparation discipline and finish quality that determine whether your cabinets look great for years or start showing problems within months.
To request your free estimate, have your homeowner checklist ready (number of doors, current finish condition, desired color direction) and reach out directly. The consultation is free, there’s no pressure, and you’ll leave with a clear picture of what the project involves and what it costs.
The Colorado Department of Regulatory Agencies contractor licensing database lets you verify that any painter you hire is properly licensed in Colorado before signing a contract. It takes two minutes and is worth doing.
Conclusion
Outdated cabinets are one of the most visible problems in a kitchen, and full replacement is rarely the right answer when the cabinet boxes are structurally sound. Denver Cabinet Painting Colorado brings 40 years of Colorado experience, meticulous surface preparation, and premium finish options to every project, from single-color updates to custom two-tone kitchens across the Front Range. Get started with Denver Cabinet Painting Colorado and walk away with a kitchen that looks like a high-end remodel at a fraction of the replacement cost.
Frequently Asked Questions
How much does it cost to paint kitchen cabinets in Denver?
The average cost of cabinet painting in Denver varies based on kitchen size, number of cabinet doors, finish type, and the extent of surface preparation required. Smaller kitchens with fewer cabinets will fall at the lower end of the range, while larger kitchens with detailed wood grain or extensive sanding and priming needs cost more. Getting a free, no-obligation quote from a licensed and insured Denver cabinet painter is the most reliable way to get an accurate ballpark estimate for your specific project.
What should be included in a cabinet painting quote?
A thorough cabinet painting quote should itemize surface preparation (sanding and priming), number of cabinet doors and drawer fronts, finish type (lacquer, epoxy, or durable coating), paint product and VOC level, project timeline, warranty terms, and cleanup. Ask whether cabinet hardware removal and reinstallation are included. A detailed quote protects you from surprise costs and helps you compare Denver cabinet painters fairly on an apples-to-apples basis.
How long does professional cabinet painting take?
Most professional kitchen cabinet painting projects in the Denver metro area take between three and seven business days from start to finish. The timeline depends on kitchen size, the number of coats applied, drying time between coats, and whether cabinet doors are painted on-site or off-site in a controlled shop environment. A factory-finish quality result requires adequate cure time, so rushing the process is one of the most common causes of chipping and peeling later on.
Is it worth painting kitchen cabinets instead of replacing them?
For most homeowners, cabinet painting or refinishing is a highly cost-effective alternative to full cabinet replacement. You preserve the existing cabinet boxes and layout while achieving a fresh, modern update, often at a fraction of the cost of a high-end kitchen remodel. As long as the cabinet structure is sound and the surfaces are properly prepared, a professional finish can dramatically transform your kitchen's appearance and add lasting value to your home.
Do cabinet painters in Denver offer free in-home estimates?
Yes, most reputable cabinet painting companies serving the Denver metro and Front Range offer free, no-obligation in-home consultations. During the visit, a professional assesses your cabinet doors, wood grain, current finish condition, and discusses color options including custom color matching. This free estimate gives you a precise project quote rather than a rough online ballpark, and it's the best first step toward planning your kitchen renovation budget accurately.
What questions should I ask a cabinet painter before hiring?
Before hiring a Denver cabinet painter, ask: Are you licensed and insured? What surface preparation steps do you follow? What paint or finish products do you use, lacquer, epoxy, or low-VOC paint? Do you offer a warranty on your work, and for how long? Can you provide references or before-and-after photos? What is the full project timeline? Getting clear answers to these questions helps you identify a reputable professional and avoid finishes that chip or peel prematurely.
This article was written using GrandRanker