Table of Contents
- Preparation and Cleaning: The Foundation of the Best Way to Paint Kitchen Cabinets
- Sanding vs. Liquid Deglosser: Which Method Wins?
- Cabinet Material Compatibility: What You Need to Know Before You Paint
- Best Paint for Kitchen Cabinets: Choosing Primer and Top Coat
- Kitchen Cabinet Painting Tools: Brush, Roller, and Sprayer Compared
- Applying Paint the Best Way: First Coat, Second Coat, and Long-Term Durability
- How Long to Let Cabinets Dry Before Reassembling
- Common Mistakes When Painting Kitchen Cabinets (And How to Avoid Them)
- Conclusion: Get a Professional Finish on Your Kitchen Cabinets
Last Updated: May 25, 2026
Painting kitchen cabinets is one of the highest-return home improvement projects you can tackle, but most DIYers underestimate what separates a durable, professional finish from a peeling, brush-marked disappointment. The best way to paint kitchen cabinets is not a single step, it is a disciplined system of preparation, material selection, and application technique. At Denver Cabinet Painting Colorado, we have spent 40 years refining that system for residential and commercial clients across the Denver metro area, and this guide distills exactly what works. Below, we break down every phase of the process, from stripping hardware to choosing between a brush, roller, and HVLP sprayer, so you can achieve a factory-quality finish without replacing your cabinets entirely.
Here is what most guides get wrong: they spend three paragraphs on color selection and one sentence on surface preparation. Prep is where the job is won or lost. Skip it, and even the most expensive cabinet paint will fail within a year.
Preparation and Cleaning: The Foundation of the Best Way to Paint Kitchen Cabinets
Thorough preparation is the single most important factor in a long-lasting cabinet paint job. Without a clean, properly deglossed surface, paint cannot bond correctly, and you will see chipping and peeling within months regardless of which paint or primer you choose.
Start by clearing the kitchen of anything that can be moved. Lay drop cloths across countertops, floors, and appliances. Kitchen cabinets accumulate years of cooking grease, and that grease is invisible to the eye but catastrophic for paint adhesion.
Use a dedicated degreaser rather than dish soap. A product like Krud Kutter Original Cleaner/Degreaser cuts through cooking oil and food residue that soap cannot fully remove. Spray it on, let it dwell for 60 seconds, then wipe with a clean cloth. Repeat until the cloth comes away clean. According to the EPA’s guidance on surface preparation for coatings, proper surface cleaning is the most critical factor in coating adhesion and longevity, a point that professional painters have known for decades.
Once the surface is clean, wipe everything down with a damp cloth to remove any degreaser residue, then allow it to dry completely. Residual cleaner is just as damaging to adhesion as grease.
Removing Cabinet Doors, Drawer Fronts, and Hardware
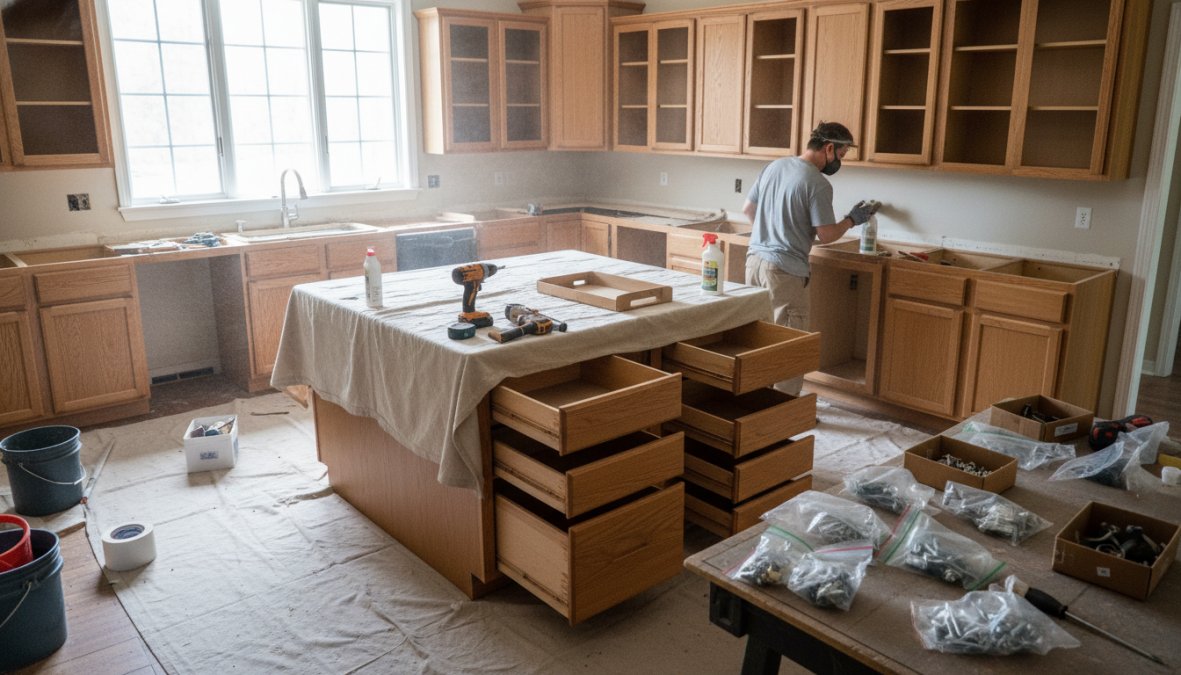
Remove every cabinet door, drawer front, and piece of hardware before you paint anything. This is non-negotiable. Painting cabinet doors in place produces uneven coverage, drips along edges, and paint that seals hinges shut.
Use a cordless drill to remove hinges and set the doors flat on a work surface or sawhorses. Pull every knob, pull, and hinge. Number the doors with painter’s tape and a marker on the back so reinstallation is straightforward. Store all cabinet hardware in labeled zip-lock bags.
Painting the frames (the fixed boxes on the wall) separately from the doors gives you better access to edges and allows each piece to cure properly before reassembly.
Repairing Damaged Cabinets Before Painting
This is the step competitors consistently skip, and it is where many DIY projects fall apart visually.
Inspect every door and drawer front for damage: gouges, dents, delaminating veneer, or old caulk that has cracked. Wood filler works well for small gouges on solid wood cabinets. Apply it slightly proud of the surface, let it cure fully, then sand flush with 120-grit sandpaper. For laminate cabinets with lifting edges, re-adhere them with contact cement before doing anything else.
Hairline cracks at joints should be filled with a flexible paintable caulk, not wood filler, which can crack again as the cabinet moves with seasonal humidity changes. Sand all repairs smooth and clean off the dust with a tack cloth before moving to the next phase.
Skipping repairs before priming is the most common DIY mistake. Paint magnifies surface imperfections rather than hiding them. A gouge that looks minor on bare wood will appear as a visible shadow under a satin or semi-gloss finish.
Sanding vs. Liquid Deglosser: Which Method Wins?
Physical sanding wins for most cabinet surfaces, but liquid deglosser has a legitimate role in specific situations. Understanding the difference, and matching the method to your specific cabinet material, determines whether your primer bonds or peels. Most guides treat this as a universal choice. It is not. The right answer depends on what your cabinets are made of.
How Each Method Works
Sanding creates mechanical tooth on the surface by physically abrading the existing finish. This gives primer a textured surface to grip rather than a slick film to sit on top of. The bond created by sanding is mechanical, primer locks into the microscopic scratches, which is why it is more reliable than chemical adhesion alone.
Liquid deglosser (also called liquid sandpaper or chemical deglosser) works differently. It does not physically abrade the surface. Instead, it uses solvents to chemically etch the existing finish, creating a slightly roughened surface that improves adhesion. The result is faster to achieve but less consistent, and it does nothing to address surface imperfections.
As noted in Purdy’s professional painting guides, proper surface scuffing before priming is essential for enamel adhesion on previously finished surfaces, and the mechanism matters as much as the outcome.
Matching the Method to Your Cabinet Material
This is the decision most guides skip, and it is where the choice between sanding and deglosser becomes concrete rather than theoretical.
Solid wood cabinets: Sand. Use 120-grit sandpaper for initial scuffing to cut through the existing finish, then 150-grit to smooth before priming. A random orbital sander handles large, flat door panels efficiently. A detail sander or sanding sponge reaches into corners and profile details. After sanding, vacuum thoroughly and wipe with a tack cloth, even a thin layer of sanding dust will contaminate your primer coat and reduce adhesion.
MDF cabinets: Sand the faces, but use caution. MDF face surfaces sand well with 150-grit, but the edges are a different problem entirely. MDF edges are porous and will absorb water-based products aggressively, causing swelling that no amount of sanding will fix after the fact. On MDF edges, skip liquid deglosser entirely, it can introduce moisture, and instead seal with a shellac-based primer before any sanding or water-based product touches those edges.
Laminate cabinets: This is where liquid deglosser earns its place, with important caveats. Sanding laminate aggressively risks cutting through the thin decorative layer entirely, especially on edges and corners. A light scuff with 220-grit followed by a liquid deglosser application is the safer approach on flat laminate panels. However, liquid deglosser alone is not sufficient for laminate, you still need a bonding primer specifically rated for slick surfaces. The deglosser prepares the surface; the bonding primer creates the actual adhesion.
Thermofoil cabinets: Do not sand aggressively. Thermofoil is a vinyl film heat-pressed over MDF, and heavy sanding can lift or tear the film at edges. Use 220-grit only for the lightest possible scuff, then apply a bonding primer. If the thermofoil is already delaminating at edges, re-adhere it with contact cement before doing anything else, no amount of primer will bond over a lifting edge.
Veneer cabinets: Sand lightly with 100-grit maximum. Veneer layers are thin, typically 1/42 inch or less on factory cabinets, and aggressive sanding cuts through to the substrate beneath, creating an uneven surface that paint will not hide. Use a sanding sponge rather than a power sander on veneer to maintain better control over pressure.
On laminate and thermofoil cabinets, liquid deglosser contains solvents that can soften or wrinkle the decorative surface if left to dwell too long. Apply it, let it sit for no more than 30 seconds, and wipe it off immediately. Do not let it pool in corners or along edges.
The Honest Verdict
Sand whenever the cabinet material allows it. Mechanical tooth from sanding produces a more consistent, reliable surface for primer adhesion than chemical etching alone. Liquid deglosser is a legitimate tool for laminate panels, heavily profiled molding where sanding is genuinely difficult, and situations where time is a real constraint, but it is a complement to sanding, not a replacement for it.
For cabinets with heavy profiling or detailed molding where a power sander cannot reach, use liquid deglosser on those specific areas and sand the flat panels. The combination approach gives you the reliability of mechanical adhesion where it is achievable and the practicality of chemical etching where it is not.
| Cabinet Material | Recommended Method | Grit / Product | Key Risk to Avoid |
|---|---|---|---|
| Solid wood | Sand | 120-grit, then 150-grit | Skipping tack cloth after sanding |
| MDF faces | Sand | 150-grit | Sanding edges (seal instead) |
| MDF edges | Shellac primer only | Zinsser B-I-N | Any water-based product before sealing |
| Laminate | Light sand + deglosser | 220-grit + deglosser | Cutting through decorative layer |
| Thermofoil | Minimal sand only | 220-grit maximum | Lifting film at edges |
| Veneer | Light sand | 100-grit maximum | Sanding through thin veneer layer |
After any sanding or deglosser application, run a clean white cloth across the surface. If it picks up color from the existing finish, the surface is not ready for primer. Repeat the sanding or deglosser step until the cloth comes away clean.
Cabinet Material Compatibility: What You Need to Know Before You Paint
Not all cabinets respond the same way to paint, and using the wrong primer for your cabinet material is one of the most expensive mistakes you can make.

Solid wood is the most forgiving surface. It accepts both oil-based and water-based primers well, sands cleanly, and holds paint reliably for years when properly prepared.
MDF (medium-density fiberboard) is common in modern cabinet doors. The face is smooth and paints beautifully, but the edges are porous and will swell if they absorb too much water-based primer. Seal MDF edges with a shellac-based primer like Zinsser B-I-N before applying a water-based topcoat system.
Laminate and thermofoil cabinets are the trickiest. The slick surface resists adhesion, and thermofoil can delaminate with heat or moisture. If you are painting laminate, you must use a bonding primer specifically rated for slick surfaces. Zinsser B-I-N shellac-based primer is the strongest option here due to its unmatched bonding power on difficult surfaces. Do not skip this step, standard primers will not adhere to laminate long-term.
Veneer cabinets sit between solid wood and laminate in terms of difficulty. Sand lightly (80-100 grit maximum) to avoid cutting through the thin veneer layer, then prime with a water-based bonding primer.
Before committing to a full paint job on laminate or thermofoil cabinets, paint a small test area on the back of one door. Let it cure for a full week, then try to peel it with your fingernail. If it releases easily, you need a stronger bonding primer or a professional consultation.
Best Paint for Kitchen Cabinets: Choosing Primer and Top Coat
The paint system matters more than any single product. A premium topcoat on a poor primer will fail. A great primer under a cheap topcoat will look mediocre. The best results come from choosing products designed to work together.
Choosing the Right Primer for Your Cabinet Surface
Primer selection should be driven by your cabinet material, not personal preference or what is on sale.
For most wood and MDF cabinets, a high-quality water-based bonding primer provides excellent adhesion with low odor and easy cleanup. For difficult surfaces, laminate, previously varnished wood, or cabinets with tannin bleed (common in oak and cherry), Zinsser B-I-N Shellac-Based Primer is the professional standard. It dries extremely fast, blocks tannins completely, and bonds to surfaces that water-based primers struggle with. The tradeoff is strong odor during application and cleanup requiring denatured alcohol rather than water.
Apply primer in thin, even coats. Two thin coats outperform one heavy coat every time. Sand lightly with 220-grit sandpaper between coats and wipe with a tack cloth before applying the topcoat.
Selecting Paint Sheen: Satin vs. Semi-Gloss
For kitchen cabinets, the choice is between satin finish and semi-gloss. Both are practical options, the decision comes down to aesthetics and your tolerance for visible imperfections.
Semi-gloss is more reflective, easier to wipe clean, and more resistant to moisture. It is the traditional choice for kitchen cabinets and performs well in high-traffic kitchens. The downside: it highlights surface imperfections and brush marks more than satin.
Satin finish has a softer sheen that hides minor surface flaws better and looks more contemporary. It is still cleanable and durable, though slightly less so than semi-gloss.
For the topcoat itself, waterborne alkyd paints represent the best of both worlds. Sherwin-Williams Emerald Urethane Trim Enamel and Benjamin Moore Advance Interior Paint are the two products professionals reach for most often. Both use hybrid alkyd formulas that level exceptionally well (reducing brush marks), cure to a hard, furniture-grade finish, and clean up with water. INSL-X Cabinet Coat is another strong option, specifically engineered for high-traffic kitchens with excellent resistance to grease and moisture.
VOCs and Environmental Impact: What to Consider
Volatile organic compounds (VOCs) are chemicals released as paint dries. High-VOC paints, traditional oil-based primers and alkyd topcoats, produce strong fumes that require respiratory protection and excellent ventilation. They also contribute to indoor air quality problems that persist for days after application.
The good news: modern waterborne alkyds like Benjamin Moore Advance have low VOC formulations that perform comparably to traditional oil-based products without the health and environmental tradeoffs. If you are painting in an occupied home or have children or pets, low-VOC products are not just a preference, they are a practical safety consideration.
Check the product’s technical data sheet for VOC content before purchasing. The EPA’s AirNow guidance on indoor VOCs recommends maximizing ventilation during and after painting regardless of VOC level, and waiting at least 24 hours before returning to a freshly painted space.
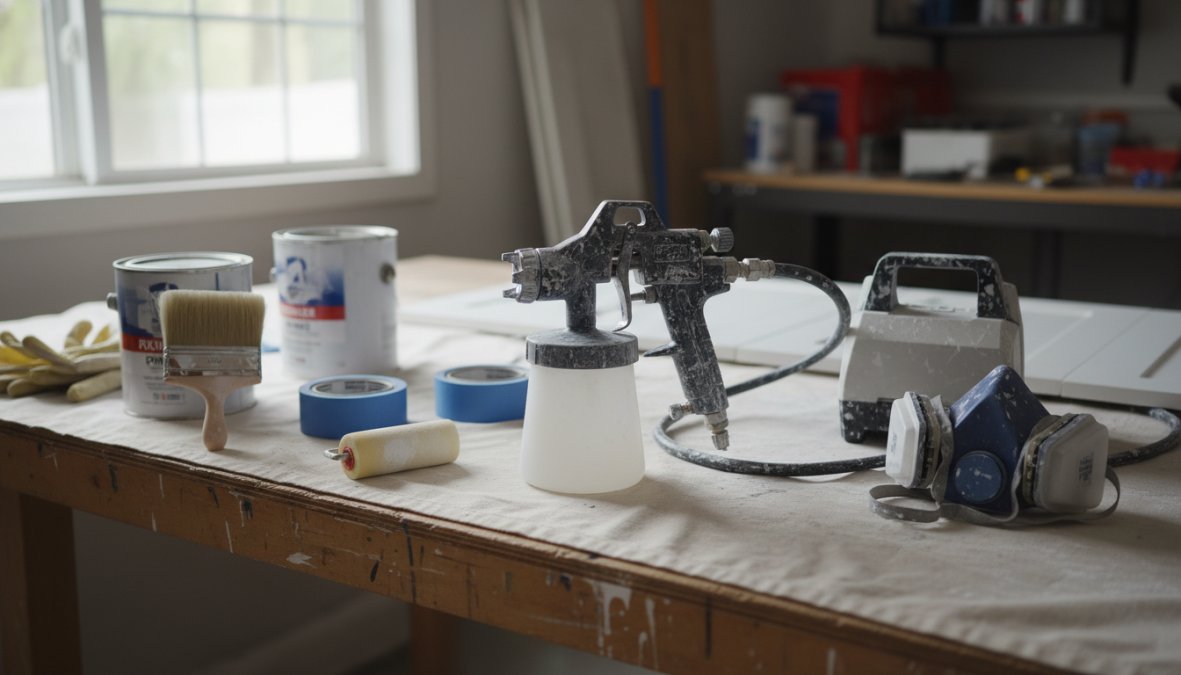
Kitchen Cabinet Painting Tools: Brush, Roller, and Sprayer Compared
Choosing the right application method is where most DIYers leave quality on the table. Each tool produces a different result, and the best choice depends on your skill level, your cabinet style, and how much prep work you are willing to do.
| Tool | Best For | Finish Quality | Skill Level | Setup Time |
|---|---|---|---|---|
| Angled sash brush | Frames, profiles, detail work | Good | Beginner | Minimal |
| High-density foam roller | Flat door panels | Very good | Beginner | Minimal |
| HVLP sprayer | All surfaces, large projects | Excellent | Intermediate | High |
Angled sash brush: A Purdy Clearcut Glide Angled Sash Brush is the right tool for cutting in around cabinet frames, painting detailed molding, and working into corners where a roller cannot reach. Use long, light strokes in the direction of the wood grain to minimize brush marks. Load the brush lightly, heavy loading causes drips and visible brush strokes.
High-density foam roller: For flat cabinet door panels and drawer fronts, a Wooster Microplush Microfiber Roller produces a smooth, near-spray finish with minimal stippling. Roll in one direction, then lightly tip off (drag a dry brush lightly across the wet surface) to eliminate any remaining texture. This brush-and-roll combination is the most practical approach for most DIYers.
HVLP sprayer: An HVLP (high-volume, low-pressure) sprayer produces the smoothest, most factory-like finish of the three options. It is the tool professionals use. The tradeoff is significant: setup takes longer, masking must be thorough to prevent overspray, and technique requires practice. If you have never used an HVLP sprayer, expect to spend time on test panels before touching your cabinet doors.
Applying Paint the Best Way: First Coat, Second Coat, and Long-Term Durability
The application phase rewards patience more than any other step. Rushing coats is the most reliable way to produce a finish that looks bad within a year. But beyond technique, understanding why certain paint systems hold up over years of kitchen use, and why others fail, is the knowledge gap most guides never close.
Applying the First Coat Without Brush Marks
The first coat’s job is coverage, not perfection. Apply thin, even coats rather than trying to achieve full opacity in one pass. Thin coats level better, dry faster, and produce fewer runs.
Work in this sequence: cabinet frames first (the fixed boxes on the wall), then doors and drawer fronts laid flat on a work surface. Painting flat surfaces horizontally eliminates gravity-driven drips and gives the paint the best conditions for self-leveling.
For brush application, use long strokes parallel to the wood grain. Do not overwork the paint, once it starts to set (usually within two to three minutes for waterborne alkyds), stop brushing. Going back over partially dried paint creates drag marks that are nearly impossible to sand out cleanly.
Allow the first coat to dry completely per the manufacturer’s instructions, then sand lightly with 220-grit sandpaper. This knocks down any raised grain or minor imperfections. Wipe with a tack cloth before the second coat.
Two thin coats of a premium waterborne alkyd will always outperform one thick coat of any paint. Thin coats level better, cure harder, and are far less likely to sag or show brush marks.
Long-Term Durability: How Different Paint Systems Actually Hold Up Over Time
This is the question most guides refuse to answer directly: how long will your painted cabinets actually look good? The honest answer depends on three variables, the paint system you chose, how thoroughly you prepared the surface, and how the cabinets are used day to day. Here is what real-world kitchen use reveals about each system.
Waterborne alkyd enamels (Sherwin-Williams Emerald Urethane, Benjamin Moore Advance, INSL-X Cabinet Coat)
These are the current professional standard for a reason. When applied over a properly primed surface, waterborne alkyds cure to a cross-linked film that resists chipping, scuffing, and repeated cleaning far better than standard latex. Most practitioners find that a properly applied waterborne alkyd system on solid wood or MDF cabinets holds up well through three to five years of normal kitchen use before showing meaningful wear at high-contact points, door edges, areas around pulls, and the cabinet frame directly below the sink.
The critical variable is full cure. Waterborne alkyds are dry to the touch within one to two hours but do not reach maximum film hardness for 21 to 30 days. Cabinets that are scrubbed, slammed, or exposed to steam during that window will show damage that looks like paint failure but is actually premature mechanical stress on an under-cured film. This is the most common reason homeowners report that their painted cabinets "started chipping after a few months", the paint was never given time to fully harden.
Standard latex paint
Standard interior latex, even premium formulas not specifically engineered for cabinets, remains softer after cure than a waterborne alkyd. It is more susceptible to blocking (surfaces sticking together when cabinet doors close against frames), and it shows wear at edges and high-contact points noticeably faster. Most practitioners find that standard latex on cabinets begins showing edge wear within 12 to 18 months in an actively used kitchen, compared to three or more years for a waterborne alkyd system.
If you have already applied standard latex to your cabinets, a water-based polyurethane topcoat applied after full cure adds a meaningful protective layer. Use a satin or semi-gloss water-based polyurethane in two thin coats, applied with a high-density foam roller to minimize brush marks in the clear coat.
When to add a polyurethane topcoat
For most cabinet painting projects using a premium waterborne alkyd, a separate polyurethane topcoat is not necessary, these products cure to a hard, scrubbable finish on their own, and adding a topcoat introduces an additional layer that can yellow slightly over time on white or light-colored cabinets.
However, a water-based polyurethane topcoat adds meaningful value in three specific situations:
- You used a standard latex paint rather than a waterborne alkyd
- The kitchen sees extremely heavy use (a household with young children, frequent cooking, or a rental property)
- You are painting laminate or thermofoil cabinets, where the bond between primer and substrate is the weakest link and an additional hard topcoat reduces mechanical stress on that bond
The High-Wear Zones: Where Painted Cabinets Fail First
Understanding where paint fails helps you apply extra protection where it matters most. In a typical kitchen, the first signs of wear appear in a predictable sequence:
- Door edges and the leading edge of drawer fronts, These surfaces take direct mechanical contact every time a door opens or closes. Apply an extra thin coat of paint to these edges and allow them to cure fully before reinstalling.
- The cabinet frame directly below the sink, Steam, moisture, and cleaning products concentrate here. A water-based polyurethane topcoat on this specific area is worth the extra step even if you skip it everywhere else.
- Around hardware holes, The paint film around pull and knob holes is thinner due to the drilling process and sees concentrated stress every time hardware is used. Apply a small amount of extra paint around these areas during the final coat.
- The inside top edge of base cabinet frames, This surface is invisible but takes constant contact from items being placed in and out of the cabinet. It is frequently missed during painting and often shows bare wood within months.
Before reassembling, run your finger along every door edge and frame edge. If you can feel a thin or rough spot, apply one more thin coat to that area specifically. Edges are where the paint film is thinnest and where failure always starts.
Protecting the Finish During the Curing Window
The 21 to 30 day curing period is when painted cabinets are most vulnerable. During this window:
- Wipe spills immediately with a soft, damp cloth, do not scrub
- Avoid hanging heavy items on doors or placing heavy objects against painted surfaces
- Do not use any cleaning products containing ammonia, bleach, or abrasives, plain water and a soft cloth only
- Leave cabinet doors open slightly rather than fully closed if possible, to prevent blocking between door faces and frame edges
- Keep the kitchen well-ventilated to support off-gassing and film hardening
After full cure, the finish is significantly more resistant to everyday kitchen wear. At that point, a mild dish soap solution applied with a soft cloth is safe for routine cleaning, and the surface can handle the normal mechanical stress of daily use.
As documented in Sherwin-Williams technical data for waterborne coatings, waterborne alkyd enamels require a minimum of 30 days to reach full film hardness, during which the surface should be treated with care to avoid damage.
How Long to Let Cabinets Dry Before Reassembling
This is one of the most common mistakes when painting kitchen cabinets: confusing "dry to touch" with "ready to reassemble."
Paint dries in layers but cures as a chemical process. Most waterborne alkyds are dry to touch within one to two hours and can receive a second coat within four to six hours. But full cure, the point at which the finish reaches its maximum hardness, takes 21 to 30 days.
For practical purposes, wait at least 24 to 48 hours after the final coat before reinstalling cabinet doors. This gives the paint enough hardness to handle the mechanical stress of hinge installation without denting or scratching. During reinstallation, avoid dragging doors across frames and be careful with screwdrivers near painted surfaces.
Do not stack painted doors against each other during the curing period. Even after 48 hours, paint surfaces can block (stick together) if pressed against each other, especially in warm conditions. Lay doors flat or store them vertically with spacers between them.
As documented in Sherwin-Williams technical data for waterborne coatings, waterborne alkyd enamels require a minimum of 30 days to reach full film hardness, during which the surface should be treated with care to avoid damage.
Common Mistakes When Painting Kitchen Cabinets (And How to Avoid Them)
Most failed cabinet paint jobs share the same root causes. Here are the ones that show up most often, and what to do instead.
Skipping the degreaser. Dish soap does not cut kitchen grease effectively enough for paint prep. Use a dedicated degreaser like Krud Kutter and repeat until the cloth comes away clean.
Using the wrong primer for the surface. Standard latex primer on laminate or heavily varnished cabinets will fail. Match the primer to the substrate: shellac-based for difficult surfaces, bonding primer for MDF and laminate.
Applying paint too thick. Thick coats sag, take longer to cure, and show brush marks. Thin coats always win.
Reassembling too soon. Rehanging doors 12 hours after painting causes dents, scratches, and surface damage. Wait a minimum of 48 hours, and handle doors carefully even then.
Not sanding between coats. Light sanding with 220-grit between coats removes raised grain and surface debris. Skipping it produces a rough, uneven finish.
Painting in poor conditions. Temperature and humidity affect how paint flows and cures. Most cabinet paints perform best between 50°F and 90°F with relative humidity below 85%. Painting on a hot, humid day produces longer dry times and increased risk of brush marks.
Using cheap brushes and rollers. A quality brush like the Purdy Clearcut Glide and a microfiber roller like the Wooster Microplush make a measurable difference in finish quality. Cheap foam rollers shed fibers into wet paint, and low-quality brushes hold paint unevenly.
Conclusion: Get a Professional Finish on Your Kitchen Cabinets
Achieving a durable, smooth finish on kitchen cabinets requires the right sequence of preparation, materials, and application technique. The best way to paint kitchen cabinets is a system, not a shortcut, and every phase from degreasing to final cure matters. For homeowners who want guaranteed results without the risk of a costly do-over, Denver Cabinet Painting Colorado brings 40 years of experience to every project, specializing in cabinet painting, refinishing, and glazing with meticulous preparation as the foundation of every job. Get a free quote from Denver Cabinet Painting Colorado and transform your kitchen with a smooth, consistent finish that lasts.
Frequently Asked Questions
Is it better to spray or brush paint kitchen cabinets?
Spraying with an HVLP sprayer produces the smoothest, most factory-like finish with no brush marks, making it the preferred method for professionals. However, it requires more setup, masking, and practice. For DIYers, a high-density foam roller paired with an angled sash brush is a practical alternative that delivers strong results. The best way to paint kitchen cabinets depends on your skill level, budget, and how much prep time you can invest.
Do you need to sand cabinets before painting?
Yes, sanding is strongly recommended before painting kitchen cabinets. Using 120- to 150-grit sandpaper scuffs the existing finish so primer and paint can bond properly. If you prefer to skip hand sanding, a liquid deglosser (liquid sandpaper) can chemically etch the surface for adhesion. However, sanding also smooths imperfections in the wood grain and gives you more control over the final result, making it the preferred step in most cabinet refinishing projects.
What is the most durable paint for kitchen cabinets?
The most durable options for kitchen cabinets are waterborne alkyd or hybrid enamel paints, such as Sherwin-Williams Emerald Urethane Trim Enamel or Benjamin Moore Advance Interior Paint. These paints cure to a hard, furniture-grade finish that resists chipping, scuffing, and grease. INSL-X Cabinet Coat is another purpose-built option designed specifically for high-traffic kitchen environments. For maximum durability, pair any of these paints with an oil-based or shellac-based primer and allow full curing time before reassembling.
How long does it take to paint kitchen cabinets properly?
A full DIY kitchen cabinet painting project typically takes three to five days from start to finish. Day one covers cleaning, degreasing, and removing cabinet doors and hardware. Day two involves sanding or deglossing and applying primer. Days three and four allow for two paint coats with proper drying time between each. Day five is reserved for light sanding between coats and reassembly. Rushing drying or curing times is one of the most common mistakes when painting kitchen cabinets and leads to peeling.
Can you paint kitchen cabinets without priming?
Skipping primer is not recommended when painting kitchen cabinets. Primer creates the adhesion layer that prevents peeling, especially on slick surfaces like laminate or previously varnished wood. Without it, even the best paint for kitchen cabinets is likely to chip or peel within months. If you're short on time, a high-adhesion shellac-based primer like Zinsser B-I-N dries extremely fast and can cut prep time significantly while still providing the bonding power your cabinets need.
How do you prevent paint from peeling on kitchen cabinets?
Preventing peeling starts with thorough preparation. Always degrease cabinets with a cleaner like trisodium phosphate (TSP) or a dedicated degreaser, then sand or degloss before priming. Use a high-adhesion primer suited to your cabinet material. Apply thin, even coats of paint and allow full drying time between each coat. Finally, allow the full curing time, often two to four weeks, before exposing cabinets to heavy use, moisture, or cleaning, as paint is still hardening long after it feels dry to the touch.
This article was written using GrandRanker