Table of Contents
- Why the Best Paint for Kitchen Cabinets Durability Starts with the Right Formula
- Acrylic vs Alkyd Paint for Cabinets: Which Wins on Durability
- Best Paint Brands for Kitchen Cabinet Durability: Top Picks Ranked
- 1. Benjamin Moore Advance: Best Overall for a Factory-Smooth Finish
- 2. Sherwin-Williams Emerald Urethane Trim Enamel: Best for High-Traffic Kitchens
- 3. INSL-X Cabinet Coat: Best Adhesion on Pre-Finished Surfaces
- 4. PPG Break-Through!: Best for Fast Turnaround Projects
- 5. Valspar Cabinet and Furniture Enamel: Best Budget-Friendly Option
- Kitchen Cabinet Painting Preparation Steps That Determine Your Finish
- Best Tools for Painting Kitchen Cabinets: Brush, Roller, or Sprayer
- How Long Does It Take to Paint Kitchen Cabinets from Prep to Cure
- Color Retention, Yellowing, and Long-Term Cabinet Maintenance
- Conclusion: Choosing Durability That Lasts in a Colorado Kitchen
Last Updated: May 28, 2026
Choosing the best paint for kitchen cabinets durability is one of the most consequential decisions in any kitchen renovation, and most homeowners get it wrong by prioritizing color before chemistry. At Denver Cabinet Painting Colorado, we’ve spent 40 years watching cabinets fail prematurely, and the culprit is almost always the wrong formula applied to the wrong substrate. Below, we’ll show you exactly which paints hold up in real kitchens, how to prepare surfaces properly, and what separates a finish that lasts a decade from one that chips in six months.
Here’s what most guides get wrong: they treat all cabinet paints as interchangeable and focus entirely on brand loyalty. The real differentiator is how a paint cures, bonds, and responds to heat, grease, and daily contact. The five strategies we cover have transformed hundreds of kitchens across the Denver metro area.
Why the Best Paint for Kitchen Cabinets Durability Starts with the Right Formula
A durable cabinet paint is one that cures to a hard, cross-linked film capable of resisting moisture, grease, abrasion, and temperature fluctuations without chipping, yellowing, or losing adhesion over time. Not every paint marketed for cabinets actually achieves this.
The chemistry matters more than the brand name. Standard latex paint, for example, remains somewhat flexible after drying. That flexibility works well on walls, but on cabinets, it means doors and drawer faces stick together, scuff easily, and show fingerprints within weeks. A true cabinet-grade enamel or hybrid alkyd cures through a chemical reaction, not just evaporation, producing a surface hardness closer to factory-finished furniture.
What Makes a Cabinet Paint Truly Durable
Cabinet paint durability comes down to four factors: hardness after full cure, adhesion to the substrate, resistance to household chemicals, and color stability over time. Paints that score well on all four tend to be urethane-modified alkyds or waterborne alkyd hybrids. These formulas combine the self-leveling and hardness properties of traditional oil-based paint with the lower VOC levels and easier cleanup of water-based products.
Scuff resistance is the most underrated metric. A kitchen cabinet gets touched hundreds of times per week. A paint that looks perfect on day one but shows wear marks by month three is not a durable paint, regardless of what the label claims.
Full cure time and dry time are completely different things. A cabinet might feel tack-free in two hours but require 30 days to reach full hardness. Treat cabinets gently during that window or you will permanently mar the surface.
VOC Levels and Indoor Air Quality: What Colorado Homeowners Should Know
Colorado’s high altitude and dry climate affect how paints off-gas. VOC (volatile organic compound) levels matter both for health and for finish quality. High-VOC oil-based paints produce strong fumes that linger longer at altitude because the reduced atmospheric pressure affects evaporation rates.
Fortunately, the best performing cabinet paints in 2026 are also among the lowest in VOCs. Benjamin Moore Advance and Sherwin-Williams Emerald Urethane Trim Enamel both carry low-VOC designations even after tinting, which matters because many paints spike in VOC content once colorants are added. For Colorado homeowners painting in attached garages or kitchens with limited ventilation, waterborne alkyd hybrids are the practical and responsible choice.
According to the EPA’s guidance on indoor air quality and VOCs, VOC exposure from interior paints can be significantly higher indoors than outdoors, making low-VOC formula selection especially important in enclosed spaces.
Acrylic vs Alkyd Paint for Cabinets: Which Wins on Durability
The acrylic vs alkyd paint for cabinets debate has a clear answer for most kitchen applications: alkyd wins on hardness, but modern waterborne alkyds eliminate most of the traditional trade-offs. Pure acrylic latex paints are easier to apply and dry faster, but they rarely achieve the surface hardness needed for high-traffic cabinet environments. Pure oil-based alkyds are extremely hard but come with high VOC levels, long dry times, and a tendency to yellow significantly on white and light-colored cabinets.

The practical winner is the hybrid alkyd category.
Hybrid Alkyd Paints: The Best of Both Worlds
Hybrid alkyd paint is a waterborne formula that incorporates alkyd resin chemistry to produce a harder, more durable finish than standard acrylic while maintaining water-based convenience. Products like Benjamin Moore Advance and Sherwin-Williams Emerald Urethane Trim Enamel are technically waterborne alkyd hybrids, which is why they outperform standard latex on cabinets.
The self-leveling properties of these formulas are particularly valuable. Brush marks that are visible when wet flow out as the paint levels, producing a surface approaching a factory-smooth finish without requiring spray equipment. This is not marketing language. The difference between a hybrid alkyd and standard latex on cabinets, applied with the same brush, is genuinely visible to the naked eye.
Compatibility with Existing Cabinet Substrates
Cabinet substrate compatibility is the topic almost no guide addresses, and it’s where many DIY projects fail. The substrate your cabinets are made from determines which primer and paint will actually bond correctly.
| Substrate | Recommended Primer | Compatible Top Coats | Key Concern |
|---|---|---|---|
| Solid wood | Oil-based or shellac primer | Any hybrid alkyd or urethane enamel | Grain raise, tannin bleed |
| MDF | Oil-based primer (2 coats) | Waterborne alkyd, urethane enamel | Moisture sensitivity at edges |
| Thermofoil / laminate | Shellac primer or bonding primer | INSL-X Cabinet Coat, PPG Break-Through! | Adhesion failure risk |
| Pre-finished wood | Shellac primer after deglossing | INSL-X Cabinet Coat, Emerald Urethane | Existing finish compatibility |
| Plywood veneer | Oil-based primer | Any hybrid alkyd | Veneer lifting at edges |
Thermofoil and laminate surfaces are the most unforgiving. Standard primers will not bond adequately, and the finish will peel within months. Shellac primer or a dedicated bonding primer is non-negotiable on these substrates.
Best Paint Brands for Kitchen Cabinet Durability: Top Picks Ranked
The best paint brands for kitchen cabinet durability, ranked by real-world performance, are Benjamin Moore Advance, Sherwin-Williams Emerald Urethane Trim Enamel, INSL-X Cabinet Coat, PPG Break-Through!, and Valspar Cabinet and Furniture Enamel. Each excels in a specific scenario, and matching the product to your situation matters more than defaulting to the most expensive option.
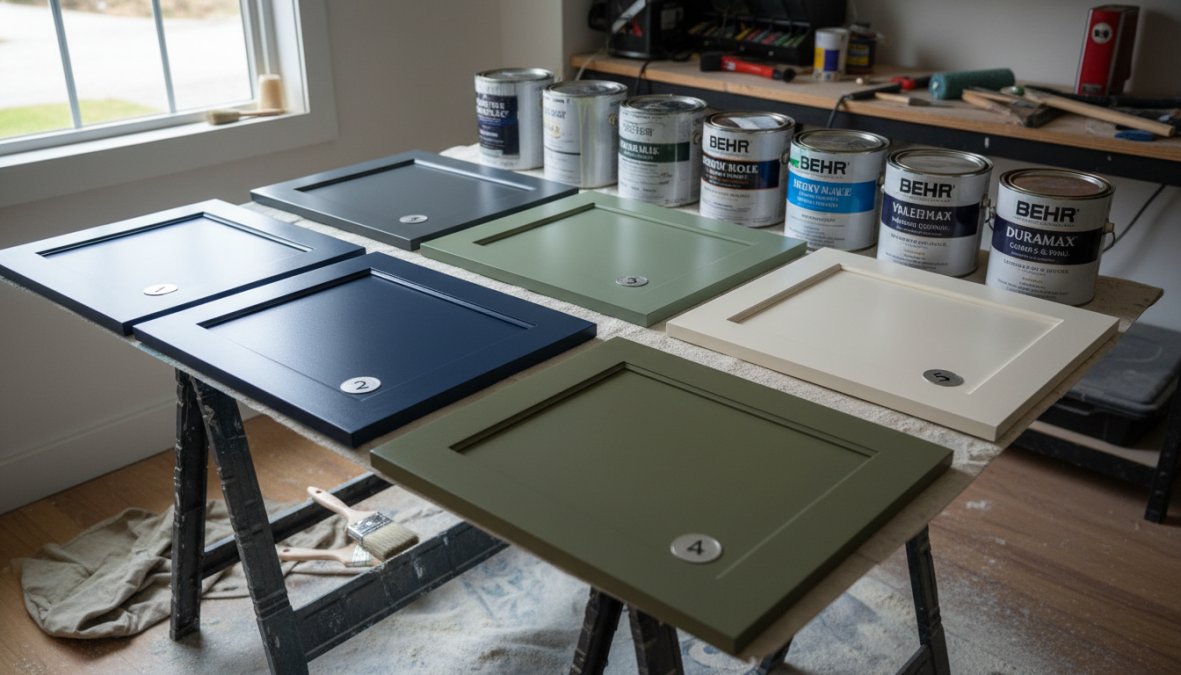
1. Benjamin Moore Advance: Best Overall for a Factory-Smooth Finish
Benjamin Moore Advance is the most consistently recommended professional-grade cabinet paint for good reason. It is a waterborne alkyd that cures to a furniture-quality hardness, flows and levels exceptionally well to minimize brush marks, and maintains a low VOC profile even after tinting across its library of over 3,500 colors.
Best for: DIYers and professionals seeking a high-end, smooth, and durable factory-like finish.
Pros:
- Exceptional self-leveling properties reduce visible brush marks
- Cures to a hard, scrubbable surface once fully cured
- Low VOC even after tinting
Cons:
- Longer curing time compared to acrylic enamels (allow 30 days for full hardness)
- Requires patience during application due to slower dry time
The one thing most reviews miss about Advance: the longer dry time is a feature, not a flaw. That extended open time is what allows the paint to level properly before it sets. Rushing it by applying heat or increasing airflow defeats the purpose.
2. Sherwin-Williams Emerald Urethane Trim Enamel: Best for High-Traffic Kitchens
Sherwin-Williams Emerald Urethane Trim Enamel is the hardest-curing waterborne product on this list. The urethane modification produces a scratch-resistant outer shell that outperforms standard alkyds in abrasion testing. It is also genuinely non-yellowing, making it the top choice for white and off-white cabinets where color retention matters.
Best for: High-traffic kitchen cabinets requiring maximum durability and a professional, hard finish.
Pros:
- Superior hardness and resistance to scuffs and scratches
- Excellent color retention; non-yellowing formula holds whites longer
- Low VOC with minimal odor during application
Cons:
- Higher price point than most alternatives
- Sensitive to humidity during application; avoid painting on high-humidity days
In practice, Emerald Urethane is the product Denver Cabinet Painting Colorado’s professional teams reach for on commercial kitchen projects where durability requirements are highest. The price difference over Advance is justified when the finish needs to survive restaurant-level daily contact.
3. INSL-X Cabinet Coat: Best Adhesion on Pre-Finished Surfaces
INSL-X Cabinet Coat is a urethane-acrylic hybrid specifically engineered for kitchen cabinet environments. Its standout quality is adhesion to difficult surfaces, including pre-finished wood and laminate, where other paints fail to bond adequately without extensive sanding.
Best for: Homeowners repainting cabinets that already have an existing finish, particularly factory-applied lacquers.
Pros:
- Superior adhesion to difficult surfaces that challenge other formulas
- Resists chipping, peeling, and grease effectively
- Dries to a smooth satin finish with good self-leveling
Cons:
- Less widely available at major retail chains; may require ordering online or through a paint specialty store
4. PPG Break-Through!: Best for Fast Turnaround Projects
PPG Break-Through! solves a specific problem: kitchens that cannot be out of commission for multiple days. It recoats in approximately one hour and reaches early block resistance faster than any other product on this list, meaning doors and drawers can be reinstalled sooner without sticking.
Best for: Projects requiring fast turnaround without sacrificing durability.
Pros:
- Extremely fast dry and cure cycle compared to hybrid alkyds
- Versatile adhesion to non-porous surfaces including laminate and ceramic
Cons:
- Fast dry time makes smooth application more challenging; a wet edge is harder to maintain
- Less forgiving of application errors than slower-drying formulas
PPG Break-Through!’s fast dry time is a double-edged quality. If you are brushing by hand, work in small sections and maintain a wet edge aggressively. Letting the edge dry before overlapping creates lap marks that cannot be brushed out.
5. Valspar Cabinet and Furniture Enamel: Best Budget-Friendly Option
Valspar Cabinet and Furniture Enamel is an oil-enriched water-based enamel that punches above its price point. The oil enrichment produces better flow and leveling than standard acrylic enamels, and the formula resists brush marks and streaks effectively. It is not in the same performance tier as Advance or Emerald Urethane, but for budget-conscious projects where the cabinets see moderate use, it delivers solid results.
Best for: Budget-conscious DIYers looking for a durable, streak-free finish on moderately used cabinets.
Pros:
- Excellent streak-free application with good leveling
- Hard, durable finish at an accessible price point
Cons:
- Availability varies by retailer; not universally stocked
| Brand | Type | Best Sheen | Cure Time | Best For |
|---|---|---|---|---|
| Benjamin Moore Advance | Waterborne alkyd | Satin / Semi-gloss | 30 days | Overall smoothest finish |
| Sherwin-Williams Emerald Urethane | Urethane trim enamel | Semi-gloss | 30 days | Maximum hardness |
| INSL-X Cabinet Coat | Urethane-acrylic | Satin | 21 days | Pre-finished surfaces |
| PPG Break-Through! | Waterborne acrylic | Semi-gloss | 7 days | Fast turnaround |
| Valspar Cabinet Enamel | Oil-enriched water-based | Satin | 21 days | Budget projects |
Kitchen Cabinet Painting Preparation Steps That Determine Your Finish
Preparation is where cabinet painting projects succeed or fail. A premium paint applied to a poorly prepared surface will peel, chip, and look worse than a budget paint applied correctly. This is not an exaggeration.
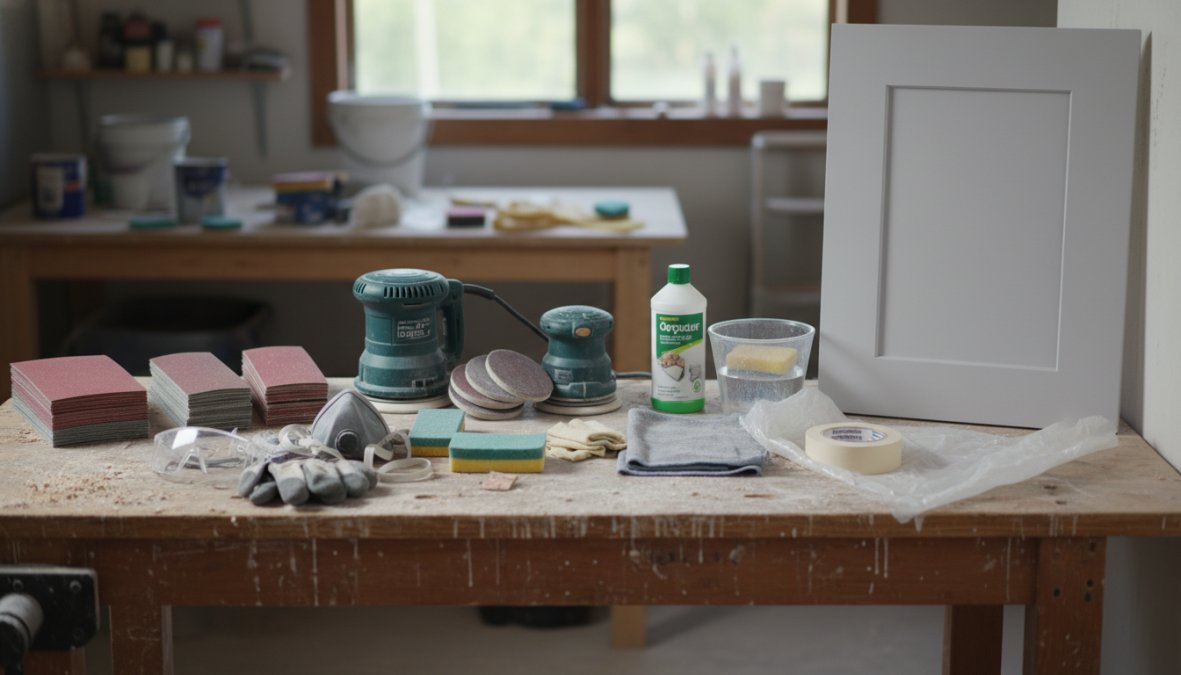
Cleaning, Degreasing, and Deglossing
Kitchen cabinets accumulate grease, cooking residue, and cleaning product buildup that standard wiping does not remove. Paint applied over this contamination will not bond correctly, regardless of primer quality.
Use a dedicated degreaser rather than dish soap. TSP (trisodium phosphate) substitute or a commercial cabinet degreaser removes grease at a molecular level that soap cannot match. Apply it with a scrub pad, rinse thoroughly, and allow the surface to dry completely before proceeding.
Deglossing follows degreasing. Liquid deglosser or light sanding breaks the surface tension of existing finishes, giving the primer a mechanical surface to grip. On factory-finished cabinets with a hard lacquer topcoat, this step is especially critical. Skipping deglossing is the single most common reason painted cabinets peel within the first year.
According to This Old House’s guide to cabinet preparation, thorough cleaning and deglossing before priming is consistently cited by professional painters as the most important step in achieving a long-lasting cabinet finish.
Sanding with 180 Grit Sandpaper and Choosing the Right Primer
Sand with 180 grit sandpaper after deglossing. Coarser grits leave scratches that telegraph through the topcoat. Finer grits do not create enough mechanical profile for the primer to bond. 180 grit is the professional standard for this reason.
Primer selection follows substrate logic from the compatibility table above:
- Shellac primer (Zinsser BIN): Best for tannin-rich woods like oak, cherry, and knotty pine. Blocks bleed-through that causes yellowing under light topcoats. Also the best primer for pre-finished and laminate surfaces.
- Oil-based primer: Best for MDF and solid wood where grain raise and porosity are concerns. Penetrates deeper than waterborne primers.
- Waterborne bonding primer: Acceptable for already-clean, lightly sanded wood surfaces in low-risk applications.
Apply primer in thin, even coats. One heavy coat is worse than two thin coats. Sand lightly with 220 grit between primer coats, then wipe with a tack cloth before applying topcoat.
On MDF cabinet doors, apply a thin coat of oil-based primer to the edges first and let it dry before priming the faces. MDF edges are highly porous and absorb primer unevenly, which creates a visible texture difference in the finished surface.
Best Tools for Painting Kitchen Cabinets: Brush, Roller, or Sprayer
The best tools for painting kitchen cabinets depend on the finish quality you need, the paint formula you have chosen, and the equipment you have access to. Each application method produces a measurably different result, and the wrong choice for your situation adds hours of correction work or produces a finish that looks amateur regardless of how good the paint is.
HVLP Sprayer: Factory-Smooth Results with the Highest Setup Cost
An HVLP (high volume, low pressure) turbine sprayer atomizes paint into fine, low-velocity particles that land with almost no texture, producing results that are genuinely indistinguishable from factory-applied finishes when done correctly. This is the method professional cabinet painters use on full kitchen projects.
What actually makes a sprayer work for cabinets: The key variable is viscosity. Hybrid alkyd paints like Benjamin Moore Advance and Sherwin-Williams Emerald Urethane are formulated for brush application and are typically too thick to atomize correctly without thinning. Advance can usually be thinned up to 10% with water for spray application without compromising the film build. Emerald Urethane is more sensitive to thinning and should be tested on scrap material first. Always check the technical data sheet for the specific product before adding any thinner.
Recommended equipment: For cabinet-only projects, a mid-range HVLP turbine unit (Fuji Semi-PRO 2 or equivalent) produces professional results and is available for rental at most tool rental centers if you do not want to purchase. Airless sprayers are harder to control at cabinet scale and produce more overspray. A gravity-feed HVLP gun with a 1.3mm to 1.5mm tip is the standard professional setup for cabinet-grade enamels.
The practical trade-off: Spraying requires masking every surface in the kitchen that you are not painting, countertops, appliances, floors, walls, and the insides of cabinet boxes if you are only painting the faces and doors. Setup and masking for a full kitchen typically takes two to four hours before a single drop of paint is applied. For whole-kitchen projects, the finish quality justifies this. For two or three replacement doors, it almost never does.
Never spray Benjamin Moore Advance or Sherwin-Williams Emerald Urethane in a closed garage without explosion-proof ventilation equipment. Even low-VOC waterborne paints produce fine atomized particles that are a respiratory hazard. Use an N95 respirator rated for paint mist at minimum, and ensure cross-ventilation throughout the spray session.
Brush Application: The Right Brush Changes Everything
Brush application is the most accessible method and, when paired with a self-leveling hybrid alkyd, produces results that are genuinely competitive with spray application on flat surfaces. The critical variable is brush quality, this is one of the few places in a cabinet painting project where spending more money directly and immediately improves the outcome.
Brush selection by task:
| Task | Brush Type | Size | Why |
|---|---|---|---|
| Cabinet door flat panels | Nylon/polyester blend, flat | 2.5 inch | Covers flat area efficiently; synthetic bristles work with waterborne formulas |
| Cabinet frames and stiles | Nylon/polyester blend, angled sash | 2 inch | Angled tip allows clean cuts at inside corners |
| Detail areas, routed profiles | Nylon/polyester blend, angled sash | 1.5 inch | Control in tight spaces |
| Primer coats on MDF | China bristle (natural) or stiff nylon | 2.5 inch | Better penetration into porous MDF surface |
The Purdy XL series and Wooster Shortcut are the professional standard for waterborne cabinet enamels. Cheap brushes from discount hardware stores leave visible bristle marks, shed fibers into wet paint, and hold less paint per load, all of which slow application and degrade the finish.
Technique that actually matters: Load the brush to about one-third of the bristle length, not to the ferrule. Apply paint in long, light strokes in the direction of the wood grain. Do not overwork the paint, hybrid alkyds begin to set faster than they appear to, and going back over partially set paint creates drag marks that do not level out. With Benjamin Moore Advance specifically, apply the coat and leave it. The self-leveling chemistry does the work; your job is to get the paint on evenly and stop touching it.
Maintaining a wet edge: Work from one end of a cabinet door to the other without stopping. If you need to pause, stop at a natural break point, the end of a rail or stile, rather than in the middle of a flat panel. Lap marks from rejoining a dry edge are the most common brush-application defect on cabinet doors.
Foam Roller: The Best DIY Compromise for Flat Surfaces
A 4-inch, 1/4-inch nap foam roller is the most practical tool for DIYers painting flat cabinet door faces and drawer fronts. It applies paint in a thin, even film with almost no texture, and when combined with a light back-brush pass in the direction of the grain, the result approaches spray quality on flat surfaces.
The combination method: Roll the flat panel with a foam roller to distribute paint evenly, then immediately follow with a dry brush held nearly parallel to the surface, using very light strokes in the grain direction to eliminate any roller stipple. This technique, roll then tip, is the standard professional approach for brush-and-roller cabinet work and produces a noticeably smoother result than either tool used alone.
What a roller cannot do: Rollers cannot reach routed profiles, inside corners, or the narrow rails and stiles of frame-and-panel doors. A brush is always required for these areas. The practical workflow for most DIY cabinet projects is to roll all flat panels and brush all detail areas, working door by door to keep a wet edge between the two tools.
Foam roller selection: Use a foam roller specifically rated for semi-gloss or gloss finishes. Woven rollers, even short-nap versions, leave a texture that is visible in the finished surface under raking light. The Purdy White Dove foam roller and the Wooster Foam Pro series are consistently recommended by professional painters for cabinet enamel application.
Before loading any roller or brush with your finish coat, wet the tool with clean water (for waterborne paints), then squeeze or shake out the excess. This pre-wetting prevents the first load of paint from being absorbed unevenly into a dry bristle or foam cell, which causes streaking at the start of each new section.
How Long Does It Take to Paint Kitchen Cabinets from Prep to Cure
Painting kitchen cabinets from prep to full cure takes between three and six weeks total, though the kitchen is typically usable within two to four days of the final topcoat. The timeline surprises most homeowners because they confuse dry time with cure time, and that confusion is responsible for more ruined cabinet finishes than any other single mistake.
Curing Time vs. Dry Time: Why the Difference Matters
Dry time is how long before paint is tack-free and can be recoated. Cure time is how long before the paint reaches its full hardness and chemical resistance through complete cross-linking of the resin. These are fundamentally different stages of the same chemical process, and treating a dried surface as a cured surface is the most common way homeowners permanently damage a finish they spent a weekend applying.
A hybrid alkyd paint like Benjamin Moore Advance or Sherwin-Williams Emerald Urethane may feel completely hard to the touch within 24 hours. At that point, the surface film has formed, but the cross-linking reaction that produces full hardness is still ongoing. Pressing a fingernail into the surface, stacking items inside a cabinet, or scrubbing with a damp cloth during this window can leave permanent impressions or scuff marks in a finish that would otherwise last a decade.
Cure timeline by product:
| Product | Recoat Time | Light Use | Full Cure |
|---|---|---|---|
| Benjamin Moore Advance | 16 hours | 5-7 days | 30 days |
| Sherwin-Williams Emerald Urethane | 4 hours | 3-5 days | 30 days |
| INSL-X Cabinet Coat | 2 hours | 3-5 days | 21 days |
| PPG Break-Through! | 1 hour | 24-48 hours | 7 days |
| Valspar Cabinet Enamel | 4 hours | 3-5 days | 21 days |
These timelines assume application at 70°F (21°C) and 50% relative humidity. Both temperature and humidity affect cure rate significantly, a factor that most guides ignore entirely.
How Temperature and Humidity Affect Cure Time
This is the content gap almost no guide addresses: the cure timeline on the paint label is a baseline, not a guarantee. Environmental conditions in your specific kitchen can extend or compress that window by days.
Temperature: Waterborne alkyd hybrids cure through a chemical oxidation and cross-linking reaction that slows significantly in cold conditions. Applying Advance or Emerald Urethane in a kitchen that drops below 55°F (13°C) at night, common in unheated garages where cabinet doors are often staged for painting, can extend the cure window by 50% or more. The minimum application temperature for most waterborne cabinet enamels is 50°F (10°C), but optimal cure happens between 65°F and 75°F (18°C-24°C). Painting in summer in a temperature-controlled kitchen is genuinely faster to full cure than painting in a cold garage in early spring.
Humidity: High humidity (above 70% relative humidity) slows the evaporation of water from waterborne formulas, which delays the onset of the cross-linking reaction. In humid climates or during summer in non-air-conditioned spaces, add 20-30% to the stated cure time as a practical buffer. Low humidity, conversely, can cause the surface film to form faster than the underlying paint layers have cured, which creates a hard shell over a still-soft interior, a condition that leads to denting and impression marks under light pressure.
Practical rule: If you are painting in conditions outside the 65-75°F, 40-60% RH window, treat the manufacturer’s cure time as a minimum, not a target.
A Realistic Project Timeline
- Day 1 (Morning): Remove all doors, drawer faces, and hardware. Label everything with painter’s tape and a marker, door position matters for rehang alignment. Clean and degrease all surfaces with TSP substitute or a dedicated cabinet degreaser.
- Day 1 (Afternoon): Apply liquid deglosser or sand with 180 grit. Wipe with tack cloth. Apply first primer coat to doors and cabinet boxes.
- Day 2: Sand primer lightly with 220 grit. Tack cloth. Apply second primer coat if needed (required on MDF, tannin-rich woods, and pre-finished surfaces).
- Day 3: Sand primer with 220 grit. Tack cloth. Apply first topcoat.
- Day 4: Inspect for missed areas, drips, or brush marks. Light sand with 320 grit only if surface texture requires it. Apply second topcoat.
- Days 5-6: Allow topcoat to dry fully before handling. Reinstall doors and hardware carefully, using a soft cloth between the door and any hard surface during handling.
- Days 7-30 (or per product spec): Full cure period. Treat surfaces as fragile during this window.
What Happens If You Handle Cabinets Too Early: Specific Failure Modes
This is the practical information that guides consistently omit. Understanding the specific failure modes of early handling helps homeowners make informed decisions about when to reinstall and how to treat cabinets during the cure window.
Door-to-frame sticking (blocking): If cabinet doors are closed against the frame before the paint has reached adequate block resistance, the two painted surfaces can bond together. Opening the door tears the finish on one or both surfaces, leaving a rough, damaged patch that cannot be touched up invisibly. PPG Break-Through! is specifically engineered to resist blocking faster than other products; Advance is the slowest to reach block resistance and requires the most patience before closing doors.
Impression marks: Setting a heavy object, a pot, a can, a stack of plates, inside a cabinet during the cure window can leave a permanent impression in the paint film. The surface looks hard but the underlying film is still cross-linking and can deform under sustained pressure. Keep cabinet interiors empty or lined with a soft cloth for the first two weeks.
Scuff marks from cleaning: Wiping a curing cabinet surface with a damp cloth, even gently, can leave visible scuff marks in the partially cured film. During the first 30 days, clean only with a barely damp cloth and no pressure. After full cure, these same surfaces can be scrubbed with a soft sponge and mild dish soap without damage.
Hinge and hardware installation damage: Reinstalling hinges and hardware requires pressing metal against the painted surface. During the cure window, this contact can leave ring marks or scratches even with careful handling. Use a soft cloth or foam pad between the hardware and the painted surface during installation, and tighten screws slowly to avoid spinning the hardware against the finish.
The single most effective thing you can do to protect a freshly painted cabinet finish is to wait. Full cure takes 21 to 30 days for most hybrid alkyd products. Every day of patience during that window adds years to the life of the finish. Mark the cure completion date on your calendar before you reinstall the first door.
Color Retention, Yellowing, and Long-Term Cabinet Maintenance
Color retention separates good cabinet paints from great ones over a multi-year horizon. This is especially visible in white and light gray kitchens, where even slight yellowing is immediately noticeable.
Which Paints Resist Yellowing Over Time
Traditional oil-based alkyds yellow significantly over time, particularly in areas with limited natural light. The alkyd resin oxidizes and develops a warm, amber cast that is most visible on white cabinets inside dark pantry areas or on the backs of cabinet interiors.
The non-yellowing formulas are all waterborne: Benjamin Moore Advance, Sherwin-Williams Emerald Urethane Trim Enamel, and INSL-X Cabinet Coat all use acrylic or urethane-acrylic binders that resist oxidative yellowing. Emerald Urethane is specifically marketed for this property and performs consistently well on whites and off-whites over multi-year timespans.
Chalk paint, sometimes suggested as a cabinet option for its ease of application, requires a protective topcoat to be durable in kitchen environments. Without a topcoat, chalk paint absorbs grease and moisture readily. With a quality urethane topcoat, it can perform adequately, but the extra step adds time and cost that eliminates its main advantage.
According to Benjamin Moore’s technical data on Advance waterborne alkyd, waterborne alkyd formulas maintain color stability significantly better than traditional oil-based alkyds in interior applications.
Long-Term Maintenance and Touch-Up Guide for Painted Cabinets
A painted cabinet finish maintained correctly can last 8 to 15 years before requiring full refinishing. The maintenance protocol is straightforward but rarely discussed.
Daily and weekly care:
- Wipe spills immediately with a damp cloth
- Use mild dish soap diluted in water for routine cleaning
- Avoid abrasive scrubbers, bleach-based cleaners, and ammonia products
- Dry surfaces after wiping; standing water at door edges softens paint over time
Touch-up protocol:
Touch-ups on painted cabinets are notoriously difficult to make invisible because the surrounding paint has cured and aged. The best approach is to keep a small amount of the original paint in a sealed container, stored at room temperature. Before touching up, lightly sand the damaged area with 220 grit sandpaper, apply a thin coat of primer if the substrate is exposed, then feather in the topcoat with a small foam applicator. The touch-up will be slightly visible initially but blends as the paint cures.
The thing nobody tells you about touch-ups: the sheen matters as much as the color. A semi-gloss touch-up on a satin finish will always be visible because the light reflects differently. Always touch up with the exact same sheen as the original.
The most durable painted cabinet finishes combine a shellac or oil-based primer with a waterborne hybrid alkyd topcoat applied in two thin coats, followed by a 30-day cure period with gentle handling. Skipping any of these steps reduces the finish lifespan significantly.
Conclusion: Choosing Durability That Lasts in a Colorado Kitchen
Selecting the best paint for kitchen cabinets durability requires matching the right formula to your specific substrate, traffic level, and color goals. The products and preparation steps outlined here represent the professional standard for finishes that last years rather than months. For homeowners who want these results without the learning curve, the expertise and meticulous preparation that define great cabinet work take time to develop.
Frequently Asked Questions
What type of paint is most durable for kitchen cabinets?
Hybrid alkyd and urethane-modified waterborne enamels offer the best durability for kitchen cabinets. Products like Benjamin Moore Advance and Sherwin-Williams Emerald Urethane Trim Enamel cure to a hard, scuff-resistant shell that holds up in high-traffic areas. These formulas combine the flow and leveling of oil-based paint with the low VOC and easy cleanup of waterborne products, making them the top choice for a long-lasting, factory-smooth finish.
Is water-based or oil-based paint better for kitchen cabinets?
Modern waterborne hybrid alkyd paints have largely closed the gap with traditional oil-based paints for cabinet durability. They offer excellent adhesion, hard curing, and self-leveling properties that minimize brush marks, without the high VOC levels and slow drying of pure oil-based formulas. For most homeowners, a high-quality waterborne urethane or hybrid alkyd like INSL-X Cabinet Coat or PPG Break-Through! delivers superior results with easier application and cleanup.
Do I need to prime kitchen cabinets before painting?
Yes, priming is one of the most critical kitchen cabinet painting preparation steps. A quality oil-based primer or shellac primer seals the substrate, improves adhesion, and prevents tannin bleed-through on wood cabinets. Skipping primer is one of the most common reasons painted cabinets peel or chip prematurely. After sanding with 180 grit sandpaper and degreasing thoroughly, applying a dedicated cabinet primer ensures your topcoat bonds correctly and delivers lasting durability.
What is the best sheen or finish for kitchen cabinet paint?
Satin and semi-gloss are the most recommended sheens for the best paint for kitchen cabinets durability. Satin offers a subtle sheen that hides minor surface imperfections while remaining easy to wipe clean. Semi-gloss provides a harder, more reflective surface with superior moisture resistance, ideal for kitchens prone to grease and steam. High-gloss can look stunning but highlights every imperfection, so it works best when a professional sprayer is used for application.
How long does it take to paint kitchen cabinets from start to finish?
Most kitchen cabinet painting projects take three to five days from prep through final cure, though full cure time can extend to two to four weeks depending on the paint formula. Preparation, cleaning, degreasing, sanding, and priming, typically takes one to two days. Applying two coats of paint with proper dry time between coats adds another one to two days. Fast-drying options like PPG Break-Through! can compress the timeline, but cabinets should still be handled gently until fully cured.
Can you paint kitchen cabinets without sanding?
While some all-in-one products like Beyond Paint or Rust-Oleum Cabinet Transformations claim to skip sanding, light scuff-sanding with 180 grit sandpaper is still strongly recommended for the best adhesion and durability. Sanding removes the glossy sheen from existing finishes, giving the new paint something to grip. Skipping this step, even with self-bonding primers, increases the risk of peeling over time, especially on high-traffic cabinet doors and drawer fronts.
Cabinet painting done incorrectly costs more to fix than it would have cost to do right the first time. Denver Cabinet Painting Colorado brings 40 years of Colorado-specific experience to every project, specializing in cabinet painting, refinishing, and glazing with an emphasis on preparation as the foundation of every smooth, consistent finish. Get a free quote from Denver Cabinet Painting Colorado and transform your kitchen with a finish built to last.
This article was written using GrandRanker