Table of Contents
- Spray Painting vs Rolling Cabinets: Which Method Actually Wins?
- Pros and Cons of Professional Cabinet Spray Painting
- Pros and Cons of Brush and Roll Cabinet Application
- Cabinet Painting Tools and Equipment: Cost Breakdown
- Cabinet Painting Preparation Steps for Both Methods
- How Long Does It Take to Paint Cabinets With Each Method?
- Paint Product Compatibility, Health Impact, and Touch-Up Feasibility
- Professional Cabinet Spray Painting vs Rolling: Decision Framework
- Conclusion
Last Updated: May 26, 2026
The choice between professional cabinet spray painting vs rolling is one of the most consequential decisions you’ll make during a kitchen or bathroom refresh. Get it right and you end up with a finish that looks factory-made. Get it wrong and you’re staring at brush marks, orange peel texture, or overspray on your countertops for years. At Denver Cabinet Painting Colorado, we’ve spent 40 years navigating exactly this decision for residential and commercial clients across the Denver metro area, and the honest answer is more nuanced than most guides admit.
Here’s what most guides get wrong: they treat this as a DIY question. It isn’t. The method you choose affects adhesion, curing time, long-term durability, and how much masking and site protection you’ll need. Below, we’ll walk through every angle, including equipment costs, paint product compatibility, environmental impact, and touch-up feasibility, so you can make a genuinely informed call.
Spray Painting vs Rolling Cabinets: Which Method Actually Wins?
Professional cabinet spray painting vs rolling isn’t a simple contest with a universal winner. The right method depends on your finish goals, project environment, and budget for labor and equipment.
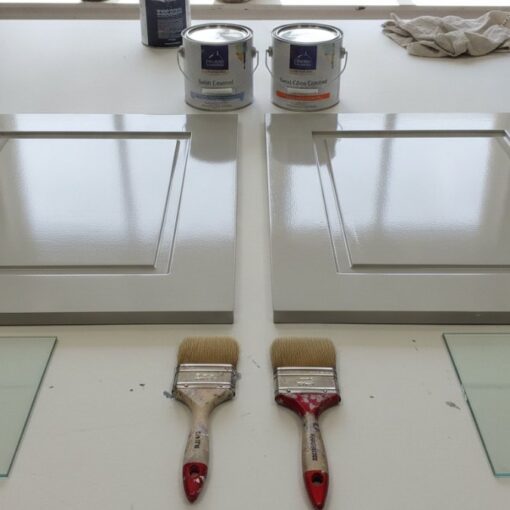
Spray painting, when done by a skilled contractor, produces a finish that closely mimics what you’d get from a factory spray booth. Cabinet doors and drawer fronts come out glassy smooth, free of brush marks, and with consistent film thickness across the entire surface. Rolling, by contrast, is accessible, forgiving for beginners, and requires far less site protection, but it introduces texture that spraying simply doesn’t.
What Defines a Professional-Grade Cabinet Finish
A professional-grade cabinet finish is one that achieves uniform color, consistent sheen, strong paint adhesion, and a surface texture indistinguishable from new cabinetry after proper curing.
That definition matters because it sets the benchmark. Spraying can hit that benchmark more reliably in trained hands. Rolling can get close, especially on flat cabinet doors with a high-quality enamel and a foam roller, but "close" is the operative word. The cabinet grain, the profile of the stile and rail, and the sheen level all influence how much the application method shows in the final result.
The throughline for this entire guide: spraying wins on finish quality, rolling wins on simplicity and site safety. Everything else is a trade-off between those two poles.
Pros and Cons of Professional Cabinet Spray Painting
Spray finishing produces the smoothest, most consistent results available outside a factory setting. That’s the core argument for it, and it’s a strong one.
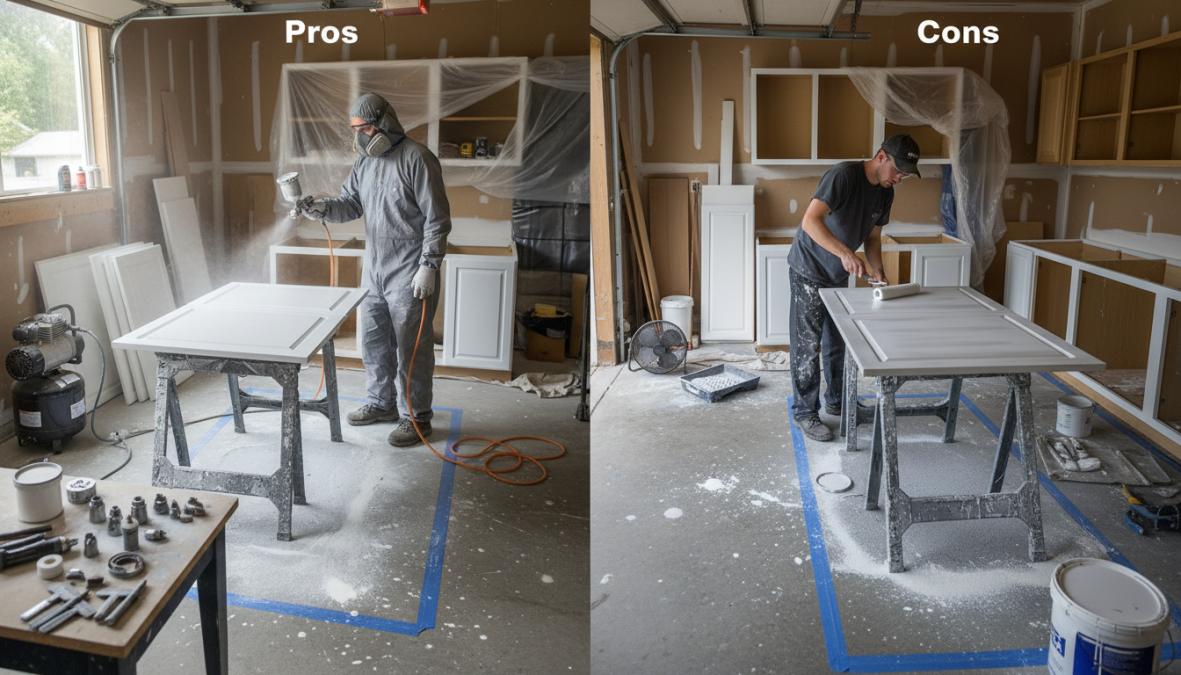
With an HVLP or airless sprayer, paint is atomized into fine particles that settle evenly across the surface. There are no applicator marks, no stippling, and no lap lines. For high-gloss enamel or lacquer topcoats, this matters enormously because sheen amplifies every imperfection. A sprayed finish on cabinet doors looks genuinely different from a rolled finish under kitchen lighting, particularly at oblique angles.
Pros of spray finishing:
- Produces a fine, factory-like finish on cabinet doors and drawer fronts
- Covers complex profiles, recessed panels, and cabinet grain without brush buildup
- Faster application on large volumes of cabinet doors once setup is complete
- Compatible with lacquer, water-based enamel, and oil-based topcoats
Cons of spray finishing:
- Significant overspray requires extensive masking and site protection
- Requires a spray booth or full room enclosure for indoor work
- Equipment investment is substantial (see cost breakdown below)
- Steep learning curve: runs, sags, and uneven atomization are common beginner mistakes
- Longer setup and cleanup time per session
According to EPA guidance on architectural coatings and VOC emissions, spray application releases more volatile organic compounds into the work environment than brush or roller methods, which has direct implications for ventilation planning and respirator selection.
HVLP vs Airless Sprayer: Choosing the Right Tool
HVLP (High Volume, Low Pressure) is the preferred tool for cabinet refinishing professionals who prioritize minimal overspray and precise control. The Fuji Spray Q5 Platinum HVLP System, for example, uses a 5-stage turbine motor to atomize paint at 9.5 PSI, producing an exceptionally fine finish suitable for high-end cabinetry. Its variable speed control lets you dial back airflow to reduce overspray in enclosed spaces. The trade-off: thicker paints often need thinning to atomize properly.
Airless sprayers like the Graco Ultra Cordless Airless Handheld Sprayer operate at much higher pressure, pushing paint through a small tip orifice without air mixing. This delivers faster coverage and handles thicker coatings without thinning, but produces more overspray and a slightly coarser atomization than HVLP. For cabinet doors removed and sprayed in a dedicated area, airless systems work well. For in-place cabinet frames, HVLP is the safer choice.
When spraying cabinet doors, always remove them from the cabinet box and spray horizontally on a flat surface. Vertical spraying dramatically increases the risk of runs on enamel and lacquer topcoats.
Pros and Cons of Brush and Roll Cabinet Application
Rolling isn’t a compromise. For the right project and the right painter, it’s a legitimate professional technique that delivers repeatable results with significantly less setup overhead.
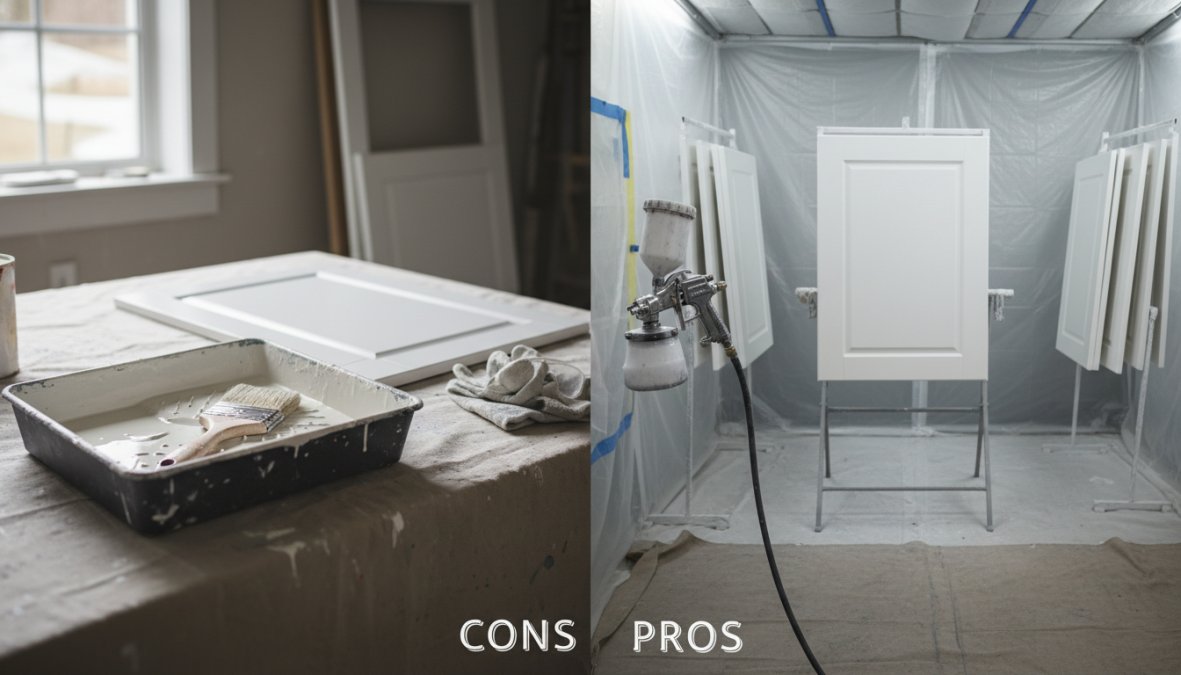
The brush and roll method typically works as follows: a brush is used to cut in edges, detailed profiles, and tight corners, while a short-nap foam or woven roller covers the flat panels. Products like the Purdy White Dove Roller Covers use high-density Dralon fabric with flagged filaments to minimize lint and produce a surface that, after light sanding between coats, reads as smooth to the eye. The Wooster Pro Woven Mini Roller Covers are purpose-built for cabinet stiles and tight areas where a full-sized roller won’t maneuver.
Pros of brush and roll:
- No overspray, which means minimal masking and site protection
- Equipment costs are a fraction of spray setups
- Easier touch-up and maintenance after the initial job
- No spray booth or ventilation enclosure required
- More forgiving for less experienced applicators
Cons of brush and roll:
- Can leave slight stippling or orange peel texture, especially on glossy finishes
- Brush marks are a real risk on stiles and rails if technique isn’t controlled
- Slower on large volumes of cabinet doors
- Requires careful wet-edge maintenance to avoid lap marks
- Less effective on complex profiles where paint can pool in corners
Using a long-nap roller on smooth cabinet surfaces is one of the most common mistakes in DIY cabinet painting. The nap leaves visible texture in enamel finishes. Stick to 1/4-inch nap or foam for cabinet doors and drawer fronts.
Cabinet Painting Tools and Equipment: Cost Breakdown
Equipment selection is where the cost gap between spraying and rolling becomes concrete. This is the section most guides skip over, and it’s the one that most directly affects your budget.

Spray Equipment Investment vs Roller and Brush Setup
| Equipment | Entry Level | Professional Grade | Best For |
|---|---|---|---|
| HVLP System (e.g., Fuji Q5 Platinum) | – | ~$1,779 | High-end cabinet refinishing |
| Airless Sprayer (e.g., Graco Ultra Cordless) | – | ~$814 | Mid-range cabinet projects |
| Purdy White Dove Roller Covers | ~$6-$12 each | Same | Rolling cabinet doors |
| Wooster Pro Mini Rollers | ~$5-$10 per pack | Same | Cabinet stiles and tight areas |
| Quality brushes, trays, frames | ~$30-$60 total | ~$80-$120 total | Brush and roll setup |
A complete professional spray setup, including the sprayer, compressor or turbine, masking materials, spray tent or booth enclosure, respirator, and filters, can run well into four figures before a single cabinet door is painted. A professional-grade brush and roll kit, by contrast, can be assembled for well under $200.
For professional contractors who spread equipment costs across dozens of jobs, the math on spray equipment makes sense. For a one-time homeowner project, rolling is almost always the more rational investment.
That said, the labor cost equation flips on large jobs. Spraying is faster once setup is complete, which means professional labor hours are lower for a full kitchen. Rolling takes longer per door, which adds to labor costs on big projects.
Cabinet Painting Preparation Steps for Both Methods
Preparation is the variable that separates a finish that lasts from one that fails within the first year. This is true regardless of application method, but the specific preparation demands differ meaningfully between spraying and rolling, and the consequences of skipping steps are not the same for both.
Surface Preparation: The Shared Foundation
Both methods require the same core surface sequence before any coating touches the cabinet:
-
Degrease thoroughly. Kitchen cabinets accumulate cooking grease, silicone residue from cleaning products, and hand oils on door edges. A TSP substitute (trisodium phosphate alternative) diluted per manufacturer instructions is the standard choice. Wipe down every surface, including the interior edges of stile and rail profiles. Skipping this step is the leading cause of adhesion failure regardless of application method, primer and enamel will not bond to a contaminated surface.
-
Sand to scuff the existing finish. 150-grit to 180-grit scuff sanding breaks the gloss on existing paint or factory finish and gives the primer mechanical adhesion. On raw wood or MDF, 120-grit followed by 150-grit removes mill glaze and opens the grain. Do not skip sanding on previously painted surfaces even if they look dull, factory finishes on stock cabinetry are often catalyzed lacquers that resist adhesion without mechanical scuffing.
-
Apply a bonding primer. A shellac-based primer (Zinsser BIN is the most widely used) or a water-based bonding primer (Zinsser Bulls Eye 1-2-3 or similar) is appropriate depending on the substrate. Shellac-based primers are the more aggressive adhesion promoters and are particularly effective on previously painted surfaces, laminate, and thermofoil. Water-based bonding primers are lower-VOC and easier to clean up, but require more careful surface prep to compensate.
-
Sand between primer and topcoat. 220-grit sanding after the primer coat knocks down raised grain, dust nibs, and any applicator texture before the topcoat goes on. This step is non-negotiable for a smooth final finish. For sprayed topcoats, 320-grit is often used after the first topcoat to achieve the glass-smooth base needed for the final coat.
Skipping the inter-coat sanding step is the single most common reason cabinet paint peels or chips within the first year. The sanding creates a mechanical key between coats, without it, you’re relying on chemical adhesion alone, which is insufficient for the mechanical stress cabinet doors experience daily.
Where Preparation Diverges: Method-Specific Requirements
Beyond the shared sequence, spraying and rolling impose different preparation demands that most guides ignore.
For spray application, preparation failures show up differently. Dust contamination is the primary enemy. Airborne dust settles into wet sprayed coatings within seconds of application, creating a rough, gritty surface texture called "fish eyes" or "seeds" in the finish. This means the spray environment itself must be prepared, not just the cabinet surfaces:
- Vacuum and damp-mop the spray area at least one hour before spraying to let airborne dust settle
- Use a tack cloth on every cabinet surface immediately before spraying, not before priming, but immediately before the topcoat
- If spraying in place (cabinet boxes in the kitchen), run the HVAC fan off during spraying to prevent dust circulation through the system
- Allow the spray area to settle for 15-20 minutes after any movement or disturbance before beginning application
For rolling, preparation failures show up as texture telegraphing. If the substrate has surface irregularities, old brush marks, dings, or raised grain, rolling will not hide them the way spraying can partially smooth over minor imperfections with multiple thin coats. This means rolled cabinet projects often require more aggressive filling and sanding at the prep stage:
- Fill any dents, gouges, or deep grain lines with a lightweight spackling compound or wood filler before priming
- Sand filled areas flush with 150-grit, then re-prime those spots before the full primer coat
- On MDF cabinet doors with routed profiles, pay particular attention to the profile edges, MDF absorbs primer aggressively at cut edges and may require two primer coats in those areas to prevent topcoat sinking
Site Protection and Masking Requirements
Site protection requirements for spraying are extensive and should not be underestimated. Overspray from an HVLP system at normal operating pressure travels 3-5 feet from the spray tip in fine mist form. Airless sprayers at higher pressure can project overspray even further. A professional spray job on kitchen cabinets in place requires:
- Heavy-duty plastic sheeting (3-4 mil minimum) over countertops, appliances, and flooring, taped at all seams
- Masking tape and paper on all adjacent walls, backsplash tile, and ceiling lines within the spray zone
- Removal of all hardware, hinges, and pulls before any coating is applied (leaving hardware in place and masking around it is a shortcut that produces visible paint buildup at hardware edges)
- Cabinet doors removed and sprayed horizontally in a dedicated area whenever possible, vertical in-place spraying dramatically increases run risk on enamel topcoats
- Ventilation setup: a box fan exhausting to the exterior with a fresh-air intake on the opposite side of the room creates the cross-ventilation needed to manage fumes and carry overspray particulate out of the work zone
Rolling requires far less masking. Standard 1.5-inch or 2-inch painter’s tape on adjacent surfaces is usually sufficient, and there is no airborne particulate concern beyond normal paint splatter. This makes rolling the practical choice for occupied homes where full room enclosure is not feasible, or where HVAC systems cannot be isolated from the work area.
The cabinet painting preparation steps are the same for both methods: degrease, sand, prime, sand, topcoat. What differs is the site protection required and the specific failure modes to guard against. Spraying demands dust-controlled environments and extensive masking. Rolling demands more aggressive substrate filling and sanding to compensate for what the application method cannot hide.
As noted in guidance on interior surface preparation from the Paint Quality Institute, proper surface preparation accounts for the majority of a paint job’s long-term performance, regardless of the coating applied. The method you choose for application is secondary to the quality of the surface you’re applying it to.
How Long Does It Take to Paint Cabinets With Each Method?
How long it takes to paint cabinets depends heavily on kitchen size, cabinet style, and whether doors are removed, but the method itself creates meaningful time differences.
For a typical kitchen with 20-30 cabinet doors and drawer fronts, a professional spray crew can complete the job in two to three days, including setup, priming, topcoating, and cleanup. The spray application itself is fast; setup and masking consume a large share of total time.
A brush and roll approach on the same kitchen typically runs three to four days for a professional crew, sometimes longer if multiple coats require extended drying and sanding cycles. The application is slower per surface, but setup time is minimal.
Curing time is the same for both methods and depends on the paint product, not the application method. Water-based acrylic enamels typically reach handling hardness within 24 hours and full cure within 21-30 days. Oil-based enamels take longer to dry between coats but often cure harder. Cabinets should not be stressed, cleaned aggressively, or have hardware reinstalled until the topcoat has fully cured.
Paint Product Compatibility, Health Impact, and Touch-Up Feasibility
This is the section most painting guides skip entirely, and it contains three of the most consequential decisions you’ll make in a cabinet refinishing project. Paint product selection, environmental safety, and long-term touch-up feasibility are not afterthoughts, they directly determine whether your finish looks good in year one and whether you can maintain it in years two through ten.
Paint Product Compatibility: Not Every Coating Works With Every Method
The single most overlooked factor in the spray-vs-roll debate is that certain high-end cabinet coatings are specifically formulated for one application method and perform measurably worse with the other. This is not a marketing claim, it is a function of viscosity, open time, and film-build chemistry.
Water-based acrylic enamel is the dominant choice for cabinet refinishing and works with both methods, but with important caveats. Products like Benjamin Moore Advance and Sherwin-Williams Emerald Urethane Trim Enamel are formulated with extended open time, meaning they stay wet longer to allow brush and roller marks to level out before the film sets. This leveling chemistry is an asset for rolling because it gives the coating time to self-smooth. For HVLP spraying, however, that same extended open time can cause runs and sags if the wet film is applied too heavily, because the coating stays workable long enough to flow downward on vertical surfaces. When spraying these products, multiple thin coats with adequate flash time between passes is essential.
Lacquer, both nitrocellulose and water-based acrylic lacquer, is a spray-only product in practical terms. Its fast dry time (often tack-free in 15-30 minutes) is what produces its characteristically hard, glass-smooth film. That same fast dry time makes it nearly impossible to roll without visible lap marks and dry-edge texture. Attempting to roll lacquer is one of the most reliable ways to produce a finish that looks worse than a standard enamel applied by brush. If a contractor or product guide suggests lacquer for a rolled application, treat that as a red flag.
Catalyzed or conversion varnish coatings, used in high-end cabinet shops, are exclusively spray-applied and require professional equipment and handling. These two-component coatings cross-link chemically after mixing, producing a film hardness that water-based enamels cannot match. They are not a realistic option for DIY application under any circumstances, and they require a dedicated spray environment with explosion-proof ventilation due to solvent content.
Oil-based alkyd enamel works with both methods but has largely been displaced by water-based alternatives in most markets due to VOC regulations and dry time. Where it remains in use, it self-levels exceptionally well when rolled, making it one of the more forgiving options for brush and roll application on flat cabinet doors. Its longer dry time (often 6-8 hours between coats) is a liability on spray projects where multiple coats in a single day are the norm.
Always check the manufacturer’s application instructions for viscosity recommendations before spraying any cabinet enamel. Most water-based enamels require thinning by 10-15% with distilled water for proper HVLP atomization. Over-thinning reduces film build per coat and can compromise the final coating thickness needed for durability.
Environmental and Health Impact: VOCs, Ventilation, and PPE
This is the topic most contractor blogs avoid because it complicates the sales pitch. The reality is that spray application and rolling create meaningfully different health and environmental risk profiles, and those differences should factor into your method decision, especially in occupied homes.
VOC exposure is higher with spray application. When paint is atomized, a larger percentage of the coating becomes airborne as fine mist and vapor compared to roller application, where the coating transfers directly to the surface with minimal aerosolization. This means spray application exposes the applicator, and anyone in the vicinity, to higher concentrations of volatile organic compounds during the application window.
The specific risk level depends on the coating:
- Water-based acrylic enamels have VOC content typically in the range of 50-150 grams per liter, which is classified as low-VOC under most regulatory frameworks. Spraying these products in a well-ventilated space with a properly fitted N95 respirator (for particulate) is adequate protection for most applicators.
- Oil-based enamels carry VOC content that can range from 250-450 grams per liter or higher. Spraying oil-based coatings in an enclosed space without supplied-air respiratory protection is a genuine health hazard. At minimum, a half-face respirator with organic vapor cartridges (OV/P100 combination cartridges) is required. The American Lung Association’s guidance on indoor air quality notes that oil-based paints release VOCs not just during application but during the curing period, which can extend days to weeks after the job is complete.
- Lacquer presents the highest risk profile. Solvent-based lacquers are flammable, and their vapors can accumulate to explosive concentrations in enclosed spaces without adequate ventilation. Professional lacquer application requires explosion-proof fans, grounded spray equipment to prevent static discharge, and supplied-air respirators in high-concentration environments. This is not a product for occupied homes or DIY application.
Ventilation requirements differ by method:
For rolling, cross-ventilation, open windows on opposite sides of the room, is generally sufficient for water-based enamels. An N95 dust mask provides adequate particulate protection during sanding; a simple paper mask is not sufficient.
For spraying, cross-ventilation is a minimum baseline, not a complete solution. A box fan exhausting to the exterior, positioned to draw air through the work zone and out of the building, combined with a fresh-air source on the opposite side of the room, creates the directional airflow needed to carry atomized paint and vapor away from the applicator. Spraying toward the exhaust fan, so the overspray travels away from you, is the correct technique.
EPA guidance on architectural coatings and VOC emissions
Never spray oil-based coatings or lacquer in a space with an open pilot light, gas appliance, or any ignition source. Solvent vapors are heavier than air and will accumulate at floor level before reaching ignition sources. This is a fire and explosion risk, not a theoretical one.
PPE summary by method and coating type:
| Method + Coating | Minimum Respiratory Protection | Eye Protection | Skin Protection |
|---|---|---|---|
| Roll, water-based enamel | N95 during sanding only | Safety glasses during sanding | Nitrile gloves |
| Spray, water-based enamel | N95 + organic vapor cartridge half-face respirator | Chemical splash goggles | Nitrile gloves, coveralls |
| Roll or spray, oil-based enamel | OV/P100 half-face respirator | Chemical splash goggles | Nitrile gloves, coveralls |
| Spray, lacquer | OV/P100 half-face respirator minimum; supplied-air preferred | Chemical splash goggles | Full coveralls, nitrile gloves |
Long-Term Maintenance and Touch-Up After Cabinet Refinishing
Touch-up feasibility is the most underappreciated factor in the spray-vs-roll decision, and it is where rolling has a genuine, durable advantage that most guides never explain in actionable terms.
Why sprayed finishes are harder to touch up:
A sprayed cabinet finish achieves its quality through atomization, paint particles of near-uniform size settle into a continuous film with no applicator texture. The surface reads as perfectly flat under raking light because there is no variation in the film surface. That uniformity is also what makes spot repairs visible. When you brush or roll a touch-up onto a sprayed surface, the applicator leaves texture in the repair area that the surrounding sprayed finish does not have. Under kitchen lighting at an angle, that texture difference is visible even after the paint color matches perfectly.
A proper touch-up on a sprayed finish requires:
- Cleaning the damaged area with a mild degreaser and allowing it to dry completely
- Lightly sanding the chip or scratch edges with 320-grit to feather the transition
- Applying touch-up paint with a fine artist’s brush (not a standard brush) in thin layers, building up to the surrounding film thickness
- Allowing full cure before assessing, wet touch-up paint always looks more obvious than cured paint
- If the repair is still visible after curing, the only reliable fix is to re-spray the entire door or drawer front, spot spraying with a rattle can or small HVLP gun rarely feathers invisibly into an existing sprayed finish
For homeowners without spray equipment, step 5 means calling a professional back for what should be a minor repair. This is a real ongoing cost that the initial quote for spray finishing does not include.
Why rolled finishes are more forgiving to touch up:
A rolled finish already has slight surface variation, the micro-texture left by the foam or woven roller nap. This variation, invisible to the naked eye at normal viewing distance, actually works in your favor during touch-up because a carefully applied brush repair blends into existing texture rather than standing out against a perfectly flat film.
The practical touch-up process for a rolled cabinet finish:
- Clean and degrease the damaged area
- Sand the chip edges lightly with 220-grit
- Apply touch-up paint with a small foam brush or fine-bristle brush in thin coats, feathering the edges outward
- Allow to cure fully (at least 24 hours for water-based enamel, longer for oil-based)
- If needed, lightly sand the repair with 320-grit and apply a final thin coat
For most minor chips and scratches on rolled cabinet finishes, a homeowner with the original paint can execute a repair that is not visible at normal viewing distance without professional involvement.
Storing touch-up paint properly:
Regardless of application method, the single most practical thing you can do at the end of a cabinet painting project is store touch-up paint correctly. Transfer a small amount of the finish coat into a glass jar with an airtight lid (not the original can, which will rust from the inside and contaminate the remaining paint). Label it with the paint name, color code, sheen level, and the date of application. Stored this way, water-based enamel remains usable for 2-3 years. This small step eliminates the most common touch-up problem: not being able to match the original color because the original product has been discontinued or reformulated.
The touch-up advantage of rolled finishes is real and measurable. If you anticipate living in the home for many years, have children or heavy kitchen use, or simply want the ability to maintain your cabinets without calling a professional back, the brush and roll method offers a long-term maintenance flexibility that spraying cannot match without ongoing equipment access.
Professional Cabinet Spray Painting vs Rolling: Decision Framework
The decision between professional cabinet spray painting vs rolling comes down to four variables: finish quality goals, project environment, budget, and long-term maintenance expectations.
Use this framework to identify the right approach for your situation:
| Situation | Recommended Method | Reason |
|---|---|---|
| Full kitchen, doors removed, dedicated spray area | Spray (HVLP or airless) | Best finish quality, efficient on volume |
| Occupied home, limited masking feasibility | Brush and roll | No overspray risk, minimal disruption |
| High-gloss lacquer or catalyzed finish | Spray only | Rolling cannot achieve this finish type |
| Budget-conscious, DIY or first-time project | Brush and roll | Lower equipment cost, more forgiving |
| Large commercial project, high door count | Spray | Speed advantage justifies setup cost |
| Touch-up and maintenance priority | Brush and roll | Easier to blend repairs over time |
A few honest observations from 40 years of cabinet refinishing work: most homeowners overestimate how much the method matters and underestimate how much preparation matters. A perfectly rolled finish on properly prepared, primed, and sanded cabinet doors will outperform a sprayed finish on poorly prepared surfaces every time.
The other thing nobody tells you: the paint product matters as much as the method. A premium water-based enamel applied by roller will outlast a budget lacquer applied by spray. Invest in the coating first, then optimize the method.
For a structured evaluation, work through these questions before committing:
- Will cabinet doors be removed and sprayed in a dedicated area, or painted in place?
- Is the project environment suitable for overspray containment?
- What is the target sheen level? (High-gloss favors spraying)
- What is the total door and drawer front count? (Higher volume favors spraying)
- Is long-term touch-up feasibility a priority?
- What is the realistic equipment budget for a one-time project?
As documented in finishing guidance from the Painting and Decorating Contractors of America, the application method should always be selected after surface preparation and coating selection, not before.
Frequently Asked Questions
Is it better to spray or roll kitchen cabinets?
For professional cabinet spray painting vs rolling, spraying generally produces a superior, factory-like smooth finish with no brush marks, ideal when appearance is the top priority. Rolling is more accessible, requires far less site protection and masking, and works well for DIYers or tight budgets. The best choice depends on your finish expectations, budget, skill level, and how much prep work you're willing to do. A professional contractor can achieve excellent results with either method when surface preparation is done correctly.
Does spray painting cabinets look better than rolling?
In most cases, yes. Spray painting, especially with an HVLP or airless sprayer, atomizes paint into a fine mist that levels out evenly across cabinet doors and drawer fronts, producing a finish that closely resembles a factory finish. Rolling can leave a subtle stippling or orange-peel texture, even with high-quality roller covers like the Purdy White Dove. That said, skilled brush-and-roll technique with the right enamel and proper sanding between coats can still achieve a very fine finish.
How long does it take to paint cabinets using spray vs rolling?
Spray painting cabinet doors and drawer fronts is generally faster during application, but the overall project timeline is often longer because of the extensive masking, site protection, and cleanup required. Rolling requires minimal prep for overspray control but takes longer per surface due to multiple thin coats and sanding. For a typical kitchen with 20-30 cabinet doors, expect 3-5 days total for spraying and 4-6 days for brush and roll, factoring in primer, topcoat, and curing time between coats.
Can you get a factory finish by rolling cabinets?
It's difficult but possible with the right cabinet painting tools and equipment. Using a high-density woven mini roller, a self-leveling water-based enamel or lacquer, and thorough sanding between coats can minimize texture significantly. However, even the best rolling technique rarely fully replicates the atomized, glass-smooth result of a professional spray finish. If a true factory finish is your goal, spraying with an HVLP system like the Fuji Q5 or a professional airless sprayer is the more reliable path.
What cabinet painting preparation steps apply to both spray and roll methods?
Regardless of application method, thorough cabinet painting preparation steps are non-negotiable: remove all cabinet doors and drawer fronts, clean surfaces to remove grease and grime, sand to scuff the existing finish for paint adhesion, apply a quality primer, and sand lightly again before the topcoat. Skipping any of these steps leads to peeling, poor adhesion, and an uneven finish. Spraying requires the additional step of masking all surrounding surfaces and appliances to control overspray.
Is it cheaper to spray or roll cabinets professionally?
Rolling is generally less expensive, both for DIY and professional cabinet refinishing. Roller covers and brushes cost a fraction of spray equipment, quality rollers run $5-$12 each versus $800-$1,800 for a professional HVLP or airless sprayer system. Professional contractors who spray may charge more due to equipment costs and longer masking time, but they often complete the finish coat phase faster. For DIY cabinet painting, rolling has a much lower barrier to entry without sacrificing too much finish quality when done carefully.
Denver Cabinet Painting Colorado brings 40 years of cabinet refinishing expertise to residential and commercial projects across the Denver metro area. If you’re weighing finish quality, project timeline, and long-term results for your kitchen or bathroom, the team offers free quotes and a hands-on assessment of which method fits your specific space. Get a free quote from Denver Cabinet Painting Colorado and get the smooth, consistent finish your cabinetry deserves.
This article was written using GrandRanker