Table of Contents
- Can You Paint Laminate Kitchen Cabinets? The Honest Answer
- Cost-Benefit Analysis: Paint vs. Replace Your Laminate Cabinets
- How to Prep Laminate Cabinets for Painting the Right Way
- Best Primer for Laminate Cabinets: Primer Chemistry Explained
- Choosing the Right Paint: Chalk Paint vs. Cabinet Coat and More
- Step-by-Step: How to Paint Laminate Kitchen Cabinets
- How Long Does It Take to Paint Kitchen Cabinets? Drying and Curing Times
- Common Mistakes When Painting Laminate Cabinets (And How to Avoid Them)
- Conclusion: Is Painting Your Laminate Cabinets Worth It?
Last Updated: May 30, 2026
Yes, you can paint laminate kitchen cabinets, and the results can genuinely transform a dated kitchen without the cost of full replacement. Denver Cabinet Painting Colorado has helped hundreds of homeowners across the Denver metro area tackle exactly this project, and the single biggest lesson from 40 years of experience is this: success or failure comes down almost entirely to preparation. Below, we’ll walk through everything from primer chemistry to edge banding repair, covering the angles most DIY guides skip entirely.
Here’s what most quick-fix guides get wrong: they treat laminate like wood. It is not. Laminate is a synthetic material bonded to a substrate, and paint does not adhere to it the way it grips raw wood grain. That distinction changes every decision you make, from which primer you buy to how aggressively you sand.
Can You Paint Laminate Kitchen Cabinets? The Honest Answer
Painting laminate cabinets is absolutely achievable, but it demands more precision than painting wood cabinets. Laminate is a plastic finish over a composite core, which means standard paints will peel, chip, or bubble within months if applied without proper adhesion prep. The good news: with the right bonding primer, the right paint, and thorough surface preparation, painted laminate cabinets can hold up for years of daily kitchen use.
What Makes Laminate Cabinets Different From Wood
Laminate cabinets are constructed from a synthetic material, typically a printed or solid-color plastic layer fused to particleboard or MDF. Unlike wood, laminate has virtually no porous surface for paint to grip. Wood grain gives primers and topcoats a mechanical anchor. Laminate gives them almost nothing.
This is why adhesion is the central challenge. A bonding primer works by chemically bonding to the smooth plastic finish rather than relying on surface porosity. Skip that step, and you’re essentially painting over glass.
When Painting Makes Sense (And When It Does Not)
Painting laminate cabinets makes sense when the cabinet boxes are structurally sound, the doors and drawer fronts are flat or in good condition, and the laminate is not peeling or bubbling. Shaker style laminate doors, in particular, respond well to painting because their clean lines hide any minor brush marks.
Painting does NOT make sense when the laminate is delaminating from the substrate, when the cabinet boxes are warped, or when the edge banding is separating extensively. In those cases, refinishing costs approach replacement costs without delivering comparable results.
Cost-Benefit Analysis: Paint vs. Replace Your Laminate Cabinets
Most guides tell you painting is cheaper than replacing. That is true. What they rarely do is show you the full math, including the hidden costs that can quietly close the gap, or help you decide which option actually wins for your specific situation.
The Real Cost Ranges (What to Expect)
Costs vary by region, kitchen size, and product choices, but the following ranges reflect what most homeowners and contractors report for a typical 10-cabinet kitchen:
| Option | DIY Cost Range | Professional Cost Range |
|---|---|---|
| DIY painting (supplies only) | $150-$400 | , |
| Professional cabinet painting | , | $1,200-$3,500 |
| Cabinet refacing (new doors + veneer) | , | $4,000-$9,000 |
| Full cabinet replacement | , | $8,000-$25,000+ |
These are directional ranges, not guarantees. A small galley kitchen lands at the low end; a large kitchen with many upper and lower cabinets, glass inserts, or custom sizes pushes toward the high end. The point is the order of magnitude: professional painting typically costs 60-80% less than refacing, and refacing typically costs 50-70% less than full replacement.
Hidden Costs Most Guides Ignore
DIY hidden costs:
- A quality bonding primer (Zinsser BIN or KILZ Adhesion) runs $25-$45 per quart. You will likely need 2 quarts for an average kitchen.
- Cabinet coat paint (Benjamin Moore Advance, Sherwin-Williams Emerald Urethane) costs $70-$90 per quart. Budget for 2-3 quarts.
- Edge banding repair supplies, sandpaper, TSP, foam rollers, and tack cloths add another $40-$80.
- Your time: most DIYers underestimate this project at 2-3 days. A realistic timeline for a thorough job is 4-6 days of active work spread over 1-2 weeks to allow proper curing between coats.
Professional painting hidden costs:
- Labor includes prep, which is where professional crews earn their fee. A professional who skips prep is not worth the price. Ask specifically what their surface preparation process includes before hiring.
- Touch-up visits: reputable cabinet painters typically offer a warranty period (commonly 1-2 years) covering adhesion failures. Confirm this before signing any contract.
The Durability-Adjusted Comparison
This is the number most guides omit entirely. Cost per year of useful life is a more honest metric than upfront cost alone.
- DIY painted laminate (properly prepped): Most practitioners report 4-7 years of durable service before touch-ups or repainting become necessary, depending on use intensity and cleaning habits.
- Professionally painted laminate: With proper prep and quality materials, 7-10 years is a reasonable expectation before significant wear appears at high-contact areas like door edges and around handles.
- Refaced cabinets: New thermofoil or wood veneer doors on existing boxes typically last 10-15 years before the substrate condition becomes the limiting factor.
- Full replacement: New cabinetry, properly installed, should last 20-30 years or more.
When you divide cost by expected years of service, the gap between painting and replacement narrows, but painting still wins decisively for homeowners who plan to sell within 5-7 years, are working within a tight budget, or have structurally sound cabinets that simply look dated.
When the Math Favors Replacement Instead
Painting stops making financial sense in three scenarios:
- The cabinet boxes are failing. If the particleboard substrate is swelling from water damage, the hinges are pulling out, or the shelves are sagging, painting the doors is cosmetic work on a structural problem. Replacement is the correct answer.
- The laminate is extensively delaminating. Widespread peeling laminate means the adhesive bond between the plastic layer and the substrate has failed. Paint will not re-bond it, and the continued delamination will destroy any paint job within months.
- You are planning a full kitchen renovation within 2-3 years. Painting is a bridge solution. If a full gut renovation is already planned, the cost-benefit equation shifts toward waiting or doing minimal cosmetic work rather than investing in a paint job you will tear out.
Painting laminate cabinets delivers the strongest return when the cabinet structure is sound, you plan to stay in the home for at least 3-5 years, and you commit to proper prep. For homeowners in that position, the cost savings over refacing or replacement are substantial, often $3,000-$20,000 depending on kitchen size. The math only holds, however, if the prep work is done correctly. A failed paint job that needs redoing in 18 months eliminates the savings quickly.
How to Prep Laminate Cabinets for Painting the Right Way
Prep work is where this project is won or lost. Most DIY failures trace back to skipping or rushing the preparation steps, not to the paint itself.
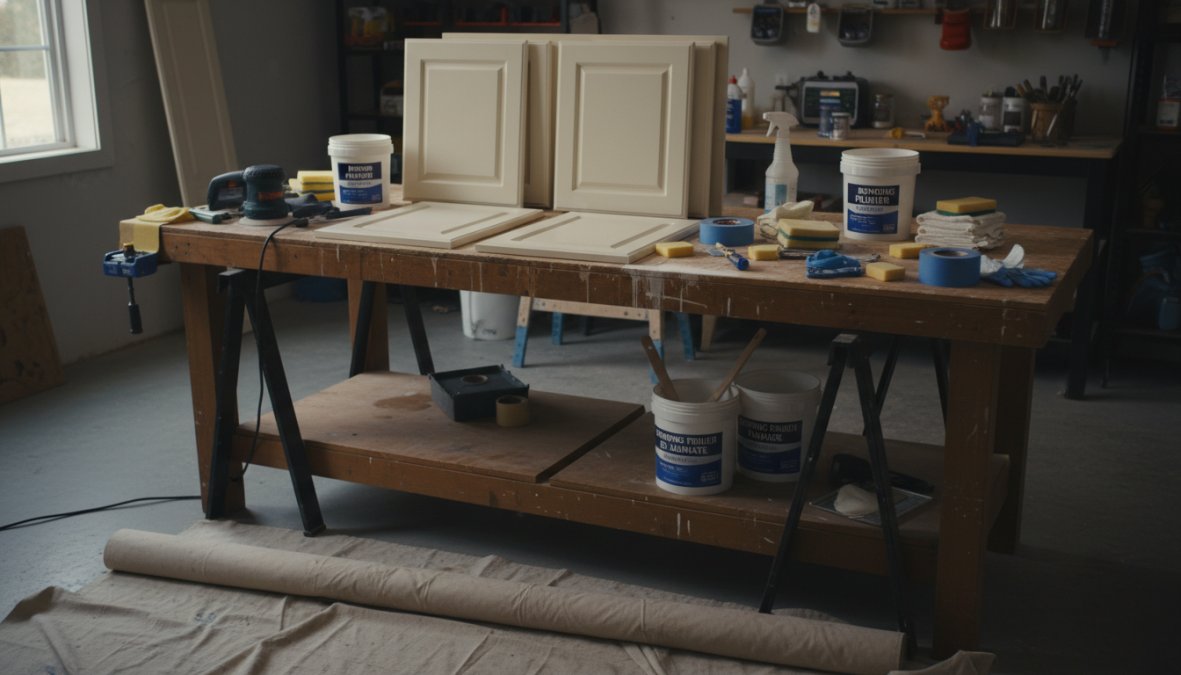
Supplies Checklist: Everything You Need Before You Start
Gather all supplies before you remove a single cabinet door. Running to the hardware store mid-project is how mistakes happen.
Complete supplies checklist:
- TSP (trisodium phosphate) or TSP substitute degreaser
- Clean rags and sponges
- 150-grit and 220-grit sandpaper or sanding block
- Liquid sander / deglosser (optional, for non-sanding method)
- Bonding primer (shellac-based or water-based bonding formula)
- Cabinet coat paint or chalk paint
- Polyurethane topcoat (for chalk paint applications)
- High-density foam roller
- Quality synthetic bristle brush
- Painter’s tape
- Drop cloths
- Screwdrivers for hardware removal
- Small containers for screws and hinges
- Edge banding adhesive (if needed)
- Tack cloth
Hardware Removal and Cabinet Door Prep
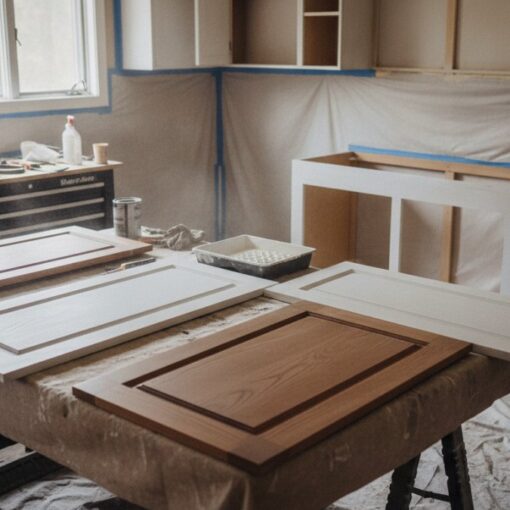
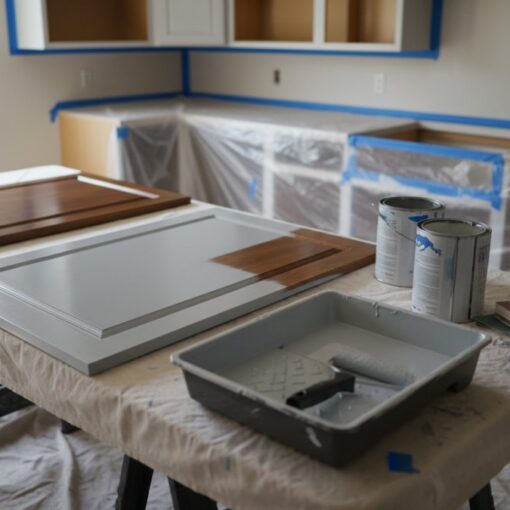
Remove all hardware before doing anything else. This means hinges, handles, pulls, and any decorative elements. Label each door and drawer front with a piece of tape on the back so you know exactly where each piece reinstalls. Lay cabinet doors flat on sawhorses or a workbench for painting. Painting doors while they’re hanging on the cabinet boxes is a reliable way to get drips, uneven coverage, and frustration.
Remove drawer fronts where possible. If they’re glued in addition to screwed, leave them in place and tape off the surrounding area carefully.
Cleaning, Degreasing, and Deglossing the Surface
Kitchen cabinets accumulate grease, cooking oils, and grime even when they look clean. This invisible film is paint’s worst enemy. TSP or a TSP substitute is the industry standard for cutting through kitchen grease before painting. Mix according to package directions, wipe down every surface you plan to paint, and rinse thoroughly with clean water.
Allow surfaces to dry completely before moving to the next step. Any residual moisture trapped under primer will cause adhesion failure.
Deglossing removes the shiny surface layer that makes laminate resistant to paint. You can degloss mechanically (sanding) or chemically (liquid sander/deglosser).
Sanding vs. Non-Sanding Methods for Laminate
Sanding is the more reliable method. A light pass with 150-grit sandpaper followed by 220-grit creates microscopic scratches that give the bonding primer something to grip. The goal is not to remove material, it is to scuff the surface. Sand with a sanding block to maintain even pressure, wipe away dust with a tack cloth, and proceed to priming.
The non-sanding method uses a liquid sander or chemical deglosser applied with a cloth. This works on flat laminate surfaces in good condition. It is faster, but many professionals consider it less reliable on the slick plastic finish common to older laminate cabinets. If you choose this route, do not skip the bonding primer.
Never skip the degreasing step before sanding or applying deglosser. Sanding over a greasy surface drives contaminants into the laminate rather than removing them, which causes primer adhesion failure weeks later.
Edge Banding Repair: The Step Most DIYers Skip
Edge banding is the thin strip of material covering the exposed edges of cabinet doors and drawer fronts. On laminate cabinets, this is often a plastic or veneer strip applied with heat-activated adhesive. Over time, corners lift, edges peel, and gaps open up.
Paint will not fix lifting edge banding. It will highlight it. Before you prime, press any loose edge banding back down with a household iron set to low heat and firm pressure, or apply fresh edge banding adhesive and clamp until cured. Trim any excess with a sharp utility knife. Sand the repaired edge smooth before priming.
This step takes 20-30 minutes and dramatically improves the final appearance of your painted cabinets.
Best Primer for Laminate Cabinets: Primer Chemistry Explained
The best primer for laminate cabinets is a high-adhesion bonding primer specifically formulated for slick, non-porous surfaces. Standard drywall primers will not bond reliably to laminate’s plastic finish. The chemistry matters here, not just the brand.

Bonding Primer vs. Shellac-Based Primer
Two primer types consistently deliver reliable adhesion on laminate: water-based bonding primers and shellac-based primers.
Water-based bonding primers contain adhesion promoters that chemically bond to synthetic surfaces. They are lower in VOCs, dry faster, and clean up with water. Brands like Zinsser Bulls Eye 1-2-3 and KILZ Adhesion are widely used for this application. These work well on laminate that has been properly deglossed and cleaned.
Shellac-based primers (such as Zinsser BIN) offer exceptional adhesion on difficult surfaces, including glossy laminate that has not been sanded. Shellac bonds aggressively to nearly any surface, including the slickest plastic finishes. The trade-off is stronger odor, longer dry time, and cleanup requiring denatured alcohol. For laminate in poor condition or with previous coating failures, shellac-based primer is the more reliable choice.
According to the Paint Quality Institute’s guidance on adhesion primers, surface compatibility between primer and substrate is the single most important factor in coating longevity on non-porous materials.
Apply primer in thin, even coats. Two thin coats outperform one heavy coat every time. Allow full dry time between coats per the manufacturer’s instructions.
Choosing the Right Paint: Chalk Paint vs. Cabinet Coat and More
Not all paints are suited for cabinet surfaces. Kitchen cabinets take daily abuse: moisture, grease, cleaning products, and constant contact. The paint you choose needs to cure into a hard, washable surface.
Cabinet coat paint is formulated specifically for cabinetry. Products like Benjamin Moore Advance and Sherwin-Williams Emerald Urethane Trim Enamel level out beautifully, resist yellowing, and cure to a hard, durable finish. These are the professional standard for good reason. They self-level well with a foam roller, minimizing brush marks.
Chalk paint is popular for its ease of application and matte finish, but it requires a protective topcoat, typically polyurethane or a dedicated wax, to be durable enough for kitchen use. Without a topcoat, chalk paint on cabinet doors will mark and stain quickly. With a quality polyurethane topcoat, it can hold up reasonably well.
All-in-one paint products combine primer and paint. On laminate, these are generally not recommended as a standalone solution. The adhesion promoters in an all-in-one are less aggressive than a dedicated bonding primer, and laminate is an unforgiving substrate.
The roller finish you choose matters too. A high-density foam roller produces the smoothest result on flat cabinet doors and drawer fronts. A brush is necessary for recessed panels and edges.
Apply cabinet coat paint with a foam roller for the main panel, then tip off lightly with a quality synthetic brush to eliminate any roller stipple. This two-tool approach produces a near-spray finish without a paint sprayer.
Step-by-Step: How to Paint Laminate Kitchen Cabinets
Total Time: 3-5 days (including drying and curing time between coats)
Difficulty: Intermediate
- Remove all cabinet doors, drawer fronts, and hardware. Label everything.
- Clean all surfaces with TSP degreaser. Rinse and dry completely.
- Repair any lifting edge banding. Allow adhesive to cure fully.
- Sand with 150-grit sandpaper, then 220-grit. Wipe with tack cloth.
- Apply first coat of bonding primer. Allow to dry per manufacturer’s instructions (typically 1-2 hours).
- Lightly sand with 220-grit between primer coats. Wipe clean.
- Apply second coat of primer. Allow to dry fully.
- Apply first coat of cabinet coat paint or chalk paint using a foam roller and brush.
- Allow to dry completely (minimum 4 hours, overnight preferred).
- Lightly sand with 220-grit. Wipe with tack cloth.
- Apply second coat of paint. Repeat for a third coat if needed for full coverage.
- For chalk paint: apply two coats of polyurethane topcoat after paint is fully dry.
- Allow full curing time before rehanging doors and reinstalling hardware.
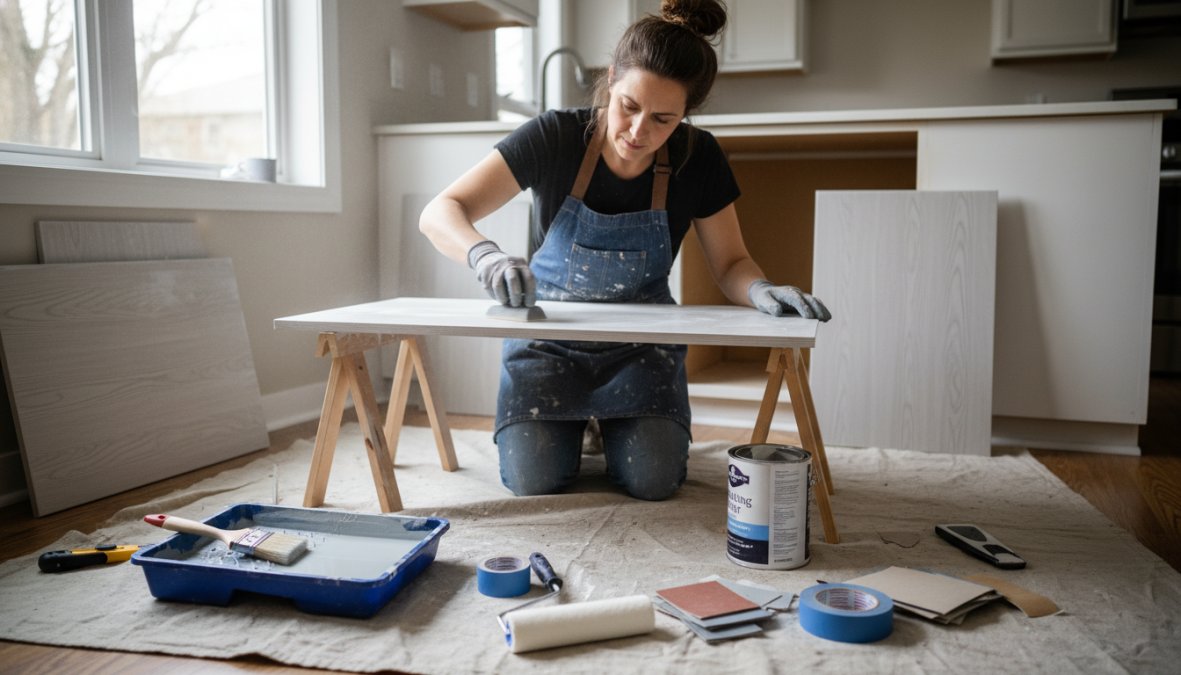
Expected Result: Smooth, consistent coverage with no brush marks or peeling edges.
As documented in the Bob Vila DIY painting guides, working with cabinet doors laid flat rather than vertical eliminates the majority of drip and sag issues in cabinet painting projects.
How Long Does It Take to Paint Kitchen Cabinets? Drying and Curing Times
How long it takes to paint kitchen cabinets depends on kitchen size, number of cabinet doors, and the products you use. Plan for a minimum of 3-5 days of active work for an average kitchen, spread across 1-2 weeks to respect drying and curing windows between coats.
Drying Time vs. Curing Time: Why the Difference Matters on Laminate
Drying time and curing time are not the same thing, and on laminate specifically, confusing them is one of the most common causes of premature failure.
Drying time is when the paint is dry to the touch and can accept another coat. Curing time is when the paint film has fully cross-linked at a molecular level and reached its maximum hardness, adhesion strength, and chemical resistance. During the curing window, the paint looks and feels finished but is actually still vulnerable.
This matters more on laminate than on wood because laminate offers no mechanical grip. The paint’s bond to the surface is entirely chemical. Stressing that chemical bond before it has fully formed, by hanging doors too soon, cleaning with anything other than a damp cloth, or allowing doors to contact cabinet frames under pressure, is how you get peeling at contact points within the first few months.
| Stage | Dry to Touch | Recoat Window | Full Cure |
|---|---|---|---|
| Shellac-based primer (Zinsser BIN) | 45 min | 45 min-1 hr | 24 hours |
| Water-based bonding primer (KILZ Adhesion, Zinsser 1-2-3) | 1-2 hours | 2-4 hours | 24 hours |
| Water-based cabinet paint, Benjamin Moore Advance | 4-6 hours | 16 hours | 21-30 days |
| Water-based cabinet paint, Sherwin-Williams Emerald Urethane | 4-6 hours | 16 hours | 21-30 days |
| Oil-based alkyd cabinet paint | 6-8 hours | 24 hours | 30 days |
| Water-based polyurethane topcoat | 2-4 hours | 4-6 hours | 7-14 days |
Do not reinstall cabinet doors until the paint has dried for at least 24 hours. Do not clean painted surfaces with anything stronger than a lightly damp cloth for the first 30 days. Do not use cabinet cleaning sprays, degreasers, or scrubbing pads during the curing window under any circumstances.
What Actually Happens at 6 Months, 1 Year, and Beyond
This is the question most guides never answer, and it is the question most people searching this topic actually want answered. Here is an honest account of what painted laminate cabinets look like over time, based on the failure patterns that show up most consistently in professional refinishing work.
At 30-90 days: This is when poor prep reveals itself. Cabinets painted without proper degreasing or with the wrong primer will show lifting at edges, bubbling near hinges, or peeling at high-contact areas like the area around door pulls. If your cabinets look good at 90 days, the adhesion foundation is solid.
At 6 months: Normal wear begins to show at the highest-contact points: the area immediately around handles and pulls, the bottom edges of upper cabinet doors (where fingers grip to open), and any spot where a door contacts a cabinet frame. On a properly prepped and painted cabinet, this wear should be minimal, slight dulling of the finish at contact points, not chipping or peeling. On an under-prepped cabinet, this is when peeling typically begins in earnest.
At 1 year: A well-executed paint job on laminate should still look largely intact at one year with normal kitchen use. The finish will have lost some of its initial sheen at high-contact areas, and minor scuffs may be visible. These are normal and can be addressed with light touch-up. Significant chipping, peeling at edges, or paint lifting from flat panel surfaces at the one-year mark indicates a prep or primer failure that touch-up will not fix, the affected areas need to be stripped and redone.
At 3-5 years: This is the realistic horizon for a DIY painted laminate cabinet job done with proper prep and quality materials. Most practitioners find that high-contact areas, around pulls, along door edges, and on lower cabinet doors that receive the most daily use, show meaningful wear by year 3 and may need spot repainting. Full cabinet doors and drawer fronts that see less direct contact often still look good at 5 years. Planning for a touch-up or refresh coat at the 3-5 year mark is realistic, not a sign of failure.
What accelerates deterioration:
- Steam from a stovetop or dishwasher hitting cabinet surfaces repeatedly softens the paint film over time, even after full cure.
- Cleaning with products containing ammonia, bleach, or abrasive particles degrades the finish faster than normal wear.
- Doors that contact the cabinet frame under spring-loaded hinge pressure before full cure will peel at the contact point and continue peeling outward.
- High humidity kitchens without adequate ventilation shorten finish life on any painted surface, but especially on laminate where the substrate can also swell.
What extends finish life:
- Using a water-based alkyd or urethane-modified cabinet paint (Benjamin Moore Advance, Sherwin-Williams Emerald Urethane) rather than standard latex. These products cure harder and resist moisture and cleaning products significantly better.
- Applying a dedicated polyurethane topcoat, particularly on lower cabinets and any surface that receives heavy daily contact.
- Adjusting hinges so doors close without contacting the frame under pressure during the first 30 days of cure.
- Cleaning painted cabinets with a microfiber cloth and mild dish soap diluted in water rather than spray cleaners.
The single most common cause of premature failure on painted laminate is not the paint, it is cleaning the cabinets with standard kitchen spray cleaners during the first 30 days while the paint is still curing. Products like multi-surface sprays contain solvents and surfactants that attack an uncured paint film. Use only a damp cloth for the first month, then introduce mild soap. Wait the full cure period before using any commercial cabinet cleaner.
The Honest Longevity Verdict
Properly prepped and painted laminate cabinets are not a permanent solution, but they are not a temporary one either. A realistic expectation is 4-7 years of good-looking, functional service with normal kitchen use and appropriate cleaning habits, followed by spot touch-ups or a refresh coat rather than full failure. That timeline makes painting a genuinely worthwhile investment for most homeowners, as long as the prep work is treated as non-negotiable.
Common Mistakes When Painting Laminate Cabinets (And How to Avoid Them)
The failure rate for DIY laminate cabinet painting is higher than most guides admit. Here are the mistakes that account for the majority of peeling, chipping, and disappointing results.
Skipping the degreaser. Grease contamination under primer is invisible and catastrophic. TSP is not optional.
Using the wrong primer. Standard wall primer will not bond to laminate’s plastic finish. A dedicated bonding primer or shellac-based primer is required.
Applying paint too thick. Thick coats trap solvents, leading to wrinkling and slow curing. Thin coats build a stronger finish.
Rehanging doors before full cure. Doors that contact cabinet frames before the paint cures will stick, pull, and peel at contact points.
Ignoring edge banding. Peeling edges are the first thing guests notice. Repair before you prime.
Using a paint sprayer without practice. A paint sprayer produces the smoothest finish but requires skill to avoid runs and uneven coverage on laminate. If you haven’t used a sprayer before, a foam roller will produce more consistent results.
Painting over laminate that is already delaminating. Paint adds weight and moisture. If the laminate is already lifting from the substrate, painting will accelerate the separation.
According to the American Coatings Association’s surface preparation guidelines, improper surface preparation accounts for the majority of coating failures across residential applications.
Conclusion: Is Painting Your Laminate Cabinets Worth It?
Painting laminate kitchen cabinets is worth it when the cabinets are structurally sound and the prep work is done correctly. The cost savings over replacement are real, and the visual transformation can be dramatic. The project is not forgiving of shortcuts, particularly around cleaning, priming, and curing time.
Frequently Asked Questions
Does paint actually stick to laminate cabinets?
Yes, paint can stick to laminate cabinets, but only with proper surface preparation. Because laminate is a synthetic material with a slick plastic finish, standard paint will peel without the right foundation. The key is thorough cleaning with a degreaser, light scuff-sanding with 120-150 grit sandpaper or a liquid sander, and applying a high-quality bonding primer specifically formulated for non-porous surfaces. Skip any of these steps and adhesion will fail, often within months.
What is the best primer for laminate cabinets?
The best primer for laminate cabinets is either a shellac-based bonding primer or a water-based bonding primer with strong adhesion chemistry. Shellac-based options like Zinsser BIN grip extremely well on slick synthetic surfaces and block stains. Water-based bonding primers are lower odor and easier to clean up. Avoid standard latex primers, they lack the adhesion chemistry needed for laminate's non-porous surface. Always check that your chosen primer explicitly states compatibility with laminate or plastic finishes.
Do I need to sand laminate cabinets before painting?
Light sanding is strongly recommended when learning how to prep laminate cabinets for painting. Use 120-150 grit sandpaper or a fine sanding block to scuff the surface, you are not removing material, just creating micro-scratches for the primer to grip. If you prefer a non-sanding method, a liquid sander or deglossing solution can substitute, but results may be less durable over time. Either way, thorough degreasing with TSP or a similar cleaner must happen first.
How long does it take to paint kitchen cabinets, including drying and curing?
How long it takes to paint kitchen cabinets depends on the number of coats and your chosen products. Expect the full project to span 3-5 days: one day for prep and priming, one to two days for paint coats with dry time between each, and at least 24-48 hours before rehanging doors. Full curing, when the finish reaches maximum hardness and becomes a truly washable surface, typically takes 2-4 weeks. Avoid heavy cleaning or scrubbing until the paint has fully cured.
Is it better to paint or replace laminate cabinets?
Painting laminate cabinets can cost a fraction of full cabinet replacement, making it a strong choice when the cabinet boxes are structurally sound and you simply want a refreshed look. Replacement makes more sense when laminate is severely delaminating, the layout is inefficient, or you want to upgrade to a shaker style or solid wood. A professional refinishing service can often deliver a durable finish that lasts many years at significantly lower cost than new cabinetry, making painting the smarter DIY kitchen upgrade for most homeowners.
How long does painted laminate last?
With proper prep, a quality bonding primer, and a durable topcoat such as a polyurethane-fortified cabinet coat, painted laminate cabinets can last 5-10 years or more under normal use. Longevity depends heavily on surface preparation quality, the paint system used, and how well the finish cures before returning to daily use. High-traffic areas like cabinet doors and drawer fronts will show wear sooner. Applying a clear protective topcoat significantly extends the life of the finish.
If you want the results without the risk, Denver Cabinet Painting Colorado brings 40 years of experience to every cabinet painting and refinishing project across the Denver metro area. Their team specializes in meticulous surface preparation and professional application, delivering smooth, consistent finishes that hold up to daily kitchen use. Get a free quote from Denver Cabinet Painting Colorado and find out what your cabinets could look like with a professional finish done right.
This article was written using GrandRanker