Table of Contents
- Understanding Paint Types for Kitchen Cabinets
- How to Prep Cabinets for Painting Success
- Choosing Sheen and Finish for Durability
- Color Selection Based on Kitchen Lighting and Countertops
- How Long Does It Take to Paint Kitchen Cabinets
- Tools and Application Techniques for Professional Results
- Common Mistakes to Avoid When Painting Kitchen Cabinets
- Maintenance and Long-Term Care for Painted Cabinets
Choose the Right Paint for Kitchen Cabinets: Expert Guide
Last Updated: July 13, 2026
Choosing the right paint for kitchen cabinets is one of the most impactful decisions when refreshing your kitchen without replacing cabinetry. At Denver Cabinet Painting Colorado, we’ve spent 40 years helping homeowners understand that paint selection determines whether cabinets look dated in two years or maintain a beautiful finish for a decade. Below, we’ll walk you through how to evaluate paint types, prepare surfaces, and apply finishes like a pro.
Understanding Paint Types for Kitchen Cabinets
Standard wall paint fails on cabinets because it lacks the hardness and adhesion required for surfaces exposed to constant touching, wiping, and kitchen humidity. Kitchen cabinets need paint formulated for durability and smooth finishes.
Acrylic vs. Alkyd vs. Hybrid: Which Works Best
Acrylic paint is water-based, low-odor, and fast-drying. It offers environmental advantages and easy cleanup but struggles with adhesion on glossy surfaces and shows brush marks more visibly than alkyd formulations.
Alkyd enamel is oil-based and delivers the smooth, hard finish cabinets demand. Alkyd levels beautifully as it cures, and the finish feels premium and durable. Trade-offs include strong odor, longer drying time (24-48 hours between coats), cleanup requiring mineral spirits, and slight yellowing over time, problematic for white or light-colored cabinets.
Hybrid paint combines acrylic and alkyd properties, offering water-based cleanup with oil-based leveling and durability. Hybrids have faster drying than alkyd, better finish than pure acrylic, and lower VOC. The downside is cost: hybrid paints run 30-50% more than standard acrylic.
For kitchen cabinets, alkyd and hybrid paints outperform acrylic. Alkyd remains the gold standard for professional finishes. If you prioritize environmental safety and faster turnaround, hybrid is worth the premium.
Test your chosen paint on a cabinet door or scrap wood before committing to full coverage. Apply two coats with your intended application method. This reveals whether you’ll see brush marks and whether the sheen matches your expectations.
Water-Based vs. Oil-Based Paint Comparison
Water-based (acrylic) paint offers low VOC emissions, quick cleanup with soap and water, and minimal odor. Drying happens in 4-6 hours, allowing multiple coats in a single day. Disadvantages include less smooth leveling, more visible brush marks, and requirements for aggressive sanding on glossy surfaces.
Oil-based (alkyd) paint delivers superior leveling, adhesion, and durability with a harder, more refined finish. Drying takes 16-24 hours between coats. Cleanup requires mineral spirits, odor is strong, and gradual yellowing occurs, particularly problematic for white cabinetry.
| Paint Type | Drying Time | Leveling | Adhesion | Odor | Cleanup |
|---|---|---|---|---|---|
| Acrylic | 4-6 hours | Fair | Good (with prep) | Low | Water |
| Alkyd | 16-24 hours | Excellent | Excellent | High | Mineral spirits |
| Hybrid | 8-12 hours | Very good | Excellent | Low | Water |
How to Prep Cabinets for Painting Success
Surface preparation separates professional results from disappointing finishes. Prep accounts for roughly 60% of the work but determines 90% of the outcome. Skipping or rushing prep causes paint to peel, chip, or develop adhesion problems within months.
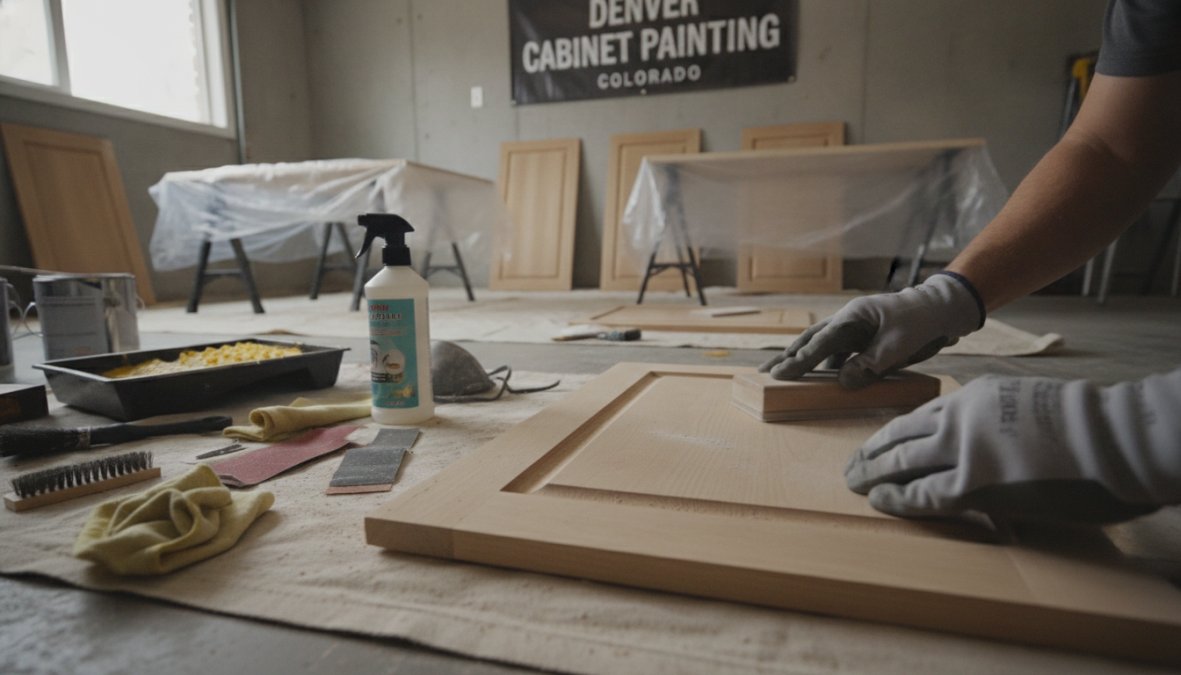
Surface Preparation and Sanding Essentials
Start by removing all cabinet doors, drawers, and hardware. Label each door and its location for reassembly.
Sanding is non-negotiable. The existing cabinet finish won’t accept new paint without mechanical tooth. Use 120-150 grit sandpaper for initial sanding, then finish with 180-220 grit. Sand by hand with a sanding block rather than power tools on flat surfaces. The goal isn’t removing all existing finish but creating a surface paint can grip. You’re done when the finish looks dull and feels slightly rough. Use a vacuum with a HEPA filter to minimize airborne particles.
For MDF cabinets, sanding is still essential but gentler. Light sanding with 150-180 grit is sufficient.
Sanding old cabinet finishes can release lead dust if cabinets were painted before 1978. Test for lead before sanding. If present, use wet sanding methods or hire a professional.
Degreasing and Cleaning Before Paint Application
After sanding, cabinet surfaces need thorough cleaning. Kitchen cabinets accumulate grease and cooking residue that prevent paint adhesion.
TSP (trisodium phosphate) is the industry standard for cabinet degreasing. Mix with warm water per manufacturer instructions, scrub all surfaces, rinse thoroughly, and allow to dry completely (4-6 hours minimum). Wear gloves and eye protection.
For lighter cleaning, use a 50/50 mixture of white vinegar and water. Allow cabinets to dry completely before priming, any trapped moisture causes adhesion failure and blistering.
Choosing Sheen and Finish for Durability
The sheen you select affects both appearance and durability. Kitchen cabinets need higher-sheen finishes than walls because they endure more contact and moisture exposure.
Semi-Gloss vs. Satin vs. Matte Finishes
Semi-gloss (85-95% gloss) is the most durable cabinet finish. It resists moisture and wipes clean easily, but shows every fingerprint and imperfection. Many homeowners find it too shiny for residential kitchens.
Satin (30-60% gloss) balances durability and aesthetics. It provides good moisture resistance while appearing softer and more refined than semi-gloss. Satin hides minor application imperfections better while still cleaning easily. This is the professional standard for residential kitchens.
Matte (0-15% gloss) offers the softest, most contemporary appearance and hides application marks beautifully. However, matte finishes are less durable, absorb moisture more readily, and are harder to clean without streaking. Matte works for low-traffic cabinets but isn’t ideal for kitchen base cabinets.
Satin finish is the sweet spot for kitchen cabinets, providing professional durability while maintaining a refined appearance.
Color Selection Based on Kitchen Lighting and Countertops
Paint color significantly impacts how your kitchen feels. Lighting is the first consideration. Kitchens with warm incandescent lighting make warm paint colors appear richer. The same colors under cool LED or north-facing natural light can look washed out.
Countertops anchor the color palette. Light countertops pair well with soft whites and warm grays. Dark countertops work with crisp whites and pale neutrals. Warm-toned countertops complement warm cabinet colors. Cool-toned countertops suit cool whites and grays.
Test paint samples on your actual cabinet doors in your actual lighting. Paint large swatches (at least 12" x 12") and observe them at different times of day.
How Long Does It Take to Paint Kitchen Cabinets
A typical residential kitchen with 15-20 cabinet doors takes 4-6 days for professional painters using spray application, including prep, painting (typically 2 coats), and reassembly. Hand-brushing adds 2-3 days. DIY projects typically take 2-3 weekends.
Drying and Curing Time Expectations
Drying and curing are different. Drying is when paint feels dry to the touch. Curing is when it reaches full hardness.
Acrylic paint dries in 4-6 hours but cures over 7-14 days. Apply a second coat after 6 hours, but cabinets won’t reach full hardness for two weeks.
Alkyd enamel dries in 16-24 hours and cures over 2-3 weeks. Avoid heavy cabinet use during this period.
Hybrid paint dries in 8-12 hours and cures over 10-14 days.
Temperature and humidity affect drying. Cool temperatures (below 60°F) or high humidity (above 85%) slow drying significantly. Ideal conditions are 65-75°F and 40-60% humidity. Many painters recommend waiting 3-4 weeks before fully loading cabinets.
Tools and Application Techniques for Professional Results
Quality tools are non-negotiable for professional results.
Brush, Roller, and Sprayer Methods
Brushing works well for smaller projects. Use a high-quality angled sash brush (2-2.5 inches wide) with natural bristles for oil-based paint or synthetic bristles for water-based paint. Apply paint in thin coats, working in the direction of the wood grain. Don’t overload the brush.
Foam rollers create a more uniform finish than brushes on flat surfaces. Use a 3/8-inch nap foam roller on cabinet doors and boxes. Roll in one direction, then lightly roll perpendicular to blend.
HVLP (High Volume Low Pressure) sprayers deliver the smoothest, most professional finish with no brush marks or roller stipple. Renting an HVLP sprayer costs $40-80 per day. For DIY painters, foam rollers offer the best balance of ease and results.
Avoiding Brush Marks and Achieving Smooth Finishes
Use paint formulated for cabinets, it has additives that help it level and flow. Apply thin coats rather than thick ones. Two thin coats create a smoother, more durable finish than one thick coat.
Use proper technique: load the brush without overloading, apply long smooth strokes in the direction of wood grain, and avoid excessive brushing once paint is applied. Use a tack cloth before final coats to remove dust particles. Maintain optimal conditions: 65-75°F and 40-60% humidity.
If brush marks appear in your final coat, wait until paint is fully dry, lightly sand with 320-400 grit sandpaper, and apply another thin topcoat.
Common Mistakes to Avoid When Painting Kitchen Cabinets
Skipping primer is the most common error. Primer ensures paint adheres to glossy surfaces. Without it, peeling occurs within months. Always use a bonding primer designed for cabinets.
Inadequate surface preparation ranks second. Rushing through sanding, cleaning, or degreasing guarantees adhesion problems. Spend time on prep.
Painting in poor conditions causes finish defects. Paint in controlled conditions: 65-75°F and 40-60% humidity, avoiding dusty environments.
Using cheap brushes or rollers creates visible defects. Invest in quality application tools.
Applying paint too thick causes brush marks and poor leveling. Apply multiple thin coats instead.
Not allowing adequate drying time between coats causes adhesion problems. Follow manufacturer recommendations.
Overworking wet paint creates texture and drag marks. Let paint level naturally.
Maintenance and Long-Term Care for Painted Cabinets
Regular cleaning prevents buildup that damages paint. Wipe cabinets weekly with a soft cloth and mild soap solution. Dry immediately after cleaning.
Avoid harsh chemicals that degrade paint. Don’t use bleach, acetone, or strong degreasers. Stick with gentle cleaners.
Address spills immediately. Wipe spills promptly with a damp cloth and dry thoroughly.
Use cabinet liners inside drawers and shelves to protect paint from moisture and contact wear.
Touch up chips and scratches quickly before damage spreads. Keep paint from your original batch.
Avoid excessive moisture exposure. Ensure adequate kitchen ventilation and don’t leave cabinet doors open during cooking.
Don’t overload cabinets. Heavy weight stresses hinges and causes paint damage from friction.
Most quality cabinet finishes last 5-7 years with proper care. When paint shows significant wear, repainting is more practical than major repairs.
Transforming your kitchen with painted cabinets doesn’t require replacing them entirely. The right paint, proper preparation, and careful application create results that rival professional cabinet refinishing. Denver Cabinet Painting Colorado has spent 40 years perfecting cabinet painting for homeowners and businesses across Colorado. Our team handles meticulous surface preparation, applies paint with professional-grade equipment, and delivers smooth, consistent finishes that last. If you’d rather let experts handle the work, get a free quote and see how much your kitchen can transform.
Frequently Asked Questions
What type of paint is best for kitchen cabinets?
The best paint for kitchen cabinets is typically a water-based hybrid or acrylic enamel that offers durability and easy cleanup. Water-based paints are low-VOC and environmentally friendly, while alkyd enamels provide exceptional adhesion and a hard finish. Consider your climate, cabinet wood type, and desired finish sheen when selecting between water-based and oil-based options. Professional-grade paints outperform standard wall paint due to superior adhesion and wear resistance.
Do I need to prime kitchen cabinets before painting?
Yes, priming is essential for kitchen cabinet painting success. A bonding primer improves adhesion between the cabinet surface and topcoat, especially on glossy or previously finished wood. Primer also prevents stains from bleeding through and provides better coverage, reducing the number of paint coats needed. After proper surface preparation including sanding and degreasing, apply primer before your final paint coats for a professional, long-lasting finish.
How long does it take to paint kitchen cabinets?
Total project time typically spans 1-2 weeks from start to finish. Preparation and sanding require 1-2 days, primer and paint application takes 2-3 days, and curing time demands 7-14 days before full use. Drying time between coats is usually 4-8 hours depending on paint type and humidity. Professional painters account for multiple thin coats rather than one thick coat to achieve smooth, durable finishes without brush marks or leveling issues.
What's the difference between oil-based and water-based paint for cabinets?
Oil-based (alkyd) paints offer superior adhesion, durability, and a hard finish ideal for high-traffic cabinets, but require mineral spirits for cleanup and emit higher VOCs. Water-based paints are low-VOC, environmentally friendly, and easy to clean, though they may require more coats for equivalent coverage. Water-based hybrids combine benefits of both: good adhesion and durability with low emissions. Choose based on your environmental concerns, ventilation capacity, and desired finish characteristics.
This article was written using GrandRanker