
Table of Contents
- Understanding the Cabinet Refinishing Process for Beginners
- Preparation and Workspace Setup: The Foundation of Success
- DIY Cabinet Refinishing Steps: Cleaning and Degreasing
- Sanding and Surface Preparation for Proper Adhesion
- Best Paint for Kitchen Cabinets Without Sanding: Your Options
- Application Methods: Brush, Roller, and Sprayer Techniques
- How Long Does It Take to Refinish Kitchen Cabinets: Timeline Expectations
- Cost to Refinish Kitchen Cabinets DIY: Budget-Specific Breakdown
Last Updated: July 17, 2026
Understanding the Cabinet Refinishing Process for Beginners
Cabinet refinishing is more achievable than most homeowners think. With proper preparation and the right materials, you can transform outdated cabinets into professional-looking showpieces. The difference between mediocre and stunning results almost always comes down to one factor: preparation. You’ll spend roughly 70% of your time on prep work and 30% on actual painting. Rushing through sanding, cleaning, or priming is precisely where DIY projects fail.
This guide walks you through every step of the cabinet refinishing process, from identifying your cabinet material to applying the final topcoat, and shows you how to avoid the common mistakes that derail most first-time attempts.
The single biggest mistake beginners make is underestimating prep time. Budget at least 40-60 hours for a full kitchen cabinet refinishing project. Professional results require patience.
Preparation and Workspace Setup: The Foundation of Success
Getting your workspace ready is where most DIY cabinet refinishing projects either succeed or fail. You need a clean, well-ventilated area where dust won’t settle on wet paint and where projects can cure undisturbed.
Identifying Your Cabinet Material
Before beginning any refinishing work, identify what you’re actually working with. Cabinet materials behave differently and respond differently to paint.
Solid wood cabinets are the most common and forgiving. Run your hand along interior edges; solid wood shows grain and natural variation. Wood cabinets accept primer and paint readily, though you’ll need to fill gaps or damage with wood filler.
Plywood cabinets have a thin wood veneer over a plywood base. Look at edges and corners to see laminated layers. Plywood requires the same prep as solid wood, but sand gently to avoid sanding through the veneer.
Laminate cabinets have a plastic coating over particle board or MDF. Run your fingernail along an edge; laminate feels smooth and uniform, not grainy. Laminate is trickier because paint doesn’t adhere well to plastic surfaces. You’ll need a bonding primer specifically designed for laminate.
MDF (medium-density fiberboard) cabinets look similar to laminate but are uncoated. They’re softer than plywood and absorb moisture easily. MDF needs careful sanding and extra primer coats to prevent uneven paint absorption.
If your cabinets are laminate or MDF, do not skip the bonding primer step. Standard primer won’t hold on these surfaces, and your paint will peel within months.
Setting Up Your Work Area
You need a dedicated workspace where you can leave projects undisturbed for days. Ideally this is a garage or workshop. If working in your kitchen, create a temporary setup that allows you to remove doors and hardware safely.
Ventilation is non-negotiable. Open windows, run exhaust fans, or use a portable air filtration system. Protect floors and surrounding surfaces with drop cloths and plastic sheeting. Tape seams with painter’s tape to create an effective barrier.
Set up a separate drying station for cabinet doors and hardware to cure without dust landing on them. Temperature and humidity matter significantly. Paint cures best between 50-85°F with humidity below 85%. Cold temperatures slow curing dramatically, and high humidity can trap moisture, leading to finish defects.
DIY Cabinet Refinishing Steps: Cleaning and Degreasing
Cabinets accumulate years of grease, cooking residue, dust, and grime. This buildup prevents adhesion between wood and new paint. You cannot skip this step.

Remove all cabinet doors and hardware before cleaning. Label everything with painter’s tape so you know which door came from which cabinet. This makes reassembly easier and lets you clean and paint doors separately from cabinet boxes.
Choosing the Right Degreaser
For heavy grease buildup, you need a degreaser that actually works. Dish soap and water won’t cut through years of cooking grease.
Trisodium phosphate (TSP) is the industry standard for cabinet degreasing. Mix TSP according to package directions (typically 1/4 cup per gallon of water), apply with a sponge or cloth, and let it sit for 10-15 minutes before scrubbing and rinsing thoroughly.
Commercial degreasers designed for kitchen cabinets work well too. Products like Krud Kutter cut through grease quickly. After degreasing, rinse thoroughly with clean water and let cabinets dry completely. This typically takes 24 hours in normal conditions, longer in humid environments.
Degreasing is not optional. Budget 4-6 hours for thorough degreasing of a full kitchen, including drying time. Skipping this step is why many DIY projects fail to hold paint long-term.
Sanding and Surface Preparation for Proper Adhesion
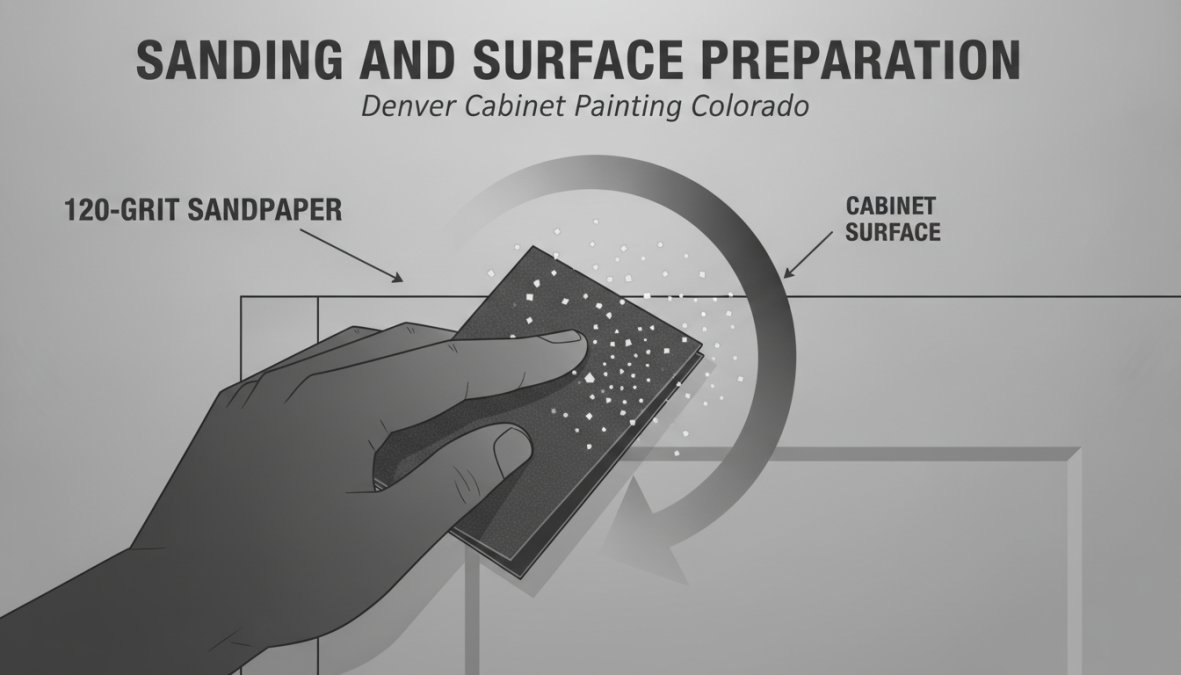
Sanding removes the old finish and creates a surface texture that helps new paint adhere. You’re not sanding cabinets down to bare wood; you’re creating a slightly rough surface that paint can grip.
Scuff Sanding Techniques
Start with 120-grit sandpaper for the initial scuff. This grit is coarse enough to dull the existing finish and remove minor imperfections without creating deep scratches.
Sand in the direction of the wood grain when possible. Use light to medium pressure; let the sandpaper do the work. Follow up with 150-grit or 180-grit sandpaper for a smoother final surface. This removes scratches left by coarser grit and creates a surface that accepts primer and paint evenly.
Use a sanding sponge or foam sanding block rather than holding sandpaper in your hand. For flat surfaces, a random orbital sander speeds up work and produces more consistent results than hand sanding.
Vacuum or wipe away all dust after sanding. Use a tack cloth to remove any remaining particles. Dust left on surfaces will create bumps in your paint finish.
Filling Holes and Imperfections
Before priming, fill any holes, gaps, or damage with an appropriate filler. For solid wood, use wood filler. For laminate or MDF, use a filler designed for those materials.
Apply filler with a putty knife, overfilling slightly so you can sand it flush after drying. Once dry, sand the filled area smooth with 150-grit sandpaper to blend it with the surrounding surface. For large gaps between cabinet components, use paintable caulk instead of filler, as it’s more flexible and won’t crack as paint expands and contracts.
Best Paint for Kitchen Cabinets: Your Options
The best paint for kitchen cabinets is acrylic enamel or polyurethane-based paint specifically formulated for cabinets. These paints are harder and more durable than standard interior latex paint, and they resist moisture and kitchen grease better over time.
Bonding Primers and Stain-Blocking Solutions
A bonding primer is essential if your cabinets are laminate, MDF, or have existing stain or water damage. Bonding primers contain special adhesion promoters that help paint stick to surfaces that normally reject paint.
Kilz Adhesion Primer and BIN shellac-based primer are the two most commonly recommended bonding primers for cabinet work. Kilz is water-based and easier to clean up. BIN is shellac-based, offering stronger adhesion but more difficult cleanup and stronger odor.
Apply bonding primer according to product instructions, typically two coats for laminate or MDF surfaces. Let each coat dry completely before applying the next. Stain-blocking primers specifically target water stains and tannin bleed from wood, preventing these from bleeding through your finish paint.
Paint Types: Acrylic Enamel vs. Polyurethane
Acrylic enamel paint is water-based, easier to apply, and dries quickly. It’s less toxic, has minimal odor, and cleanup is simple with soap and water. Acrylic enamel works well for most cabinet projects and is the most beginner-friendly option.
Polyurethane paint creates a harder, more durable finish than acrylic enamel, resists moisture better, and handles kitchen abuse more effectively. The tradeoff is longer drying time, stronger odor, and more difficult cleanup. For a beginner cabinet refinishing project, acrylic enamel is usually the better choice.
Cabinet paint quality matters significantly. Mid-range cabinet-specific paints from brands like Benjamin Moore or Sherwin-Williams produce vastly better results than basic interior latex paint. The difference in cost is minimal compared to the improvement in finish quality and durability.
Application Methods: Brush, Roller, and Sprayer Techniques
How you apply paint determines whether your finished cabinets look handmade or professionally painted.
Synthetic Brush vs. Foam Roller Application
A high-quality synthetic brush is the most versatile tool for cabinet painting. Synthetic bristles work better with water-based paints than natural bristles. Apply paint with long, smooth strokes in the direction of the wood grain. Don’t press hard or work the paint excessively.
A foam roller creates an even, smooth finish on flat cabinet surfaces. Foam rollers don’t shed fibers like traditional rollers. Use a 3/8-inch nap foam roller for cabinet painting. Roll in one direction, then lightly roll perpendicular to blend the paint. Many professionals use a combination approach: foam roller for flat surfaces and a brush for details and edges.
HVLP Sprayer Tips for Professional Results
An HVLP (high-volume, low-pressure) sprayer produces the smoothest, most professional-looking finish. Spray creates a thin, even coat with no brush strokes or roller marks. The learning curve is steeper than brush or roller application, but the results are worth the effort.
Rent or purchase an HVLP sprayer from a home improvement store. Practice on cardboard or scrap material before spraying your actual cabinet doors. Hold the sprayer 6-8 inches from the surface and move in smooth, overlapping passes. Spray in light coats rather than heavy coats; multiple thin passes produce better results.
Ventilation is critical when spraying. Set up plastic sheeting to contain overspray, wear a respirator rated for paint fumes, and ensure continuous air movement through the workspace.
How Long Does It Take to Refinish Kitchen Cabinets: Timeline Expectations
A typical full kitchen cabinet refinishing project takes 2-4 weeks from start to finish, depending on cabinet size, your experience level, and environmental conditions.
Days 1-3: Remove doors and hardware, clean and degrease all surfaces, allow drying time. Expect 12-15 hours of active work.
Days 4-6: Sand all surfaces, fill imperfections, vacuum and tack cloth to remove dust. Expect 10-12 hours of active work.
Days 7-9: Apply primer to all surfaces. Primer typically dries in 2-4 hours between coats. Expect 8-10 hours of active work.
Days 10-14: Apply topcoat paint. Most cabinet paints require 24 hours between coats. Plan for 2-3 coats for full coverage. Expect 6-8 hours of active work, spread over multiple days.
Days 15-21: Cure time. Paint is dry to the touch within 24 hours but continues hardening for 7-14 days.
Curing Time and Environmental Factors
Curing time is different from drying time. Paint may be dry to the touch after 24 hours, but it continues hardening for days or weeks. Full cure typically takes 7-14 days depending on the paint type and environmental conditions.
Temperature directly affects drying and curing speed. Paint dries fastest between 65-75°F. Below 50°F, drying slows dramatically. Above 85°F, some paints dry too quickly, which can cause brush strokes or uneven finishes.
Humidity also impacts drying. High humidity (above 85%) slows water-based paint drying significantly. Moderate humidity between 40-60% is ideal. Air circulation speeds drying without creating problems. Open windows or run fans to keep air moving, but avoid directing fans directly at wet paint.
Don’t reinstall cabinet doors or return cabinets to full use until paint has fully cured. Most manufacturers recommend waiting at least 7 days, but 14 days is safer.
Cost to Refinish Kitchen Cabinets DIY: Budget-Specific Breakdown
For a typical 15-20 cabinet kitchen with standard-size doors and boxes:
Cleaning and prep supplies: Degreaser, drop cloths, painter’s tape, tack cloths, sandpaper, wood filler, and safety equipment. Total: $40-60.
Primer: Two coats for all surfaces typically requires 2-3 gallons at $15-25 per gallon. Total: $30-75.
Paint: Cabinet-specific acrylic enamel or polyurethane typically costs $30-50 per gallon. You’ll need 2-3 gallons for full coverage. Total: $60-150.
Tools: If you already own basic tools, minimal additional investment is needed. If starting from scratch, add $50-100 for quality brushes, foam rollers, and a sanding block. An HVLP sprayer rental runs $30-60 per day.
Total material investment for a typical kitchen: $180-400 depending on paint quality and whether you rent a sprayer.
Compare this to professional cabinet refinishing, which typically costs $2,000-5,000 for a full kitchen. Even accounting for your time, DIY refinishing is substantially cheaper.
Cabinet refinishing as a DIY project is entirely achievable for beginners willing to invest time in proper preparation. Success depends on how thoroughly you approach the prep work, not on painting skill. If you want professional-quality finishes without professional pricing, follow these steps methodically, don’t rush the drying and curing phases, and verify adhesion before declaring your project complete. For complex situations, laminate cabinets, severe water damage, or when you want guaranteed results, professional refinishing services deliver consistency that DIY attempts cannot always match. Get a free quote from Denver Cabinet Painting Colorado to compare DIY investment against professional cabinet refinishing costs.
According to the EPA guide to household paint application, proper ventilation during paint application prevents harmful fume exposure and ensures optimal paint performance. Research from the Sherwin-Williams cabinet painting guide emphasizes that surface preparation accounts for 80% of finish quality in cabinet refinishing projects. For climate-specific guidance on paint curing in Colorado’s unique environment, Colorado State University’s guide to paint application in high-altitude regions provides detailed technical recommendations for managing the state’s low humidity and intense sunlight conditions.
Frequently Asked Questions
What is the easiest way to refinish cabinets for a beginner?
The easiest approach focuses on thorough prep work using a bonding primer and quality paint applied with a foam roller or synthetic brush. Start with cleaning and degreasing using trisodium phosphate (TSP), then scuff sand with appropriate grit sandpaper to improve adhesion. Use a stain-blocking primer before applying your topcoat. This method minimizes sanding intensity while ensuring professional results. Proper ventilation and drop cloths protect your space. Most beginners find the cabinet refinishing process more manageable when they invest time in preparation rather than rushing through application.
Can you refinish cabinets without sanding, and what paint works best?
Yes, you can refinish cabinets with minimal sanding by using a bonding primer specifically designed for glossy surfaces. These primers improve adhesion without heavy scuff sanding. For best paint for kitchen cabinets without sanding, choose acrylic enamel or polyurethane topcoats formulated for cabinet use. Apply 2-3 thin coats rather than one thick coat. Light scuff sanding between coats with fine-grit sandpaper still helps with leveling and adhesion, but full surface sanding is unnecessary. This approach reduces prep time while maintaining durability and a smooth finish.
How long does it take to refinish kitchen cabinets as a DIY project?
Total time varies by cabinet size and method. Preparation (cleaning, degreasing, sanding) typically takes 2-4 days. Priming and painting require 3-5 days with curing time between coats. Full curing time for polyurethane can extend 7-14 days depending on temperature and humidity. Climate conditions significantly affect timelines, cooler or humid environments require longer drying periods. Most DIYers complete a full kitchen cabinet refinishing process in 2-3 weeks when working part-time. Professional crews with proper ventilation and equipment complete similar projects faster.
What are common mistakes beginners make when refinishing cabinets?
The most frequent beginner mistakes include insufficient prep work (skipping degreasing or proper sanding), applying paint too thick in single coats, neglecting proper ventilation and respiratory protection, and rushing curing time between coats. Many beginners underestimate the importance of a quality bonding primer, especially on glossy surfaces. Using wrong brush types or foam rollers that shed fibers also compromises finish quality. Failing to mask off hardware and hinges, and not testing environmental conditions (temperature, humidity), leads to adhesion and leveling problems. Investing time in thorough surface preparation prevents most refinishing failures.
This article was written using GrandRanker