Table of Contents
- What Is Cabinet Staining and Glazing?
- Tools and Materials Needed for Cabinet Refinishing
- Surface Preparation: The Foundation of Success
- Cabinet Glazing Techniques for Professional Results
- Cabinet Glaze Color Ideas and Selection
- How Long Does Cabinet Glazing Last?
- Troubleshooting Common Cabinet Staining and Glazing Problems
- DIY vs. Professional Cabinet Glazing: Cost and Quality Analysis
Last Updated: June 19, 2026
Cabinet staining and glazing transforms dated kitchen cabinetry into custom-looking finishes without cabinet replacement. At Denver Cabinet Painting Colorado, we’ve spent 40 years refining these techniques for residential and commercial clients across the Denver metro area. Below, we’ll show you exactly how the process works, what separates a professional finish from a DIY disaster, and where most people go wrong before they even open a can of stain.
Glazing is not a simple wipe-on step you do at the end. It’s a layered finishing technique requiring proper surface prep, a compatible base coat, and clear understanding of how pigmented glaze interacts with wood grain and sealed surfaces. Skip any one of those steps and you’ll end up with streaking, blotchy color, or a finish that peels within months.
What Is Cabinet Staining and Glazing?
Cabinet staining and glazing is a two-stage finishing process combining a base color layer with a translucent glaze coat to create depth, dimension, and an aged appearance. The stain penetrates the wood grain to establish uniform color, while the glaze sits on top, settling into recessed panels to highlight architectural features.
Cabinet glazing is the application of a semi-transparent, pigmented coating over a sealed base coat, then partially wiped away to leave color concentrated in the low points of the surface. This technique gives traditionally styled cabinets their characteristic depth and visual complexity.
The process is distinct from simple cabinet painting, which produces a flat, uniform color. Glazing introduces a layered, dimensional finish that reads differently depending on light, wood species, and glaze color.
Wood Stain vs. Glaze: Key Differences
Wood stain penetrates the wood fiber to change its base color, allowing the grain pattern to show through. Stains come in water-based and solvent-based formulas, affecting drying time and compatibility with subsequent coats.
Glaze sits on top of a sealed surface and does not penetrate. A pigmented glaze is applied over a cured top coat, then manipulated with a lint-free cloth to create highlighting effects. Because glaze sits on a sealed surface, it can be partially wiped away, blended, or feathered before it sets.
| Property | Wood Stain | Glaze |
|---|---|---|
| Penetrates wood | Yes | No |
| Applied over sealed surface | No | Yes |
| Wiped away during application | Sometimes | Always |
| Creates depth/antiquing | Indirectly | Directly |
| Requires top coat | Yes | Yes |
You can stain without glazing, but never glaze without a properly sealed base coat underneath.
Tools and Materials Needed for Cabinet Refinishing
Getting the tools right before you start is the difference between a professional finish and a frustrating redo.

Essential Application Equipment
For cabinet staining and glazing, you’ll need tools that support both precision application and controlled removal of the glaze layer.
- Foam rollers (4-inch) for flat surfaces
- Natural bristle or synthetic brushes for recessed panels
- Lint-free cloths for wipe-on glaze application
- Chip brushes for carved details
- Tack cloth for final surface cleaning
- Painter’s tape and plastic sheeting for masking
The lint-free cloth is non-negotiable for glazing work. Terry cloth or paper towels leave fibers and create uneven texture. Invest in proper cheesecloth or purpose-made glazing cloths.
Preparation and Safety Supplies
Surface preparation consumes more time than the actual finishing steps, and the right prep supplies make a measurable difference in adhesion and final appearance.
- TSP substitute or cabinet-specific degreaser
- 120-grit and 220-grit sandpaper
- Wood grain filler for open-grain species
- Respirator rated for solvent-based products
- Nitrile gloves
- Proper ventilation fan
Never skip the degreaser step, even on cabinets that look clean. Cooking grease and silicone from cleaning products create invisible barriers that prevent stain and glaze adhesion. Finishing over a contaminated surface is the single most common cause of peeling within the first year.
Surface Preparation: The Foundation of Success
Most failed cabinet refinishing projects fail in the prep stage, not the finishing stage. Proper preparation creates a receptive base that allows stain to penetrate evenly and glaze to adhere predictably.
Cleaning and Degreasing Cabinet Surfaces
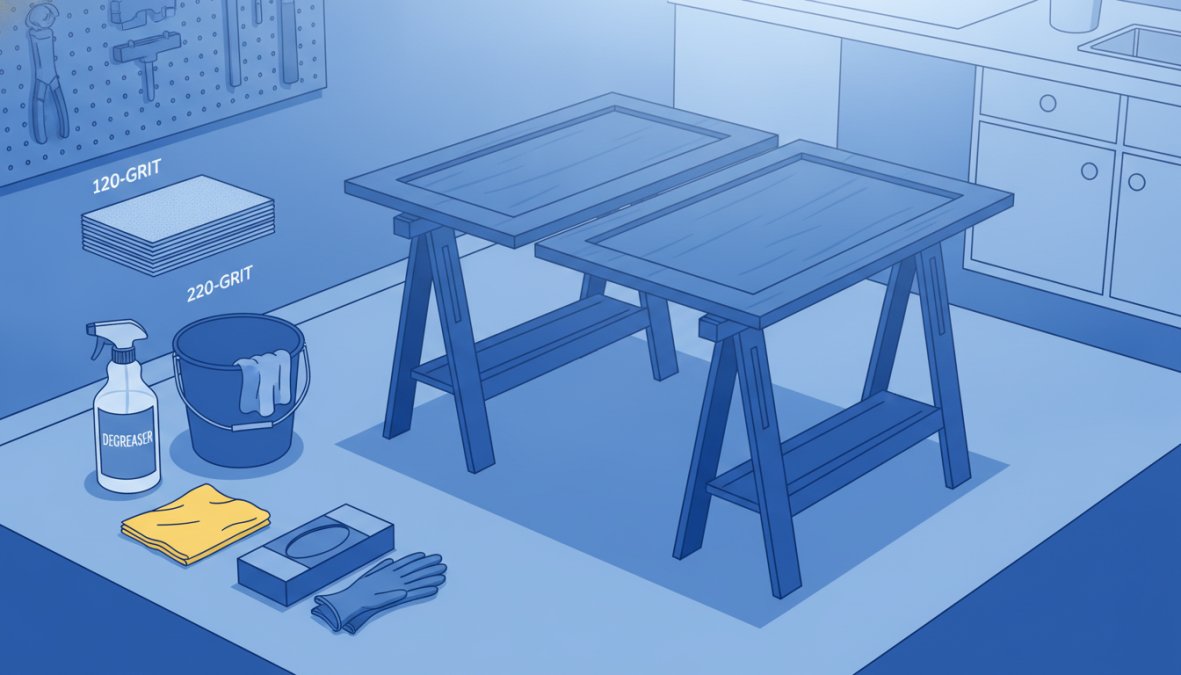
Start by removing all cabinet doors and drawer fronts. Work flat whenever possible: vertical surfaces cause runs and uneven glaze distribution.
- Mix your degreaser according to manufacturer instructions
- Apply with a clean sponge, working in sections
- Wipe down with clean water to remove residue
- Allow surfaces to dry completely (minimum 2 hours)
- Inspect under raking light for grease spots, silicone residue, or wax buildup
- Repeat degreasing on any contaminated areas
The raking light inspection is an insider technique worth adopting. Hold a work light at a low angle across the cabinet surface. Contamination and surface defects become immediately visible in ways that overhead lighting hides.
Sanding and Creating a Receptive Base
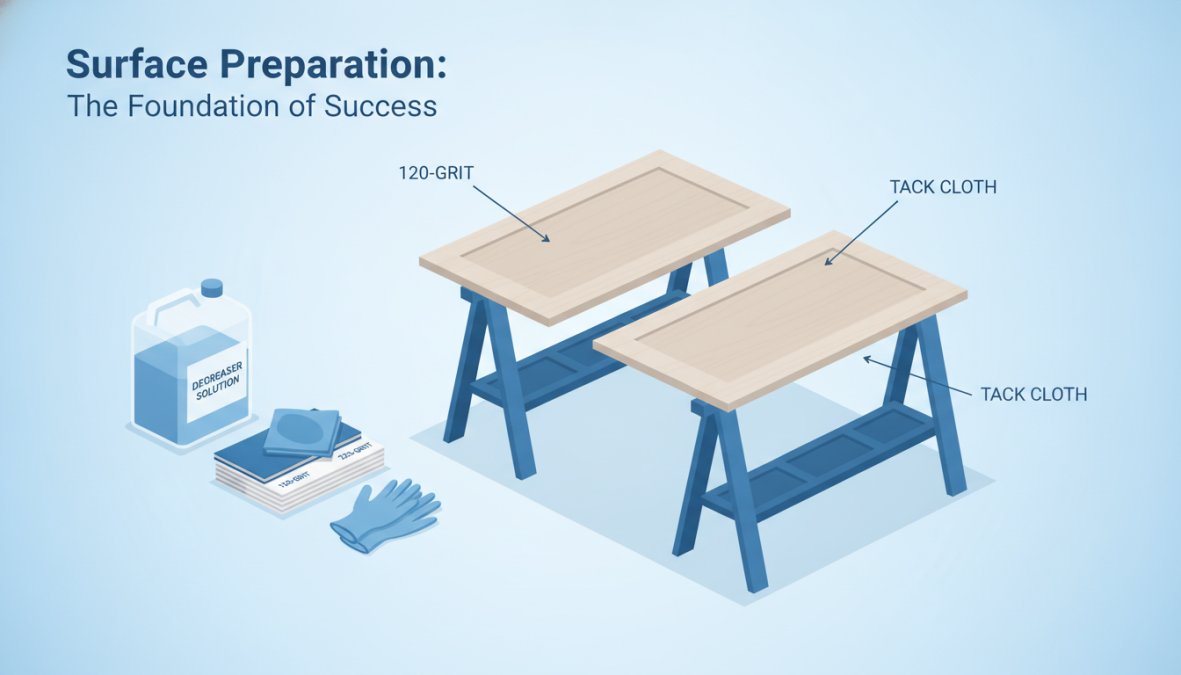
Sanding removes the existing sheen so new coats can bond and smooths surface irregularities. Start with 120-grit to break the existing finish, then move to 220-grit for final smoothing. On recessed panels and routed profiles, use sanding sponges that conform to the surface contour.
After sanding, remove all dust with a vacuum, then wipe with tack cloth. Sanding dust left on the surface mixes with stain and creates muddy, uneven color.
On open-grain wood species like oak, apply a grain filler before staining. This creates a smoother surface and prevents the glaze from pooling excessively in the pores.
Cabinet Glazing Techniques for Professional Results
The application technique determines whether your glazed cabinets look like a professional finish or a craft project.
Applying Base Coat and Stain
For stained cabinets, the wood stain itself serves as the base color. Apply stain in long, even strokes following the wood grain direction. Work in manageable sections, wet-edging as you go to prevent lap marks. Wipe away excess stain according to the manufacturer’s recommended wait time.
Once the stain is dry, apply a seal coat before glazing. This step locks in the stain and gives the glaze a consistent sealed surface to sit on. Without this step, the glaze penetrates the stain unevenly, producing blotchy results.
Wipe-On Glazing and Highlighting Methods
Brush the pigmented glaze generously over a section of the cabinet surface. Work one door at a time. Using a folded lint-free cloth, wipe away the glaze from the raised, flat areas while leaving it concentrated in the recessed panels, corners, and profile details.
The wiping direction matters. For a uniform color effect, wipe in straight lines following the wood grain. For a more antique highlighting effect, wipe in circular motions on the flat faces and leave the edges darker.
Common cabinet glazing techniques include:
- Straight wipe: Creates subtle depth
- Pad application: Builds heavier color concentration
- Dry brush blending: Feathers the glaze at edges for soft transitions
- Sponge stippling: Creates texture variation for rustic styles
Distressing and Antiquing for Depth
Distressing takes the glazing process further by physically aging the surface before or after glazing. Light sanding at corners and edges after the base coat mimics natural wear patterns. Combined with a dark glaze that settles into those worn areas, the result is a convincingly aged finish.
Cabinet Glaze Color Ideas and Selection
Choosing the wrong glaze color undermines an otherwise well-executed finish. The glaze color doesn’t just add depth: it shifts the entire perceived tone of the base color.
Modern vs. Traditional Aesthetics
Traditional cabinet glazing typically uses dark brown, raw umber, or black glazes over cream, white, or warm wood tones. This combination reads as classic, formal, and aged.
Modern applications take a different approach. Gray glazes over white bases create a contemporary, lightly weathered effect. Warm gold or bronze glazes over navy or deep green bases add warmth without the antiqued look.
The key principle: the glaze color should either contrast with or complement the base, never match it exactly.
Matching Glaze to Your Kitchen Design
Work from your fixed elements outward. Your countertop material, hardware finish, and flooring color should inform the glaze selection.
- Warm-toned countertops (cream, beige, gold veining): brown or raw umber glazes
- Cool-toned countertops (white, gray, blue-gray veining): gray or charcoal glazes
- Brushed nickel or chrome hardware: gray or soft black glazes
- Oil-rubbed bronze or antique brass hardware: brown, umber, or warm black glazes
How Long Does Cabinet Glazing Last?
A properly applied cabinet glaze finish lasts many years under normal kitchen conditions. The actual lifespan depends heavily on the top coat applied over the glaze, not the glaze itself.
Curing Time and Durability Factors
Curing time and dry time are not the same thing. A glazed cabinet surface may feel dry to the touch within hours, but full chemical cure takes considerably longer. Water-based top coats typically reach full hardness within 7-14 days. Conversion varnish, a solvent-based professional top coat, cures faster and produces a harder, more durable film.
During the curing period, avoid:
- Hanging cabinet doors back on boxes
- Cleaning with anything other than a dry cloth
- Exposing surfaces to steam from dishwashers or stovetops
- Placing objects on surfaces that could leave impressions
The top coat sheen also affects durability perception. Semi-gloss and satin finishes show wear less quickly than matte finishes in high-traffic kitchen environments.
Maintenance Tips for Lasting Finishes
Clean with a damp cloth and mild dish soap, then dry immediately. Avoid abrasive cleaners or scrubbing pads that scratch the top coat. Reapply a fresh top coat every 5-7 years in high-use areas around the stove and sink.
The top coat is the real workhorse of a glazed cabinet finish. Investing in a quality conversion varnish or catalyzed top coat pays off in longevity far more than the glaze product itself.
Troubleshooting Common Cabinet Staining and Glazing Problems
Even experienced finishers run into problems. Knowing how to diagnose them quickly saves a project from becoming a complete refinish.
Streaking, Blending Issues, and Uneven Color
Streaking is almost always caused by inconsistent wiping pressure, a glaze that’s starting to set before you’ve finished working it, or a base coat that wasn’t sealed before glazing. Work in smaller sections. If the glaze is setting too fast, add a small amount of glazing extender to slow the open time.
Uneven color in the stain layer typically traces back to uneven sanding or skipped grain filler on open-grain wood. Sand back to bare wood in affected areas, apply grain filler if needed, and restain.
Blotchy glaze on recessed panels usually means the glaze was applied too thin. Apply a heavier coat and work it before it sets.
When to Call a Professional
DIY cabinet staining and glazing is achievable for patient, detail-oriented homeowners. Call a professional when:
- Cabinets have existing finish failures (peeling, bubbling, or previous poor refinishing)
- The wood species is unfamiliar
- The project involves more than 20 doors and drawer fronts
- You’re working with conversion varnish, which requires spray equipment
- The desired finish requires spray application for a truly smooth, consistent result
DIY vs. Professional Cabinet Glazing: Cost and Quality Analysis
DIY cabinet staining and glazing produces acceptable results when the scope is small and the homeowner has patience. It rarely produces results that match a professional spray-applied finish.
The quality gap comes down to equipment. Professional finishers use spray systems that apply base coats and top coats in thin, even layers with no brush marks. They also have access to catalyzed conversion varnish, which cures to a harder film than any consumer-grade product.
DIY advantages:
- Lower material cost
- Full control over schedule
- Satisfying for homeowners who enjoy finishing work
DIY limitations:
- Brush and roller application leaves texture that spray doesn’t
- Consumer top coats are less durable than professional-grade conversion varnish
- Errors require complete refinishing
- Time investment is significant: a full kitchen typically takes 3-5 weekends
Professional advantages:
- Spray-applied finish with no brush marks
- Access to commercial-grade products
- Consistent results across all doors and drawer fronts
- Warranty on workmanship
For a full kitchen with 30-40 doors and drawer fronts, the time savings alone often justify professional work. Cabinet refinishing consistently delivers strong value compared to full cabinet replacement, regardless of whether the work is done DIY or professionally.
Achieving a durable, professional-quality glazed cabinet finish requires proper materials, surface preparation, and technique. Denver Cabinet Painting Colorado brings 40 years of cabinet painting, refinishing, and glazing expertise to residential and commercial projects across the Denver metro area, with a focus on meticulous preparation and smooth, consistent finishes. Get a free quote from Denver Cabinet Painting Colorado and find out what your kitchen could look like without the cost of full cabinet replacement.
Frequently Asked Questions
What is the difference between staining and glazing cabinets?
Wood stain penetrates the wood grain and provides uniform color, while glaze is a translucent topcoat applied over stain to add depth, highlighting, and protection. Stain is the base coat; glaze creates dimension and antiquing effects. Cabinet staining and glazing work together, stain establishes the foundation color, and glaze enhances it with visual complexity and durability through a protective sealed surface.
How long does cabinet glazing last on kitchen cabinets?
Quality cabinet glazing typically lasts 5-10 years with proper maintenance, depending on kitchen traffic and care. Curing time is critical, allow 24-72 hours before normal use. Factors affecting longevity include base coat quality, application technique, and whether water-based or solvent-based products were used. Semi-gloss and satin sheens resist wear better than matte finishes. Regular gentle cleaning extends the lifespan significantly.
What tools do I need for cabinet refinishing and glazing?
Essential tools include lint-free cloths for wipe-on application, quality brushes or foam applicators, sanding supplies (120-220 grit), tack cloth for dust removal, degreaser, and protective equipment. For glazing specifically, you'll need the glaze product itself, conversion varnish or top coat for sealing, and containers for mixing. Professional-grade tools produce smoother, more consistent finishes than budget alternatives, especially for recessed panels and drawer fronts.
Can you glaze over stained cabinets, and what's the best technique?
Yes, you can glaze over existing stain if the surface is properly prepared. Sand lightly with 220-grit paper, clean with a degreaser, and wipe with a tack cloth. Apply pigmented or translucent glaze using the wipe-on method, working in small sections. Blend edges while glaze is wet to avoid streaking. Allow proper curing time before applying top coat. This technique adds depth and highlights wood grain without complete refinishing.
This article was written using GrandRanker