Table of Contents
- How to Paint Kitchen Cabinets Professionally: Essential Preparation
- Cabinet Painting Tools List: What You’ll Need
- Scuff Sanding and Surface Preparation Techniques
- Best Primer for Kitchen Cabinets: Selection and Application
- Painting Techniques: Brush Marks and Smooth Finishes
- How Long Does It Take to Paint Kitchen Cabinets
- Common Mistakes When Painting Kitchen Cabinets
- DIY vs. Professional Cabinet Painting: Cost-Benefit Analysis
Last Updated: June 22, 2026
Painting kitchen cabinets is one of the highest-return home improvement projects you can tackle, but the gap between a DIY result and a factory-quality finish comes down to process, not paint. Surface preparation accounts for roughly 80% of the final result, skip it or rush it, and no premium paint will save you. This guide covers everything from degreasing and scuff sanding to primer selection, application technique, and the common mistakes that ruin otherwise solid work.
How to Paint Kitchen Cabinets Professionally: Essential Preparation
Professional cabinet painting starts with a clean, organized workspace and systematic disassembly. Rushing into paint application without proper preparation is the single most common reason DIY cabinet projects fail within the first year.
Removing Cabinet Doors and Hardware
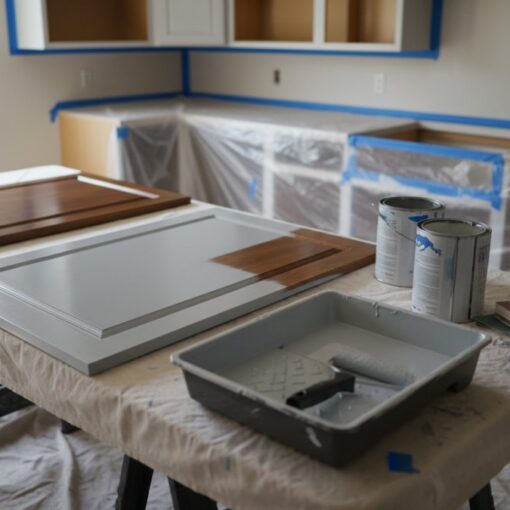
Number every door and drawer front with painter’s tape on the inside edge before removal. Remove all hinges, handles, and pulls, storing hardware in labeled zip-lock bags corresponding to each numbered door. Lay doors flat on sawhorses or a workbench for painting, vertical application creates drips and uneven coverage in recessed panels. Remove remaining hinge plates from the cabinet box so nothing interferes with your primer coat.
Take photos of hinge positions before removal to save time during reinstallation.
Cleaning and Degreasing Surfaces
Kitchen cabinets accumulate years of grease, cooking residue, and airborne oils. No primer or paint bonds reliably to contaminated surfaces. Use a two-stage clean: start with household degreaser applied with a scrub sponge, then follow with trisodium phosphate (TSP) diluted in warm water. TSP cuts through stubborn grease and etches the surface slightly to improve adhesion. Rinse thoroughly with clean water and allow 24 hours for complete drying before sanding.
Cabinet Painting Tools List: What You’ll Need
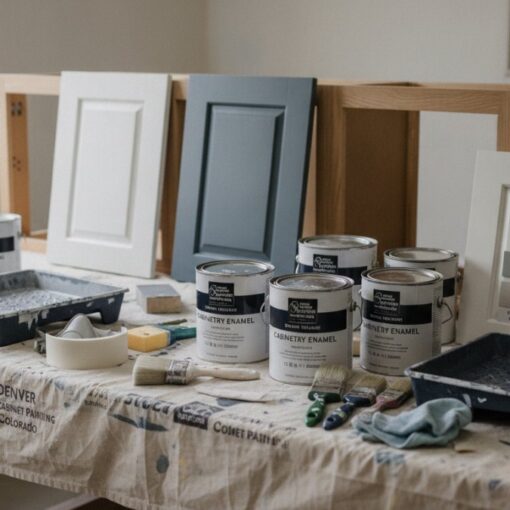
Having the right tools prevents mid-project trips to the hardware store and ensures consistent results.
| Stage | Tool | Purpose |
|---|---|---|
| Disassembly | Cordless drill, labeled bags | Remove and organize hardware |
| Cleaning | TSP, scrub sponge, clean rags | Degrease all surfaces |
| Sanding | 120-grit and 220-grit sandpaper, sanding block | Scuff sand for adhesion |
| Dust removal | Tack cloth, vacuum with brush attachment | Remove all sanding dust |
| Priming | High-adhesion primer, 4-inch foam roller, angled brush | Seal and prep surface |
| Painting | Cabinet-grade enamel, foam roller, HVLP sprayer | Apply finish coats |
| Finishing | 320-grit sandpaper, tack cloth | Light sand between coats |
Foam rollers in the 4-inch size are ideal for flat door faces and cabinet interiors. For recessed panels and tight corners, a quality 2-inch angled brush is essential. An HVLP sprayer produces results approaching a factory finish but requires practice.
Scuff Sanding and Surface Preparation Techniques
Scuff sanding creates mechanical adhesion for your primer coat by giving the surface microscopic texture. After degreasing and drying, sand all surfaces with 120-grit sandpaper on a sanding block. The sanding block keeps pressure even and prevents soft spots from fingertip pressure. Sand with the grain on wood cabinets, paying particular attention to areas with existing finish buildup or rough patches. Fill dents or holes with wood filler, let it cure fully, and sand smooth before priming.
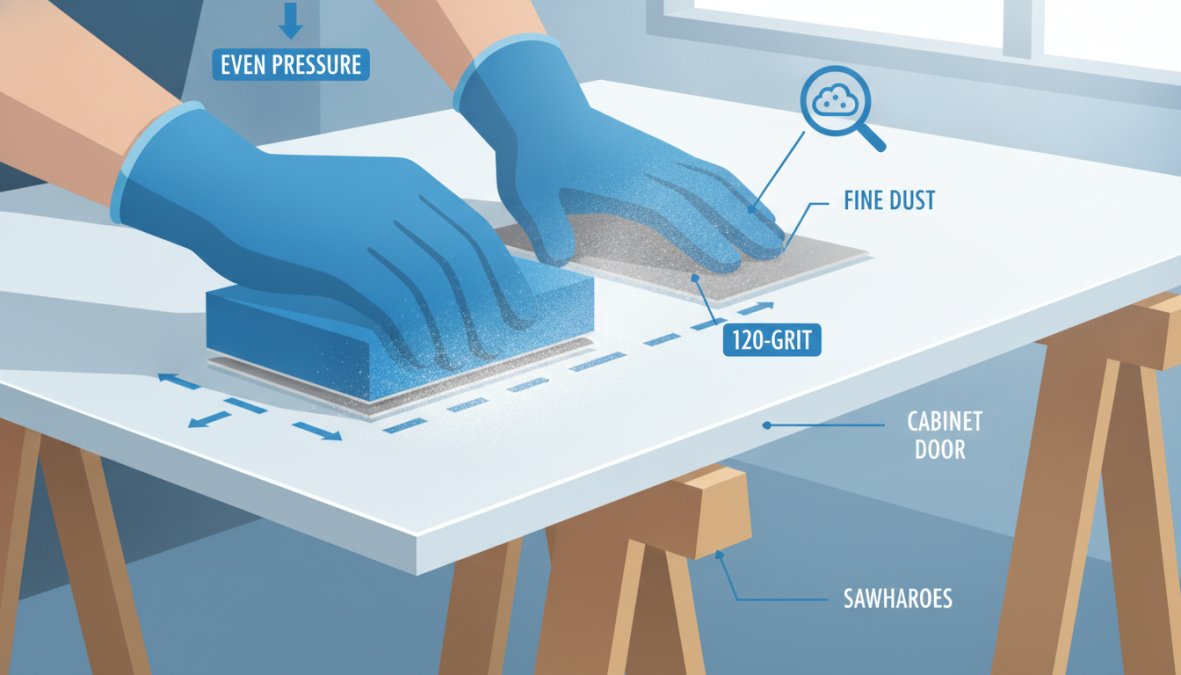
Choosing the Right Grit Sandpaper
Use 120-grit for initial scuff sanding on raw or previously painted surfaces. Between primer coats, use 220-grit for light smoothing. Between finish coats, 320-grit gives the ultra-smooth surface needed for a near-factory finish. The progression matters: jumping to fine grit on an unprepared surface leaves it too smooth for proper bonding.
Using a Tack Cloth for Dust Removal
After every sanding stage, wipe all surfaces with a tack cloth before applying the next coat. A tack cloth picks up fine sanding dust that a dry rag or vacuum alone will miss. Sanding dust left on the surface gets trapped under primer or paint and creates gritty texture that is nearly impossible to fix.
Do not use a tack cloth that is too saturated with tack compound, as it can leave residue that interferes with paint adhesion.
Best Primer for Kitchen Cabinets: Selection and Application
The best primer for kitchen cabinets is a high-adhesion primer specifically formulated for slick or previously finished surfaces. Standard drywall primer will not provide adequate adhesion on cabinets, particularly on laminate, thermofoil, or previously painted surfaces.

Apply primer in thin, even coats. Two thin coats outperform one thick coat. Roll flat areas with a foam roller and cut in recessed panels with a brush, then lightly tip off brush marks with the foam roller while the primer is still wet.
Oil-Based vs. Waterborne Alkyd Primers
Oil-based primer offers exceptional adhesion and stain-blocking with beautiful leveling. Drawbacks include 24-hour drying time between coats, strong fumes requiring ventilation, and cleanup with mineral spirits. It remains the gold standard for cabinets with heavy staining or surfaces in poor condition.
Waterborne alkyd primer is the modern choice most professionals now prefer. It delivers adhesion and leveling approaching oil-based performance, dries in 4-6 hours, cleans up with water, and produces significantly fewer VOCs. For most kitchen cabinet projects in good to fair condition, a waterborne alkyd high-adhesion primer is the right choice.
Painting Techniques: Brush Marks and Smooth Finishes
The technique you use to apply paint matters as much as the paint itself. Brush marks are the most common complaint from DIY painters and are almost always caused by the wrong applicator, paint applied too thick, or insufficient leveling time.
Foam Roller vs. HVLP Sprayer Methods
Foam roller method: Roll flat surfaces in one direction using light, overlapping passes. Work in sections small enough that paint stays wet and self-levels before skinning over. Follow the roller with a dry angled brush to tip off stipple texture in recessed panels. The foam roller produces a fine orange-peel texture that sands out easily between coats.
HVLP sprayer method: An HVLP sprayer produces the smoothest possible finish and is what professional cabinet painters use. Thin your paint according to manufacturer specifications, typically 10-15% with water for waterborne paints. Spray in steady, overlapping passes, keeping the gun perpendicular to the surface. For most DIYers, a foam roller with careful tipping produces excellent results without the setup and cleanup overhead of spraying.
Cabinet-Grade Enamel and Topcoat Application
Cabinet-grade enamel is the correct paint for this project. Standard latex paint lacks the hardness and durability to withstand daily kitchen use. Apply two finish coats, sanding lightly with 320-grit sandpaper and wiping with a tack cloth between coats. Semi-gloss is the most practical finish sheen for kitchens: it reflects enough light to look clean while being more forgiving of surface imperfections than high-gloss.
Let cabinet-grade enamel condition at room temperature for 30 minutes before application for proper leveling.
How Long Does It Take to Paint Kitchen Cabinets
Painting kitchen cabinets professionally takes between 3 and 5 days for a typical kitchen, spread across multiple sessions to allow proper drying between coats.
Drying and Curing Times by Paint Type
Understanding the difference between drying time and curing time is critical. Paint that is dry to the touch is not fully cured. Hanging doors and loading shelves before full cure causes dents, scratches, and adhesion failure.
| Paint Type | Dry to Touch | Recoat Time | Full Cure |
|---|---|---|---|
| Waterborne alkyd enamel | 1-2 hours | 4-6 hours | 21-30 days |
| Oil-based enamel | 6-8 hours | 24 hours | 30 days |
| Standard latex paint | 1 hour | 2-4 hours | 14-21 days |
Hang doors and reinstall hardware after 48-72 hours, but treat the finish gently for at least 2-3 weeks. Avoid scrubbing, placing heavy objects against painted surfaces, or using cleaning products until the paint has reached full cure.
Common Mistakes When Painting Kitchen Cabinets
Most cabinet painting failures trace back to predictable errors. Knowing these before you start improves your chances of success.
The most common mistakes:
- Skipping TSP degreasing. Primer over grease peels within months.
- Using the wrong primer. Drywall primer on cabinets causes adhesion failure.
- Applying thick coats. Thick coats sag, drip, and cure slowly.
- Not sanding between coats. Coats do not bond properly without light sanding.
- Reinstalling hardware too early. Screwing hinges into uncured paint damages the finish.
- Painting in a dusty environment. Dust settling into wet paint creates texture.
- Using grain filler on open-grain wood. Skipping grain filler on oak means wood grain telegraphs through finish coats.
Troubleshooting Common Painting Failures
Peeling or flaking: Almost always an adhesion failure from inadequate degreasing or wrong primer. Strip back to bare wood, clean thoroughly with TSP, and restart the priming process.
Visible brush marks: Caused by paint applied too thick, wrong brush type, or insufficient leveling time. Sand with 220-grit, wipe with a tack cloth, and reapply a thinner coat. Adding a paint conditioner improves flow and leveling.
Orange-peel texture: Common with foam rollers. Sand with 320-grit between coats and apply thinner finish coats.
Yellowing on white cabinets: Oil-based paints yellow over time. Waterborne alkyd enamels have largely solved this problem and are better for light-colored cabinets.
DIY vs. Professional Cabinet Painting: Cost-Benefit Analysis
The decision to DIY or hire a professional depends on your tolerance for process complexity, time investment, and expected finish quality.
DIY cost: Materials for a typical kitchen run several hundred dollars. The real cost is time: a thorough project takes 4-7 days of active work spread over 1-2 weeks, plus the learning curve.
Professional cost: Professional cabinet painting produces a factory-quality finish using commercial HVLP spray equipment and refined processes. The finish quality difference is genuine and visible.
Where most DIYers underestimate the project: Prep work. Degreasing, scuff sanding, priming, and sanding between coats takes far longer than actual painting. Many DIYers rush prep, which is exactly where results fall apart.
For homeowners wanting a truly professional result without process complexity, Denver Cabinet Painting Colorado brings 40 years of experience to every project, specializing in cabinet painting, refinishing, and glazing for residential and commercial clients across the Denver metro area. Their team handles every step from meticulous surface preparation through final topcoat application, delivering smooth, consistent finishes that rival new cabinetry.
Painting kitchen cabinets professionally is a process where every stage builds on the last, and shortcuts in preparation compound into visible failures. If the scope of proper degreasing, scuff sanding, priming, and multi-coat application sounds like more than you want to manage, Denver Cabinet Painting Colorado is the right call. With 40 years of experience serving Colorado homeowners and commercial clients, their team delivers the smooth, durable finishes that DIY projects rarely achieve. Get a free quote from Denver Cabinet Painting Colorado and see what a professionally finished kitchen actually looks like.
Frequently Asked Questions
What is the best paint to use for kitchen cabinets?
Cabinet-grade enamel paint offers superior durability and finish quality for kitchen cabinets. Look for high-adhesion primers paired with semi-gloss or satin enamel topcoats. Waterborne alkyd and oil-based primers both work well, though oil-based provides better adhesion to glossy factory finishes. The best primer for kitchen cabinets depends on your cabinet material and existing finish, consult product specifications to ensure compatibility with your project.
Do you need to sand cabinets before painting them?
Yes, scuff sanding is essential for professional results. Lightly sand the cabinet surfaces with 120-150 grit sandpaper to dull the factory finish and improve paint adhesion. This step removes the glossy coating without exposing bare wood. After sanding, use a tack cloth to remove all dust before priming. Skipping this preparation is one of the most common mistakes when painting kitchen cabinets and leads to poor adhesion and peeling.
How long does it take to paint kitchen cabinets professionally?
The timeline varies based on project scope and paint type. Proper preparation typically takes 1-2 days, including removal, cleaning, sanding, and priming. Painting and drying between coats adds 2-4 days. Total curing time ranges from 3-7 days for latex paint to 2-3 weeks for oil-based finishes. Professional painters account for drying and curing times by paint type to ensure a durable, smooth finish before reinstalling hardware and doors.
Should I use a brush or roller for kitchen cabinets?
For professional results, an HVLP sprayer delivers the smoothest finish and eliminates brush marks, though it requires more equipment and skill. A foam roller combined with a quality brush for detail work offers a practical middle ground for DIY projects. Avoid cheap brushes, which shed bristles and create imperfections. The key to avoiding brush marks is using proper brushing technique, light pressure, and multiple thin coats rather than one thick coat.
This article was written using GrandRanker