Table of Contents
- Why Cleaning Grease Off Kitchen Cabinets Before Painting Is Non-Negotiable
- Gathering the Right Supplies Before You Start
- Best Degreaser for Kitchen Cabinets: Choosing the Right Product
- Using TSP for Kitchen Cabinets: When and How to Apply It
- How to Clean Grease Off Kitchen Cabinets Before Painting: Step-by-Step
- How to Prep Cabinets for Painting After Degreasing
- Troubleshooting Failed Paint Adhesion After Cleaning
- Common Mistakes to Avoid When Degreasing Cabinets Before Painting
Last Updated: June 10, 2026
Grease is the single biggest reason cabinet paint fails within months of application. Knowing how to clean grease off kitchen cabinets before painting is not optional prep work, it’s the difference between a finish that lasts years and one that peels by spring. At Denver Cabinet Painting Colorado, we’ve spent 40 years watching cabinet refinishing jobs fail because the degreasing step was rushed or skipped. Below, we’ll show you exactly how to strip grease, choose the right products, and prep surfaces so paint bonds properly the first time.
Cooking grease, airborne oil, and cleaning product residue build up in layers over years. A single pass with dish soap won’t cut it. With the right degreaser, the right tools, and a systematic approach, you can achieve a surface that holds paint as reliably as bare wood.
Why Cleaning Grease Off Kitchen Cabinets Before Painting Is Non-Negotiable
Paint adhesion is a chemistry problem. For paint to bond, the coating needs direct contact with the substrate. Grease is a barrier, even a thin, invisible film of cooking oil prevents primer from penetrating, causing peeling, bubbling, and chipping within weeks. According to the Paint Quality Institute’s guidance on surface preparation, surface prep accounts for the majority of coating failures when done incorrectly.
Cabinets near your stove are the worst offenders. Years of frying and roasting deposit a sticky, polymerized grease layer that regular household cleaners can’t fully dissolve. That layer needs a purpose-formulated degreaser.
One more thing worth stating plainly: primer does not fix a dirty surface. Many DIYers assume a shellac-based primer like Zinsser BIN will seal over contamination. It won’t. Primer bonds to the surface beneath it, if that surface is greasy, the primer fails too.
Skipping degreasing and going straight to primer is the most common cause of cabinet paint failure. Even if the surface looks clean, airborne cooking grease is nearly invisible but completely real. Always degrease, even on cabinets that appear spotless.
Gathering the Right Supplies Before You Start
Pulling everything together before you start prevents mid-job interruptions and ensures you don’t cut corners because you’re missing a tool.
Core supplies checklist:
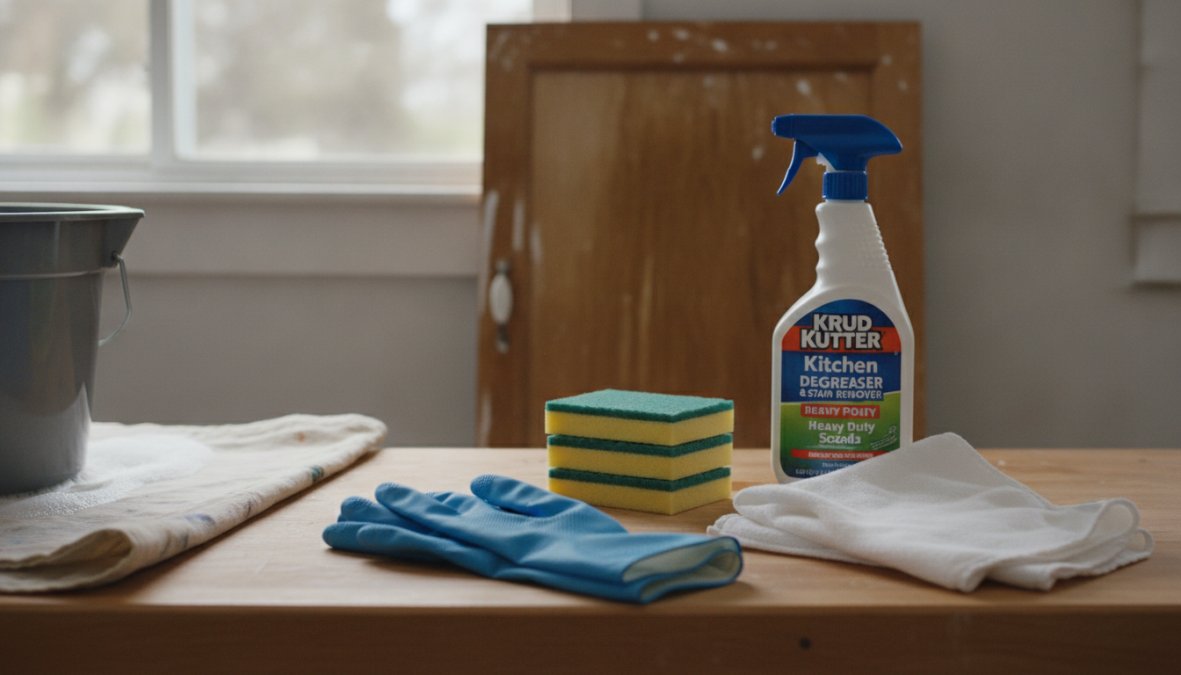
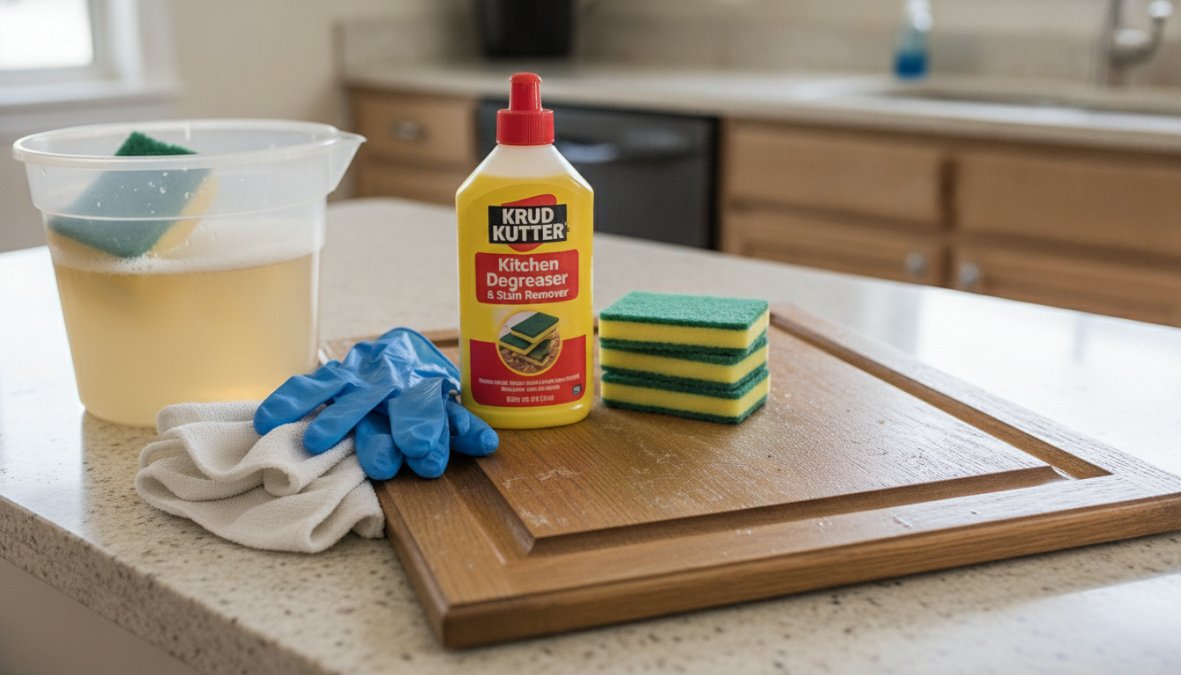
- Purpose-formulated degreaser (TSP, Krud Kutter, or Simple Green, more on choosing below)
- Scotch-Brite scrubbing pads (non-scratch for painted surfaces, standard for raw wood)
- Microfiber cloths and clean cotton rags
- Rubber gloves (chemical-resistant nitrile, not latex)
- Safety glasses or goggles
- Plastic drop cloths to protect countertops and floors
- Two buckets (one for cleaning solution, one for rinse water)
- Tack cloth for final surface wipe before priming
- Denatured alcohol for spot-treating stubborn residue
Remove all cabinet doors and drawer fronts before you begin. Cleaning flat surfaces on a workbench is far more thorough than cleaning vertical surfaces in place. Label each door with painter’s tape so you know where it goes back.
Scrubbing Tools and Abrasive Pads You’ll Need
A Scotch-Brite pad provides enough mechanical abrasion to break up polymerized grease without gouging wood grain or scratching laminate. Avoid steel wool, it leaves microscopic metal fragments that rust under paint. Avoid paper towels for scrubbing; they disintegrate and leave fiber residue. For tight corners, molding profiles, and recessed panel details, a soft-bristle toothbrush reaches spots a flat pad can’t. Grease accumulates in grooves, and those spots are exactly where adhesion problems start.
Safety Precautions When Using Cleaning Chemicals
Nitrile gloves are non-negotiable, prolonged skin contact with TSP or solvent-based degreasers causes irritation and chemical burns. Safety glasses protect against splatter. Work in a ventilated space with windows open and an exhaust fan running. Keep cleaning products away from open flames; many solvent-based degreasers and denatured alcohol are flammable. Turn off the gas range pilot light before working in the kitchen.
Best Degreaser for Kitchen Cabinets: Choosing the Right Product
Choosing the best degreaser for kitchen cabinets depends on grease severity, cabinet material, and your tolerance for chemical exposure.

| Degreaser | Best For | Dilution Required | Rinse Required |
|---|---|---|---|
| TSP (Trisodium Phosphate) | Heavy grease buildup, raw wood | Yes (1 tbsp per gallon) | Yes, thoroughly |
| Krud Kutter | Moderate to heavy buildup | No (use full strength) | Yes |
| Simple Green | Light to moderate buildup, laminate | Yes (varies by use) | Yes |
| Denatured Alcohol | Spot treatment, final wipe | No | No |
Krud Kutter is the contractor’s go-to for most kitchen cabinet degreasing jobs, it cuts through polymerized cooking grease without the caustic risk of TSP and is safe on most painted and wood surfaces. For cabinets with years of heavy buildup near the stove, TSP remains the most effective option but requires careful dilution, thorough rinsing, and proper protective gear. Simple Green works well for lighter jobs and laminate cabinets. Denatured alcohol is best as a final step after water-based degreasing.
Professional contractors often do a two-pass degreasing process: one pass with Krud Kutter or TSP for the heavy lifting, followed by a wipe-down with denatured alcohol before priming. This two-step approach catches residue that a single cleaning misses and is especially worth doing on cabinets near the range.
Environmental and Safety Impact of Common Degreasers
TSP is highly effective but carries real environmental considerations. According to EPA guidance on phosphate-based cleaners, phosphate runoff contributes to aquatic ecosystem disruption, and TSP is restricted or banned in some states, check local regulations before purchasing. Simple Green and plant-based degreasers are biodegradable and safer for households with children or pets, but require more scrubbing on heavily soiled surfaces. Denatured alcohol evaporates completely with no residue; the primary concern is flammability and VOC exposure in enclosed spaces.
Using TSP for Kitchen Cabinets: When and How to Apply It
TSP for kitchen cabinets is the right choice when dealing with years of accumulated grease near the stove, or as a deglossing agent on previously painted cabinets, TSP solution etches the surface slightly, improving mechanical adhesion for new coatings.
How to mix and apply TSP correctly:
- Mix TSP at approximately 1 tablespoon per gallon of warm water for cleaning; follow manufacturer instructions for deglossing.
- Wear nitrile gloves and safety glasses before handling the solution.
- Apply to cabinet surfaces using a clean cloth or Scotch-Brite pad, working in small sections.
- Scrub in a circular motion, then with the grain of the wood to avoid cross-grain scratching.
- Allow the solution to dwell for 2-3 minutes on heavily greased areas.
- Rinse thoroughly with clean water, TSP residue left on the surface will interfere with paint adhesion.
- Allow the surface to dry completely before proceeding.
One important caution: TSP is alkaline and can raise the grain on bare wood. Sand lightly after the TSP wash has dried completely to smooth any raised grain before priming.
How to Clean Grease Off Kitchen Cabinets Before Painting: Step-by-Step
The full process takes two to four hours for a standard kitchen, depending on buildup and number of cabinet doors. Plan for drying time between steps.
Total Time: 2-4 hours (plus drying time)
Difficulty: Beginner to intermediate
Step 1: Remove all cabinet doors, drawer fronts, and hardware [Time: 20-30 minutes]
Label each piece before removal. Store screws and hinges in labeled zip-lock bags. Lay doors flat on a protected work surface.
Step 2: Vacuum and dry-wipe surfaces [Time: 10 minutes]
Remove loose dust, crumbs, and debris with a vacuum and dry cloth before applying any liquid. Wet cleaning over dry debris creates muddy residue that’s harder to remove.
Step 3: Apply degreaser to cabinet boxes and doors [Time: 30-45 minutes]
Work in sections. Apply Krud Kutter or TSP solution generously, allow it to dwell for 2-3 minutes, then scrub with a Scotch-Brite pad. Focus extra attention on surfaces near the stove and range hood.
Step 4: Rinse thoroughly with clean water [Time: 20-30 minutes]
Use a clean cloth dampened with fresh water to wipe away all degreaser residue. Change rinse water frequently, dirty rinse water just redistributes grease.
Step 5: Allow surfaces to dry completely [Time: 1-2 hours minimum]
Inspect for remaining grease spots, which appear as slightly shiny or tacky areas.
Step 6: Spot-treat remaining residue with denatured alcohol [Time: 10-15 minutes]
Wipe stubborn spots with a clean cloth dampened with denatured alcohol to dissolve any remaining oil film the water-based degreaser didn’t fully remove.
Expected Result: Surfaces should feel completely dry, non-tacky, and have a consistent matte appearance. Any remaining sheen indicates grease that needs another pass.
Rinsing and Drying Techniques for a Residue-Free Surface
Degreaser residue left on cabinet surfaces is almost as problematic as the original grease. Use two separate buckets: one for cleaning solution, one for plain rinse water. Wring your rinse cloth thoroughly, excess water raises wood grain and causes swelling in MDF doors. After the final rinse, run your hand across the surface; it should feel smooth and slightly rough, not slick or tacky. If it feels slick, that area needs another degreasing pass. Allow at least one hour of air drying in a warm, ventilated space, longer in humid conditions. Applying primer to a damp surface traps moisture and causes adhesion failure.
How to Prep Cabinets for Painting After Degreasing
Degreasing is the first half of surface preparation. The second half is mechanical preparation: sanding, priming, and final inspection.
After degreasing and drying, sand cabinet surfaces lightly with 120-150 grit sandpaper to remove raised grain and create microscopic scratches that give primer mechanical grip. Wipe all sanding dust away with a tack cloth before priming.
For kitchen cabinets, a shellac-based primer like Zinsser BIN is the professional standard. It seals wood tannins, prevents bleed-through on knots, and bonds aggressively to clean, degreased surfaces. Apply in thin, even coats, then sand lightly with 220 grit sandpaper before topcoating for the smoothest possible finish.
As documented in Bob Vila’s cabinet painting preparation guide, proper primer application after degreasing is the step that separates a professional-looking result from a DIY finish that shows brush marks and uneven sheen.
Cabinet Material-Specific Cleaning: Wood, Laminate, and Painted Surfaces
Wood cabinets (solid wood and wood veneer): Wood is porous and absorbs cleaning solutions. Use TSP or Krud Kutter at recommended dilution, scrub with a Scotch-Brite pad, and rinse quickly to minimize water exposure. Allow extended drying time before sanding.
Laminate cabinets: Grease sits on the surface rather than penetrating it, making degreasing easier, but laminate is sensitive to aggressive scrubbing. Use Simple Green or diluted Krud Kutter with a non-scratch pad. Avoid TSP; the alkalinity can damage the surface coating. Deglossing is critical on laminate before painting, as the smooth surface offers minimal mechanical adhesion on its own.
Previously painted cabinets: These often have multiple buildup layers, grease, cleaning product residue, and wax from furniture polishes. Degrease thoroughly with Krud Kutter, then use denatured alcohol for a final wipe. If existing paint is peeling or flaking, strip it before degreasing.
Cabinet material determines which degreaser is safe to use. TSP is the strongest option for wood, but it can damage laminate surfaces. Always match your degreaser to your cabinet material before you start.
Troubleshooting Failed Paint Adhesion After Cleaning
Paint failure after a cabinet project is almost always traceable to surface preparation.
Peeling at edges and corners usually indicates grease wasn’t fully removed, hands touch those spots most frequently. Strip the failed paint, re-degrease thoroughly, and re-prime before repainting.
Bubbling on flat panels points to moisture trapped under the paint film from surfaces that weren’t fully dry before priming. Strip the affected area, allow it to dry completely, and repaint.
Poor adhesion near the stove is the most common failure point. This area sees the heaviest contamination and often requires multiple degreasing passes with TSP or a denatured alcohol wipe before priming. According to the Painting and Decorating Contractors of America’s preparation standards, surface preparation is responsible for the vast majority of coating failures in residential painting projects. If adhesion failures persist despite thorough cleaning, switching to Zinsser BIN shellac-based primer on problem areas often resolves the issue.
Common Mistakes to Avoid When Degreasing Cabinets Before Painting
Using dish soap as a degreaser. Dish soap removes surface grease but leaves a surfactant residue that interferes with paint adhesion. It’s not a substitute for a purpose-formulated degreaser.
Skipping the rinse step. Degreaser residue is a paint adhesion problem. Always rinse with clean water and change rinse water frequently.
Painting over damp surfaces. Moisture under paint causes bubbling and peeling. Wait at least one hour, longer in humid conditions.
Neglecting the cabinet boxes. Most people focus on doors and drawer fronts but rush through the frames. The frames are equally important, especially interior faces visible when doors are open.
Using the same cloth for cleaning and rinsing. Cross-contamination between cleaning solution and rinse water defeats the purpose of rinsing. Use separate cloths for each step.
Assuming new cabinets don’t need degreasing. New cabinets often have mill oil, handling residue, and release agents from manufacturing. They need degreasing too, even if they look clean.
The throughline across all these mistakes is the same: degreasing is not a formality. It’s the foundation every other step is built on. Rush it, and everything above it is compromised.
Cabinet painting projects fail at the prep stage far more often than at the painting stage. If you want a finish that holds up to a real kitchen environment, the degreasing and surface preparation work described here is non-negotiable. Denver Cabinet Painting Colorado brings 40 years of experience to every cabinet refinishing and painting project, with meticulous preparation as the top priority on every job. Their team serves residential and commercial clients across the Denver metro area and throughout Colorado, offering free quotes to help you achieve the smooth, consistent finish your kitchen deserves. Get a free quote from Denver Cabinet Painting Colorado and start your kitchen transformation with the prep work done right.
Frequently Asked Questions
What is the best degreaser for kitchen cabinets before painting?
TSP (Trisodium Phosphate) and TSP substitutes are widely favored by professional painting contractors for heavy grease buildup because they clean and degloss in one step. For lighter grease, products like Krud Kutter or Simple Green work well and are less harsh. Denatured alcohol is another effective solvent for spot-treating stubborn surface contaminants on wood cabinets before applying primer. Always rinse thoroughly after use to avoid leaving residue that could cause paint failure.
Can I paint over grease on kitchen cabinets?
No. Painting over grease is one of the most common causes of paint failure in kitchen renovations. Grease acts as a barrier between the cabinet finish and the primer, preventing proper paint adhesion. Even a thin film of cooking oil or residue can cause peeling, bubbling, or flaking within weeks of painting. Proper surface preparation, including degreasing with a product like TSP or Krud Kutter, is essential before applying any primer or paint to cabinet doors and drawer fronts.
Do I need to sand kitchen cabinets before painting if I clean them well?
In most cases, yes. While thorough degreasing removes surface contaminants, light sanding or using a Scotch-Brite pad to scuff the cabinet finish helps the primer bond mechanically to the surface. Some professional painters use a liquid deglosser as an alternative on certain finishes. For laminate cabinets, sanding is especially important. After sanding, always wipe down with a tack cloth to remove dust before applying a shellac-based primer like Zinsser BIN for the best paint adhesion results.
How do you remove sticky grease from wood cabinets before painting?
Start by applying a dedicated degreaser such as TSP substitute, Krud Kutter, or Simple Green to the wood cabinet surface. Let it dwell for a minute or two, then scrub with a Scotch-Brite pad or scouring pad using circular motions. For particularly sticky grease buildup near the stove or above the range hood, a second application may be needed. Rinse thoroughly with clean water and a clean cloth, then allow the cabinets to dry completely before moving on to sanding and priming.
What happens if you don't clean cabinets before painting?
Skipping the cleaning and degreasing step almost guarantees paint failure. Grease, cooking oils, and surface contaminants prevent primer and paint from bonding properly to the cabinet finish. The result is typically peeling, bubbling, or chipping paint, often within just a few months. In a kitchen environment where cabinets are regularly touched and exposed to heat and steam, poor surface preparation means the entire DIY painting project may need to be redone, costing significantly more time and money.
This article was written using GrandRanker