Table of Contents
- Can You Paint Over Existing Cabinet Finish? The Short Answer
- Assessing Your Existing Cabinet Finish Condition
- How to Prep Cabinets for Painting: Essential Steps
- Sanding vs. Non-Sanding Methods for Cabinet Painting
- Painting Kitchen Cabinets Without Sanding: Is It Possible?
- Choosing the Best Primer for Kitchen Cabinets
- Paint Selection and Application for Lasting Finish Durability
- How Long Does It Take to Paint Kitchen Cabinets?
Can You Paint Over Existing Cabinet Finish? A Complete Guide
Last Updated: July 8, 2026
When facing outdated kitchen cabinets, the question is whether can you paint over existing cabinet finish without stripping to bare wood. The answer is yes, but it depends on what you’re working with. Most cabinet painting failures occur because homeowners skip proper assessment and prep work. A glossy finish that isn’t deglossed will reject new paint. The key separating a five-year paint job from a fifteen-year one is meticulous surface preparation and choosing the right primer for adhesion.
Can You Paint Over Existing Cabinet Finish? The Short Answer
Yes, you can paint over existing cabinet finish in most cases. The critical factor is adhesion, your new paint must bond to the old finish, not sit on top of it.
Painting over works best when:
- The existing finish is in good condition (no peeling, flaking, or heavy damage)
- The finish is not heavily glossy or has been deglossed
- You’re willing to invest time in thorough cleaning and surface preparation
- The cabinets are solid wood, plywood, or quality veneer
Painting over fails when:
- The existing finish is severely damaged, cracked, or peeling across large areas
- The cabinets have been painted multiple times (layers of old paint are unstable)
- The finish is a slick polyurethane that resists all bonding primers
- Moisture damage or rot has compromised the wood structure
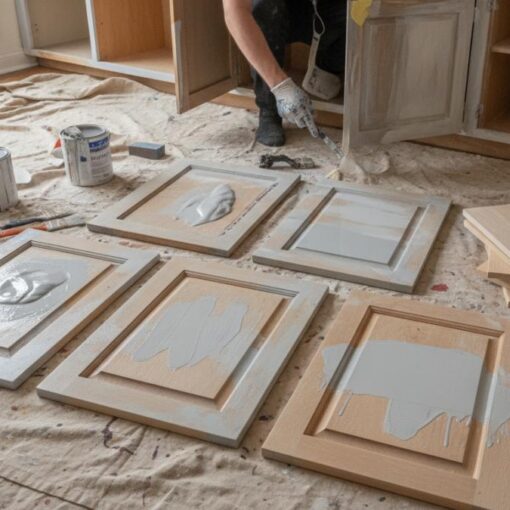
Before committing to painting over, test your primer and paint on a hidden cabinet section. Apply primer, let it cure fully, then paint. Wait two weeks and try to scrape the paint off with a putty knife. If it peels easily, your primer isn’t bonding, strip the finish instead.
When Painting Over Works Best
Painting over existing cabinet finish delivers excellent results when the original finish is stable. The best candidates are cabinets with solid wood doors, plywood boxes, or quality veneer that have been properly maintained. If your cabinets have a satin or semi-gloss finish that’s not heavily damaged, you’re in good shape.
The timeline for painting over is significantly shorter than stripping. Full stripping, sanding to bare wood, staining, and sealing can take three to four weeks. Painting over typically takes one to two weeks, including prep, primer, and paint coats. Modern acrylic bonding primers have improved dramatically and can adhere to glossy surfaces if properly deglossed first.
When You Should Strip the Finish Instead
Strip the existing finish when paint is peeling across more than 20-30% of the surface, as painting over will trap moisture underneath and accelerate failure. Moisture damage, swelling, warping, or visible water damage are also hard stops, you need to address the moisture source and let the wood dry completely before repainting.
Multiple layers of old paint are another reason to strip. After three or four paint jobs, the adhesion chain becomes unreliable. Heavily glossy finishes that resist deglossing are also candidates for stripping.
Never paint over cabinets with visible mold or mildew. The finish will trap moisture and the mold will continue growing underneath the paint. Clean with a fungicide, allow to dry completely, and wait a few weeks to confirm the mold doesn’t return before painting.
Assessing Your Existing Cabinet Finish Condition
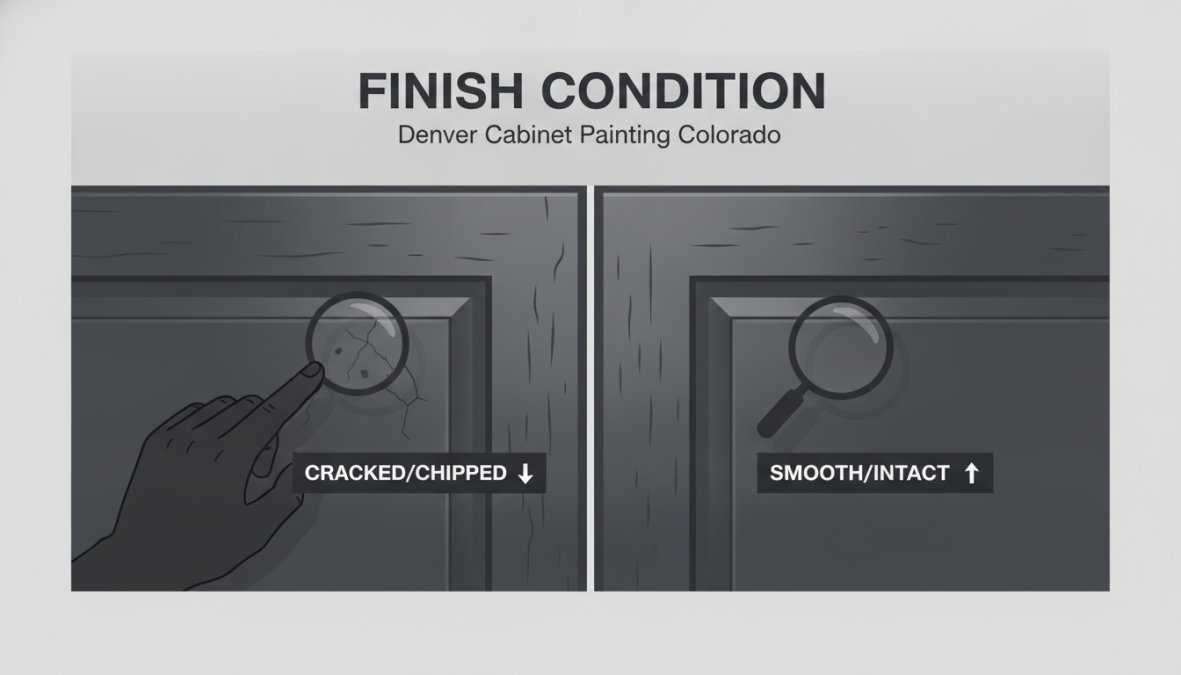
Before committing to painting over, understand what you’re working with. The finish type determines your primer choice. The finish condition determines whether painting over is viable.
Run your hand across the cabinet surface. Does it feel slick and glass-smooth? That’s a glossy finish with poor tooth for adhesion. Does it feel slightly textured or dull? That’s a satin or semi-gloss finish, much better for painting over.
Examine the finish for damage under bright light. Are there areas where the finish is lifting, peeling, or flaking? Run your fingernail across the surface. If the finish is compromised in multiple areas, painting over is risky.
Test adhesion of the existing finish by applying painter’s tape to the cabinet surface, pressing it down firmly for 30 seconds, then peeling it off quickly. If the finish comes off with the tape, adhesion is already failing.
Check the cabinet material. Solid wood and plywood accept paint well. Veneer can work but requires extra care with moisture. Laminate is problematic, paint doesn’t adhere well to laminate.
Testing for Adhesion and Compatibility
Choose a hidden area inside a cabinet door or the back panel of an upper cabinet. Clean this area thoroughly with degreaser, let it dry, then sand lightly with 120-grit sandpaper. Wipe away dust with a tack cloth.
Apply your chosen bonding primer to this test area, following the manufacturer’s cure time exactly. Most primers need 24 hours to cure fully. Once the primer is cured, apply your chosen paint color. After the paint has fully cured (48-72 hours), perform the scrape test. Use a putty knife and try to scrape the paint off. If the paint peels off easily in large flakes, your primer isn’t bonding. If the paint chips off in small fragments and requires significant effort to remove, adhesion is good.
Identifying Finish Type and Durability Issues
Polyurethane and varnish finishes are the most common on modern cabinets. These are durable and glossy, requiring deglossing with 150-220 grit sandpaper before painting over. Lacquer finishes are less common but still present on older cabinets. Shellac is rare on cabinets but occasionally found on antique pieces and is sensitive to water, so water-based primers can cause problems.
Durability issues are visible clues that the finish is failing. Chalking indicates the finish has degraded from UV exposure. Crazing, fine cracks in the finish that look like dried mud, indicates the finish is brittle. Check the cabinet doors for warping or swelling, which indicates moisture has penetrated the finish.
The adhesion test on a hidden area is the single best predictor of whether painting over will succeed. If primer and paint adhere well in the test area, you can proceed with confidence.
How to Prep Cabinets for Painting: Essential Steps
Surface preparation is where the real work happens. Eighty percent of paint durability comes from prep work. The prep sequence matters: remove hardware first, then clean and degrease, then sand or chemically degloss, then prime, then paint.
Step 1: Remove Hardware and Label Everything
Remove all cabinet hardware, hinges, handles, knobs, and drawer slides. Keep hardware organized in labeled ziplock bags. Take a photo of each cabinet before removing hardware so you remember where everything goes. Inspect hinges and drawer slides, replace bent hinges and clean gummed-up slides with degreaser and light oil.
Step 2: Clean and Degrease Thoroughly
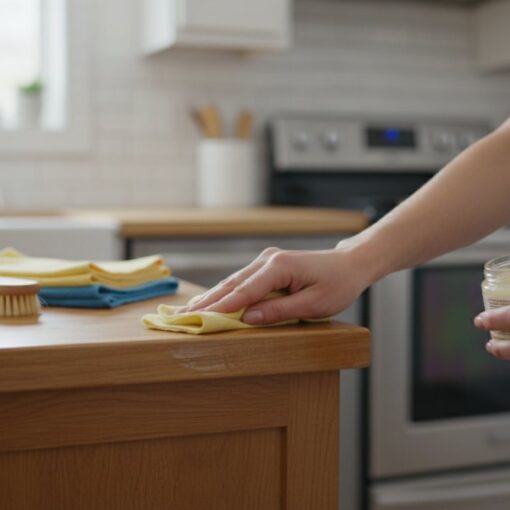
Kitchen cabinets accumulate a film of cooking grease, dust, and grime that prevents primer from bonding. Use a degreaser, TSP (trisodium phosphate) is the industry standard. Mix it according to package directions, typically 1/2 cup per gallon of hot water. Scrub the cabinet surfaces with a stiff brush, paying special attention to areas near the stove.
After degreasing, rinse thoroughly with clean water using multiple rinses, residual TSP will prevent paint adhesion. Wipe down with clean towels and allow to dry completely. This can take 24 hours in humid conditions.
Step 3: Choose Your Surface Preparation Method
Light sanding with 150-220 grit sandpaper creates mechanical tooth for primer to grip. This is the most reliable method and the industry standard. Sand with the grain when possible. The goal is to dull the gloss, not to remove the finish.
Chemical deglossers chemically soften the finish surface, creating tooth without dust. These work well on delicate veneers that might be damaged by sanding. However, chemical deglossers are slower than sanding and require careful application.
For solid wood with a durable polyurethane or varnish finish, light sanding is fastest and most reliable. For veneer or delicate finishes, a chemical deglosser is safer.
Sanding vs. Non-Sanding Methods for Cabinet Painting
Light sanding with 150-220 grit sandpaper is the gold standard for surface preparation. A sanding sponge is better than sandpaper for cabinet work, sponges conform to curved edges better and last longer. After sanding, vacuum with a shop vac, then wipe down with a tack cloth to remove fine dust that a vacuum misses.
Chemical deglossers work by softening the finish surface. Apply according to package directions, typically with a brush or cloth. The finish will look slightly dull and textured. Allow to dry completely before priming, usually 2-4 hours.
Liquid sandpaper is a specific type of chemical deglosser formulated to mimic the effect of light sanding. It’s gentler than traditional deglossers and works well on most finishes. For cabinets with delicate veneer or existing paint that’s already thin, liquid sandpaper is the safer choice.
Never sand cabinets without a dust mask and eye protection. If the cabinets are older than 1980, the finish might contain lead, professional stripping is safer than DIY sanding.
Painting Kitchen Cabinets Without Sanding: Is It Possible?
Yes, you can paint kitchen cabinets without sanding if you use the right primer. However, "without sanding" doesn’t mean "without surface preparation." You still need to clean, degrease, and degloss. You’re replacing mechanical sanding with chemical deglossing or a bonding primer.
Bonding primers are formulated to adhere to glossy surfaces without sanding. They contain special resins and adhesion promoters that grip slick finishes. The best bonding primers are acrylic-based and designed specifically for cabinet work. Bonding primers still require a clean, degreased surface and chemical deglossing to remove the shine.
No-sanding methods fail most often because the existing finish is glossier or more slick than the primer can handle. Some polyurethane finishes are so hard and smooth that even bonding primers struggle to grip. If the old finish is already peeling or chalking, a bonding primer won’t improve adhesion to the substrate. The solution when no-sanding fails is to strip the finish and start over.
Choosing the Best Primer for Kitchen Cabinets
Primer is more important than paint for cabinet durability. The paint is only as good as the primer it’s applied to.
| Primer Type | Best For | Adhesion | Drying Time | Cost |
|---|---|---|---|---|
| Acrylic Bonding | Glossy finishes, no-sand approaches | Excellent on prepared surfaces | 2-4 hours | Higher |
| Oil-Based | Difficult finishes, shellac, lacquer | Very strong | 8-16 hours | Higher |
| Latex | General use, water-based paint | Good on sanded surfaces | 1-2 hours | Moderate |
| Shellac | Stains, odors, old finishes | Excellent | 1 hour | Higher |
Oil-based primers create the strongest adhesion to difficult finishes. They penetrate old finishes and bond at a molecular level. The downside is strong odors, longer drying times, and cleanup with mineral spirits. Oil-based primers are the right choice when the existing finish is shellac or lacquer, when the cabinet has adhesion problems, or when you want the most durable bond.
Acrylic bonding primers are water-based and specifically formulated for cabinet work. They dry faster than oil-based primers and have minimal odor. Modern acrylic bonding primers have adhesion that rivals oil-based primers when used on properly prepared surfaces. Acrylic bonding primers are the right choice when you’re painting over polyurethane or varnish finishes, when you want faster drying time and easier cleanup, or when the existing finish is in good condition.
Before committing to a primer, test it on the hidden area you prepared earlier. Apply the primer according to the manufacturer’s instructions. Once cured, try to peel it with your fingernail, it should resist strongly. After the primer cures fully, apply your chosen paint to the test area and perform the scrape test.
Buy a quart of primer and paint before committing to gallons. Test them on hidden cabinet areas first. The cost of a quart is minimal compared to the cost of repainting an entire kitchen because you chose the wrong products.
Paint Selection and Application for Lasting Finish Durability
Cabinet paint needs to be tougher than wall paint. Cabinets take abuse, doors open and close thousands of times, handles are grabbed, surfaces are wiped down, heat and moisture fluctuate. Cabinet-grade paint is formulated with harder resins and better adhesion than standard interior paint.
Acrylic enamel is water-based cabinet paint. It dries fast, has minimal odor, and cleans up with soap and water. Modern acrylic enamels have hardness and durability comparable to oil-based paint. The downside is that it requires perfect primer adhesion and shows brush marks more easily than oil-based paint.
Oil-based cabinet paint creates an extremely durable, hard finish. It levels out better than acrylic, hiding brush marks. The downside is strong odor, long drying time (24+ hours), and cleanup with mineral spirits. Oil-based paint is the right choice when you’re painting over shellac or lacquer finishes or when you want the absolute hardest, most durable finish.
A quality brush (2-3 inch angled brush) gives the most control and works well for doors and drawer fronts. Use long, smooth strokes and avoid overworking the paint. A foam roller creates a smoother finish than a brush with fewer visible marks and works well for flat cabinet box surfaces. An HVLP (high-volume, low-pressure) sprayer creates the smoothest, most professional finish but requires cost, learning curve, and overspray management.
Satin finish has a subtle sheen that’s elegant and hides dust and fingerprints better than flat. It’s durable and easy to clean. Satin is the most popular choice for kitchen cabinets. Semi-gloss has more shine and is more durable than satin but shows every imperfection and dust particle.
How Long Does It Take to Paint Kitchen Cabinets?
Drying time is when the paint feels dry to the touch. Curing time is when the paint reaches full hardness. These are different, and this distinction matters for cabinet durability. Most cabinet paint dries to the touch in 2-4 hours, but the paint is not fully hard. Full curing time is when the paint reaches maximum hardness, typically 7-14 days for acrylic enamel and 14-21 days for oil-based paint.
Total project timeline for painting over is typically 2-3 weeks from start to finish:
Week 1:
- Days 1-2: Remove hardware, clean, and degrease
- Days 3-4: Sand or degloss and prepare surfaces
- Day 5: Prime all surfaces
- Days 6-7: Apply first paint coat
Week 2:
- Day 8: Apply second paint coat
- Days 9-14: Allow curing, light use only
Week 3:
- Day 15+: Full use is safe
The biggest variable is drying and curing time. In cold, humid conditions, drying time doubles. In hot, dry conditions, drying time halves.
The most common mistake is using cabinets before full cure time. Paint feels dry after a few hours but isn’t fully hard for days. Plan your project around the full cure timeline, not just the drying time.
Troubleshooting Peeling or Adhesion Issues
If paint starts peeling or chipping after painting, the problem is almost always adhesion.
Peeling in the same spots as the old paint: The old finish had adhesion problems that painting over didn’t solve. Solution: Strip the finish and start over.
Peeling in scattered spots across the cabinet: This usually indicates inadequate surface preparation, dust, grease, or gloss wasn’t properly removed. Solution: Sand the peeling areas, prime, and repaint.
Peeling along edges or around hardware: Moisture is likely the culprit. Water is seeping under the paint at edges or gaps. Solution: Identify the moisture source, seal gaps with caulk, and repaint.
Brush marks or texture in the paint: This usually indicates thick application or wrong brush technique. Solution: Sand smooth, prime, and repaint with thinner coats.
Paint wrinkles or becomes tacky: This indicates chemical incompatibility between the old finish and the new primer/paint. Solution: Strip the finish and use oil-based primer.
The best prevention is the adhesion test on a hidden area. If the test fails, you know your approach won’t work before you commit to the entire kitchen.
If your cabinets are showing signs of age or damage, painting over the existing finish is often the fastest and most cost-effective solution. Success depends entirely on proper assessment, surface preparation, and primer selection. Denver Cabinet Painting Colorado has helped hundreds of homeowners and businesses transform their kitchens with cabinet painting that lasts. Our team handles everything from assessing finish condition to selecting the right primer and paint for your specific situation, ensuring smooth, consistent finishes that resist chipping and peeling. Get a free quote and discover how professional cabinet painting can revitalize your space without the expense of full cabinet replacement.
Frequently Asked Questions
Do I need to sand cabinets before painting over existing finish?
Not always. If your existing finish is in good condition and properly cleaned, you can use a bonding primer designed for glossy surfaces and skip sanding. However, light sanding or deglosser application improves adhesion significantly. The decision depends on the existing finish type, surface condition, and whether you're willing to invest extra prep time for better long-term durability. Many professionals recommend at least light sanding or chemical deglosser for best results.
What is the best primer for kitchen cabinets when painting over existing finish?
A bonding primer specifically formulated for glossy surfaces is ideal for painting over existing cabinet finishes. Oil-based bonding primers offer superior adhesion to wood grain and old finishes, while acrylic bonding primers provide lower VOCs and easier cleanup. Choose based on your existing finish type, test chemical compatibility first. The primer creates a bridge between the old finish and new paint, ensuring the topcoat adheres properly and resists peeling or chipping.
Can you paint over glossy cabinet finish without stripping?
Yes, you can paint over glossy cabinet finish without full stripping. The key is proper surface preparation: clean thoroughly with TSP (trisodium phosphate) or degreaser, use light sanding or liquid sandpaper to dull the gloss, and apply a bonding primer. The glossy surface actually helps paint adhere better than raw wood if you properly prepare it. However, adhesion improves dramatically with at least light sanding or deglosser application before priming.
How long does painted cabinet finish take to cure completely?
Drying time and curing time are different. Most cabinet paints dry to the touch in 2-4 hours and can be recoated in 4-8 hours. However, full curing, where the finish reaches maximum hardness and durability, typically takes 7-14 days depending on paint type, humidity, and temperature. During this curing period, avoid heavy use of cabinets. Latex paints cure faster than oil-based options. Allow the full curing time before subjecting painted cabinets to daily wear and moisture exposure.
This article was written using GrandRanker