Table of Contents
- How to Clean Painted Kitchen Cabinets: What You’ll Need
- Best Cleaning Solution for Painted Cabinets
- Step-by-Step Process: How to Clean Painted Kitchen Cabinets
- How to Remove Grease from Kitchen Cabinets
- DIY Cabinet Cleaner Recipe for Painted Finishes
- How to Prevent Grease Buildup on Cabinets
- Paint Finish Compatibility and Troubleshooting Damage
- Common Mistakes to Avoid When Cleaning Painted Cabinets
Last Updated: July 3, 2026
How to Clean Painted Kitchen Cabinets: What You’ll Need
Proper cabinet maintenance starts with the right supplies. Most people grab whatever cleaner sits under their sink, only to discover weeks later that their cabinet finish has dulled or started peeling. The difference between cabinets that look pristine for years and ones that deteriorate comes down to preparation and technique.
Essential Cleaning Supplies and Tools
You don’t need an expensive arsenal. Start with mild dish soap paired with warm water, this handles 80% of typical kitchen grime. A microfiber cloth is non-negotiable; it traps dirt and oils without scratching paint the way cotton towels can.
For tougher grease buildup, white vinegar becomes your secret weapon. Mix equal parts white vinegar and warm water for a natural degreaser that cuts through cooking residue without harsh chemicals. Baking soda works as a gentle abrasive when mixed into a paste for stubborn spots.
Keep a soft sponge for applying your cleaning solution and a dry cloth for removing excess moisture immediately after cleaning.
Keep your supplies in a caddy under the sink so you’re never tempted to grab harsh degreasers in a pinch.
Tools to Avoid When Cleaning Painted Cabinets
Never use abrasive scouring pads, steel wool, or heavy-duty scrubbing tools, these scratch through paint and expose wood underneath. Avoid commercial oven cleaners, bleach-based products, and harsh degreasers designed for restaurants, as they strip protective coatings and cause permanent discoloration or peeling.
Skip acetone, mineral spirits, and paint thinners, which dissolve paint finishes. Pressure washers damage paint and drive water into seams where it causes swelling and rot.
Best Cleaning Solution for Painted Cabinets
For weekly maintenance, warm water with a few drops of mild dish soap handles fingerprints and light dust perfectly. For monthly deep cleaning when grease buildup appears, mix one part vinegar to one part warm water. Spray onto your microfiber cloth rather than directly on cabinets to prevent excess moisture from seeping into seams.
Baking soda paste works for stubborn spots. Mix baking soda with a small amount of water until spreadable, apply to problem areas, let sit for five minutes, then gently scrub with a soft cloth. Rinse immediately and dry thoroughly.
Natural vs. Chemical Cleaning Solutions
Natural solutions like vinegar and baking soda clean effectively while protecting your paint finish and cost pennies compared to specialty cleaners. They’re safe around food preparation areas and won’t create lingering fumes. The trade-off is they work more slowly and require more elbow grease on heavy grease buildup.
Chemical cleaners promise faster results, but many contain solvents that gradually degrade paint finishes. If you choose a commercial cleaner, test it on a hidden cabinet area first.
The safest approach combines both worlds: use natural solutions for routine maintenance and one carefully-selected commercial degreaser for quarterly deep cleans.
Never mix vinegar with bleach or ammonia-based cleaners. The chemical reaction creates toxic chlorine gas. Stick to one cleaning product at a time and rinse thoroughly between solutions.
Step-by-Step Process: How to Clean Painted Kitchen Cabinets
Step 1: Prepare Your Workspace
Clear countertops of small appliances and anything that sits on your cabinets. Open windows or turn on your exhaust fan for good ventilation. Gather all supplies before starting. Fill one bucket with your cleaning solution and a second with plain warm water for rinsing, this two-bucket system prevents spreading dirty water back onto freshly cleaned surfaces.
Step 2: Apply Your Cleaning Solution
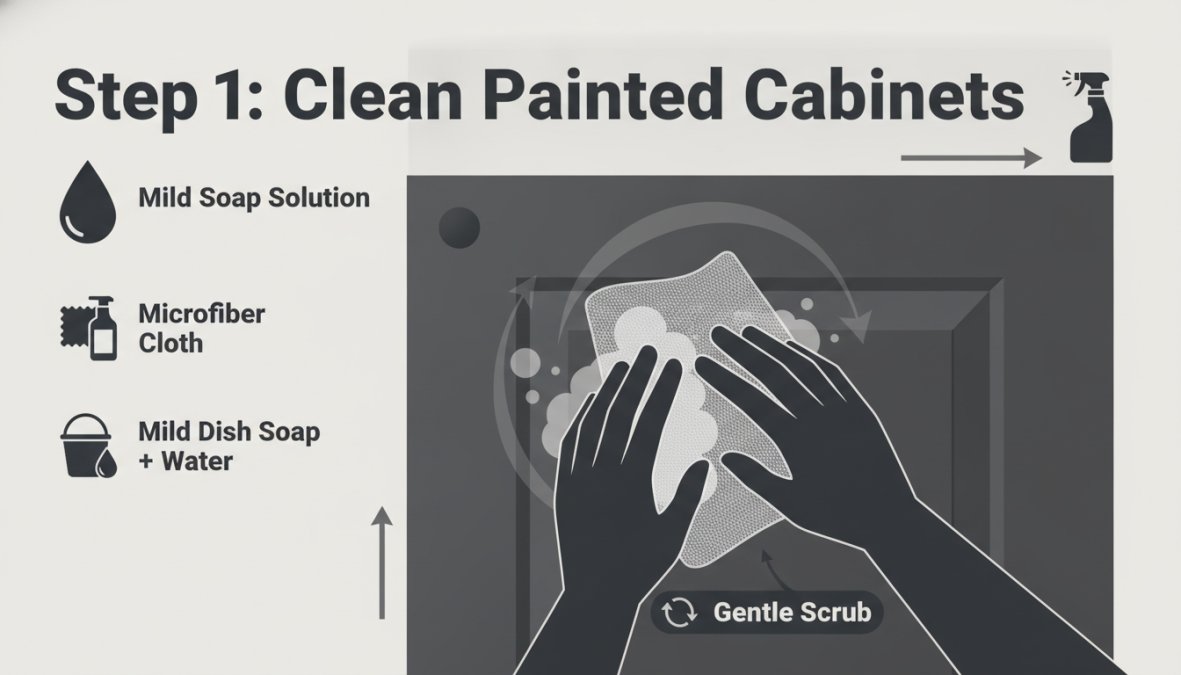
Start with the mildest solution first. Apply diluted mild dish soap to your microfiber cloth and wipe cabinet surfaces in the direction of the wood grain. Work from top to bottom so drips fall onto areas you haven’t cleaned yet.
Don’t oversaturate the cloth, you want it damp, not dripping. Excess water seeps into seams, causes swelling, and creates dark water stains. For grease-heavy areas, switch to your vinegar solution and let it sit for 30 seconds on stubborn grease before wiping.
Step 3: Gentle Scrubbing and Residue Removal
When mild soap and vinegar don’t fully remove buildup, apply baking soda paste directly to problem areas and let it work for five minutes. Use a soft cloth to gently scrub in circular motions. Never use fingernails or hard tools to scrape away grime, this scratches through the paint and creates entry points for moisture.
After scrubbing, wipe the area with a cloth dampened in plain water to remove all baking soda residue.
Step 4: Dry Thoroughly to Prevent Water Damage
Immediately dry every surface with a clean, dry cloth after cleaning and rinsing. Don’t let water sit on the paint even for a few minutes. Pay special attention to seams, edges, and areas where cabinet doors meet the frame, water trapped in these joints causes the wood to swell and pushes paint off.
How to Remove Grease from Kitchen Cabinets
Tackling Grease Buildup on Cabinet Doors
Grease accumulation is most common on cabinet doors near your stove. Fresh grease (less than a month old) responds to mild dish soap. For older buildup, white vinegar becomes essential as the acetic acid chemically breaks down oxidized grease.

For extremely stubborn grease accumulated over years, a commercial degreaser designed for kitchen surfaces might be necessary. Always test it on a hidden area first and follow package directions carefully.
Cleaning Cabinet Hardware and Hinges
For removable hardware, take off knobs and pulls and soak them in warm soapy water for 15 minutes. Use an old toothbrush to scrub away grime from crevices. For permanently attached hinges, work your cleaning solution into the joints with a soft brush and let it sit for a few minutes before scrubbing gently.
Don’t forget the inside edges of cabinet doors where they meet the frame, grease accumulates there and often gets overlooked.
DIY Cabinet Cleaner Recipe for Painted Finishes
Mix one cup of warm water, one tablespoon of mild dish soap, and one tablespoon of white vinegar in a spray bottle for an effective all-purpose cleaner. For a degreasing paste, combine three parts baking soda with one part water and add a few drops of lemon juice for fresh scent.
Store solutions in clearly labeled spray bottles. The soap and vinegar solution lasts indefinitely; the baking soda paste is best made fresh each time.
The most effective cabinet cleaner is the one you’ll actually use consistently. Simple, inexpensive solutions encourage regular maintenance, which prevents heavy buildup.
How to Prevent Grease Buildup on Cabinets
Maintenance Tips for Long-Term Cabinet Care
Wipe down cabinet fronts weekly with a barely damp microfiber cloth to remove dust and fingerprints before they accumulate. Keep your kitchen exhaust fan running while cooking and for 15 minutes afterward, this reduces grease buildup by 60%.
Place a mat or towel on the counter in front of your stove to catch splashes. Avoid placing hot pans directly against cabinet surfaces, as heat damages paint and accelerates grease oxidation.
Establishing a Cleaning Routine
Create a simple schedule: Weekly light wipe with barely damp cloth, monthly deeper clean with vinegar solution focusing on grease-prone areas, and quarterly full cabinet cleaning with baking soda paste. This routine takes roughly one hour per month spread across four sessions.
Paint Finish Compatibility and Troubleshooting Damage
Understanding Your Cabinet Paint Finish
Most modern kitchen cabinets use semi-gloss or satin finishes because these resist moisture and grease better than flat finishes. Semi-gloss appears shiny and reflective, satin has subtle sheen, and matte or flat finishes look completely non-reflective.
Identifying and Addressing Paint Peeling or Discoloration
Paint peeling usually indicates water damage from moisture seeping behind the paint. If you notice small areas of peeling, immediately stop using wet cleaning methods and switch to barely damp cloths, drying within seconds.
Discoloration comes from water stains, grease stains, or heat damage. For minor discoloration, professional refinishing may become necessary. Denver Cabinet Painting Colorado specializes in addressing these situations and can assess whether your cabinets need touch-ups or full refinishing.
Common Mistakes to Avoid When Cleaning Painted Cabinets
The most frequent mistake is using too much water, your cloth should be damp, not wet. Using abrasive tools ranks second; once paint is scratched, water penetrates and causes peeling.
Mixing cleaning products creates toxic reactions. Stick to one product at a time and rinse thoroughly between solutions. Ignoring hardware and hinges lets grease accumulate in hard-to-reach places. Not drying immediately after cleaning causes water damage, and waiting too long between cleanings creates exponential problems.
Weekly light cleaning prevents heavy buildup that requires aggressive scrubbing. Monthly deep cleaning keeps grease from oxidizing into stubborn dark coatings. Consistency beats intensity every time with painted cabinets.
Keeping painted kitchen cabinets looking fresh requires consistency rather than intensity. The weekly wipe-down and monthly deeper clean prevent heavy buildup that forces aggressive scrubbing. If your cabinets show signs of wear, peeling paint, water damage, or discoloration that won’t respond to cleaning, Denver Cabinet Painting Colorado offers professional refinishing that restores them to like-new condition. Their team brings 40 years of experience refinishing kitchen cabinets throughout Colorado and provides free quotes.
| Cleaning Task | Frequency | Solution | Time Required |
|---|---|---|---|
| Light dust and fingerprints | Weekly | Mild soap and water | 5 minutes |
| Grease buildup removal | Monthly | White vinegar and water | 15 minutes |
| Stubborn spot treatment | As needed | Baking soda paste | 10 minutes |
| Hardware cleaning | Monthly | Soap solution and soft brush | 10 minutes |
| Full cabinet refresh | Quarterly | Vinegar solution plus paste | 45 minutes |
According to the EPA’s guidance on household cleaners, vinegar and baking soda are among the safest natural cleaning alternatives for food preparation areas. Research from the American Cleaning Institute’s cabinet care recommendations confirms that gentle, frequent cleaning prevents damage caused by aggressive scrubbing or harsh chemicals. For homeowners dealing with existing paint damage or severe discoloration, the National Kitchen and Bath Association’s cabinet maintenance standards recommends professional assessment to determine whether touch-ups or full refinishing is necessary.
Frequently Asked Questions
What is the best cleaner for painted kitchen cabinets?
The best cleaning solution for painted cabinets combines mild dish soap with warm water. Mix a few drops of gentle dish soap in a bowl of warm water, then apply with a soft sponge or microfiber cloth. For stubborn grease buildup, white vinegar diluted with water works effectively without damaging the paint finish. Avoid abrasive cleaners and harsh chemicals that can strip the protective coating or cause paint peeling.
Can you use vinegar to clean painted kitchen cabinets?
Yes, white vinegar is safe for painted cabinets when properly diluted. Mix one part vinegar with one part warm water to create an effective degreaser that cuts through kitchen grime and residue. Apply with a damp cloth and wipe thoroughly to prevent water damage. This non-toxic solution is particularly useful for removing sticky grease without the harsh fumes of chemical degreasers, making it ideal for eco-friendly cleaning routines.
How do you remove sticky grease from painted cabinets?
Start by applying a diluted degreaser solution (mild dish soap or white vinegar mixture) directly to the greasy area. Let it sit for 2-3 minutes to break down the grease buildup, then gently scrub with a soft sponge using circular motions. For heavy grease, a microfiber cloth provides better control than abrasive cleaners. Wipe with a damp cloth to remove all residue, then dry thoroughly with a clean cloth to prevent water damage to the paint finish.
How often should you clean painted kitchen cabinets?
Establish a cleaning routine that includes weekly light dusting and monthly deep cleaning with your chosen cleaning solution. High-traffic kitchens with frequent cooking may require bi-weekly maintenance to prevent grease buildup. Daily wipe-downs of visible spills help maintain the protective coating and prevent stain accumulation. Regular maintenance extends the life of your painted finish and keeps cabinets looking fresh without needing refinishing.
Will dish soap damage painted cabinets?
Mild dish soap is safe for painted cabinets when diluted properly with warm water. Use only a few drops in a bowl of water to avoid excessive moisture that could cause water damage or paint peeling. The key is moderation and thorough drying afterward. Avoid harsh, concentrated dish soap or abrasive scrubbing, which can strip the paint finish. Always wipe cabinets dry immediately after cleaning to protect the protective coating.
This article was written using GrandRanker