Table of Contents
- What Is the Cabinet Glazing Process?
- The Cabinet Glazing Process: Step-by-Step
- How to Glaze Kitchen Cabinets: Tools and Materials
- Cabinet Glazing Mistakes to Avoid
- How Long Does Cabinet Glazing Take to Cure?
- Pros and Cons of Cabinet Glazing
- Modern vs. Traditional Cabinet Glazing Aesthetics
- Conclusion
Cabinet Glazing Process: Step-by-Step Guide
Last Updated: July 1, 2026
What Is the Cabinet Glazing Process?
Cabinet glazing is a decorative finishing technique that adds depth, dimension, and aged appearance to cabinets by applying a semi-transparent coating over a base coat, then strategically wiping it away to create shadows and highlights. At Denver Cabinet Painting Colorado, we’ve spent 40 years perfecting this craft. Unlike staining, which soaks into wood, or painting, which sits flat on the surface, glaze settles into crevices and profiled areas, building character through contrast. This technique delivers results that look custom-built rather than mass-produced.
The most common mistake homeowners make is applying glaze too thick. A thin, even application that you wipe partially away creates elegance. Heavy glaze that you don’t remove properly looks muddy and amateurish.
How Cabinet Glazing Differs from Staining and Painting
Staining penetrates the wood surface and changes its color permanently, while painting creates an opaque protective layer that hides the wood entirely. Glazing occupies the middle ground, transparent enough to show the base coat and wood grain beneath, yet concentrated enough in recessed areas to create definition and shadow. According to Fine Woodworking’s cabinet finishing guide, glazing specifically highlights architectural details that stain alone cannot emphasize, making it the preferred choice for raised-panel and profiled cabinet doors.
Paint provides maximum protection but obscures wood character. Stain offers moderate protection with visible wood grain. Glaze requires a protective topcoat (typically polyurethane or lacquer) to achieve durability comparable to paint, but the visual result is far more sophisticated.
The Cabinet Glazing Process: Step-by-Step
Achieving professional results requires methodical preparation and precise technique. Most DIY attempts fail because people skip preparation steps or rush the application.
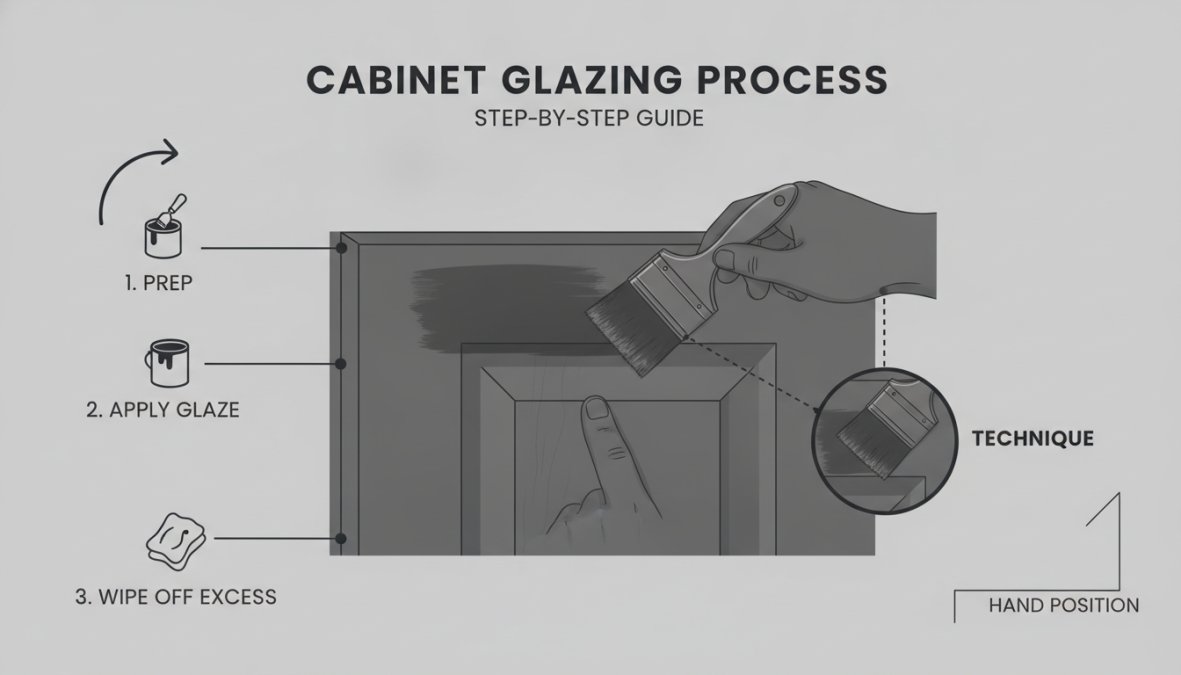
Step 1: Prepare and Sand the Cabinet Surface
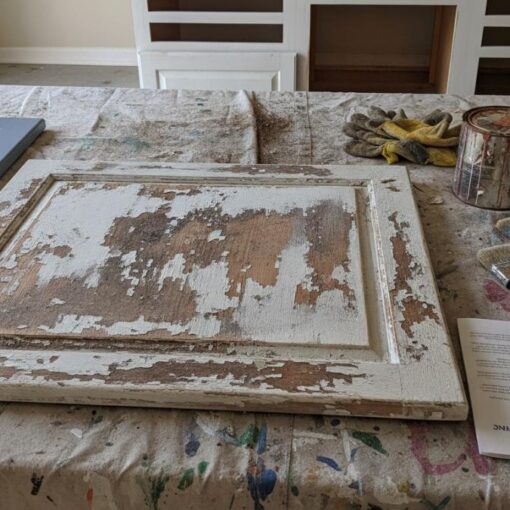
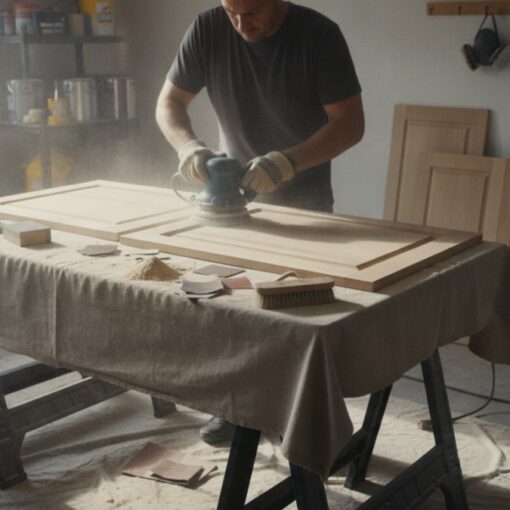
Your glaze will only look as good as the surface beneath it. Remove all cabinet doors and hardware from the frame. Inspect the existing finish and sand accordingly: use 120-grit sandpaper for initial sanding, then 150-grit for final smoothing. Sand with the grain to avoid cross-grain scratches that glaze will emphasize.
After sanding, vacuum thoroughly and wipe with a tack cloth to remove all dust. Dust particles trapped under glaze create a gritty, unprofessional finish. Many professionals spend 40% of their total time on preparation and sanding alone.
Skipping the tack cloth step is a common mistake that ruins otherwise good work. Even microscopic dust particles become visible when glaze settles over them. Take the extra five minutes per cabinet door.
Step 2: Apply the Base Coat
Your base coat is the foundation color that shows through the glaze. Most professionals use a quality primer followed by paint for maximum control and consistency. Allow paint to cure for the manufacturer’s recommended time, typically 24-48 hours for latex, longer for oil-based. Glazing over wet or incompletely cured paint creates adhesion problems.
The base coat color dramatically affects the final appearance. Darker base coats make glaze appear more dramatic and aged. Lighter base coats create a more subtle, refined effect. Many people choose a base coat one shade lighter than their desired final color, knowing that glaze will darken and deepen the appearance.
Step 3: Apply Glaze to Profiled Areas and Details
Start by loading your brush with glaze and applying it generously to profiled areas, raised panels, routed edges, and decorative details. Work in sections, typically one cabinet door at a time. Apply glaze liberally into crevices and along edges where shadows naturally fall.
The consistency of your glaze matters enormously. If it’s too thick, it won’t flow into crevices. If it’s too thin, it won’t create visible depth. Test your glaze consistency on a scrap piece before committing to cabinet doors. It should flow smoothly from the brush but hold its shape in recessed areas without running.
Step 4: Wipe-Off Technique for Excess Glaze
Using a lint-free cloth (cotton rags work best; avoid paper towels which shed fibers), begin wiping away excess glaze from flat surfaces. You’re not removing all the glaze; you’re removing enough to create contrast between recessed and flat areas.
Wipe with light to moderate pressure, using long strokes that follow the grain direction. Most professionals wipe within 5-15 minutes of application, depending on glaze type and desired intensity. Leave glaze intentionally in crevices and profiled areas, this is what creates dimension. The contrast between wiped-clean flat surfaces and glaze-filled details is the entire point of the technique.
Some professionals use a dry brush technique as a final step, lightly brushing a dry brush across the surface to blend any harsh wipe lines and create a more natural transition between glazed and unglazed areas.
How to Glaze Kitchen Cabinets: Tools and Materials
Success depends partly on having the right tools. Poor-quality supplies create poor-quality results.

DIY Cabinet Glazing Supplies You’ll Need
Preparation supplies:
- 120-grit and 150-grit sandpaper
- Tack cloth
- Vacuum with brush attachment
- Drop cloths or plastic sheeting
Application supplies:
- Quality bristle brushes (1-2 inch widths for detail work)
- Lint-free cotton rags or cheesecloth
- Glaze product (oil-based or water-based)
- Base coat paint or stain
- Primer if needed
Protection and finishing:
- Polyurethane or lacquer topcoat
- Foam roller or brush for topcoat application
- Painter’s tape
- Gloves and safety glasses
The glaze itself comes in two main types: oil-based and water-based. Oil-based glazes offer longer working time (15-30 minutes) and create richer, more traditional-looking results. Water-based glazes dry faster and offer lower VOC emissions, but require quicker technique. For DIY work, oil-based glaze is generally more forgiving.
| Supply Category | Specific Items | Purpose |
|---|---|---|
| Surface Prep | Sandpaper, tack cloth, vacuum | Remove imperfections, dust |
| Application | Brushes, rags, glaze | Apply and wipe glaze |
| Protection | Polyurethane, roller | Seal and protect finish |
| Safety | Gloves, glasses, ventilation | Personal protection |
Quality matters more than quantity. One excellent brush beats three cheap ones. Invest in supplies that professionals use, and your results will reflect that investment.
Cabinet Glazing Mistakes to Avoid
Understanding what goes wrong helps you avoid those pitfalls entirely.
Common Application Errors
Inadequate surface preparation is the most frequent mistake. Dust, previous finish residue, or uneven sanding creates a foundation that no glaze can overcome. Spend 30% of your time on preparation and you’ll spend 70% less time troubleshooting problems later.
Applying glaze too thick creates a muddy, uniform appearance rather than dimension. If you can’t see the base coat or wood grain through the glaze, you’ve applied too much.
Inconsistent wiping pressure creates uneven results where some areas are heavily glazed and others are nearly bare. Develop a consistent, light-to-moderate pressure technique and maintain it throughout each door.
Waiting too long to wipe causes glaze to set, making it harder to remove. Conversely, wiping too quickly before glaze settles into crevices removes it from the areas where you want definition. The sweet spot is typically 5-15 minutes after application.
Applying glaze to uncured base coat causes adhesion failure. Always verify that your base coat is fully cured before proceeding.
Troubleshooting Glazing Failures
If your glaze finish looks streaky, you likely wiped with inconsistent pressure or waited too long before wiping. For future attempts, wipe more deliberately and immediately after application.
If glaze is peeling or separating, the base coat wasn’t fully cured or the surface wasn’t clean before glazing. Sand back to bare wood if necessary and start over.
If the finish looks too light and subtle, you either applied too little glaze or wiped too aggressively. Apply more glaze or wait longer before wiping on your next attempt.
If the finish looks blotchy or uneven, your glaze consistency was likely incorrect or your application technique was inconsistent. Ensure glaze is well-stirred and apply in deliberate sections rather than random patches.
The difference between a professional-looking glaze finish and an amateur one usually comes down to three things: thorough surface preparation, consistent application technique, and correct wiping timing.
How Long Does Cabinet Glazing Take to Cure?
Timing is critical because you can’t apply topcoat until glaze is fully cured, and you can’t use cabinets until topcoat is cured.
Drying vs. Curing: What’s the Difference?
Drying is when a coating feels dry to the touch and looks set. Curing is when it has fully hardened and developed complete chemical resistance. A glaze might feel dry after 2-4 hours but not be fully cured for 24-48 hours. Applying topcoat too early traps solvents and creates a finish that remains soft or tacky indefinitely.
For oil-based glaze, expect 4-8 hours of drying time before you can apply topcoat, but 24 hours of curing before the finish has full hardness. For water-based glaze, drying happens faster (2-4 hours) but curing still requires 24 hours minimum. Humidity and temperature affect these timelines significantly.
Water-Based vs. Oil-Based Glaze Curing Times
Water-based glazes typically dry to the touch in 2-4 hours and cure in 24-48 hours. They emit lower VOCs and cleanup is easier, but require faster technique because the working window is shorter.
Oil-based glazes dry more slowly, 4-8 hours to touch dry, but this longer working window makes technique easier. Full curing takes 48-72 hours. The trade-off is stronger odor and longer ventilation requirements.
Plan your project timeline assuming 24-48 hours between glaze application and topcoat application, then another 24-48 hours before cabinets can be reinstalled.
Pros and Cons of Cabinet Glazing
Glazing isn’t the right choice for every situation.
When Glazing Works Best
Glazing excels on cabinets with profiled doors, raised panels, or decorative routed details. The technique was invented specifically to enhance these architectural elements by creating shadow and contrast. If your cabinet doors are simple flat panels, glazing provides less dramatic benefit.
Glazing also works beautifully when you want an aged, custom furniture appearance rather than a modern, flat finish. It’s the technique of choice for traditional, transitional, and farmhouse design styles. Contemporary and minimalist kitchens typically benefit more from solid paint colors without glaze.
Glazing costs significantly less than replacing cabinets while delivering results that look far more expensive than the actual investment. For homeowners with budget constraints and quality cabinetry, glazing is often the best value proposition available.
Limitations and Durability Concerns
Glazed finishes require a protective topcoat to achieve durability comparable to paint alone. Without proper topcoat application, glaze can scratch, fade, or wear through in high-traffic areas.
Glazed finishes also show fingerprints and dust more readily than solid paint finishes. This requires more frequent cleaning, which some homeowners find annoying.
Repairing a glazed finish is more complex than repairing paint. A scratch in a glazed cabinet requires reapplying glaze to the damaged area and potentially rewiping surrounding areas to blend the repair seamlessly.
Glazing also requires more skill to execute well than basic painting. The wipe-off technique, timing, and consistency management are learnable but require practice.
Modern vs. Traditional Cabinet Glazing Aesthetics
The glazing technique itself is centuries old, but contemporary applications look different from traditional ones.
Traditional glazing emphasizes aging and distressing. Heavy glaze application in crevices creates pronounced shadows and an intentionally weathered appearance. This approach works beautifully in farmhouse, cottage, and country-style kitchens.
Modern glazing applications are more subtle. Rather than creating an aged appearance, contemporary glazing adds dimension and visual interest while maintaining a cleaner, more refined look. The glaze is applied more lightly and wiped more thoroughly, creating definition without the heavily antiqued effect. This approach complements transitional and contemporary designs.
The color palette also differs. Traditional glazing often uses darker glaze colors applied over lighter base coats to create dramatic contrast. Modern glazing tends toward more neutral, sophisticated combinations where the glaze enhances rather than dominates.
Both approaches are valid. The choice depends on your overall design aesthetic and how much visual drama you want in your kitchen. Clients with open-concept kitchens often prefer modern, subtle glazing because it feels less heavy in a large space. Clients with traditional or cottage-style homes gravitate toward more pronounced glazing effects.
Cabinet glazing is a transformative technique that adds character and sophistication to kitchen cabinetry without the expense of full replacement. The process requires attention to detail, proper materials, and correct technique, but the results justify the effort. When you’re ready to transform your kitchen with professional glazing, Denver Cabinet Painting Colorado brings 40 years of Colorado experience to every project. Our team specializes in smooth, consistent finishes with meticulous preparation that ensures your cabinets look custom-built. Get a free quote today and discover how cabinet glazing can revitalize your space.
Frequently Asked Questions
What is the difference between cabinet glazing and staining?
Cabinet glazing applies a semi-transparent topcoat over a base coat to add depth and dimension, while staining penetrates the wood grain directly. Glazing creates more control over color and sheen, works on painted or stained surfaces, and builds finish durability with a protective topcoat. Staining is simpler but offers less flexibility for existing painted cabinets and may require separate sealing.
How long does cabinet glazing take to dry and cure completely?
Drying typically takes 4-8 hours for water-based glaze and 8-12 hours for oil-based glaze, but full curing, when the finish reaches maximum hardness, takes 7-30 days depending on the product. During curing, cabinets should remain undisturbed. Check manufacturer specifications for your specific glaze, as temperature and humidity affect timing significantly.
Can you apply cabinet glazing over painted cabinets?
Yes, glazing works well over existing painted cabinets. The painted surface acts as your base coat. Lightly sand the existing finish for better adhesion, clean thoroughly to remove dust, and apply your glaze using brush or wipe-on wipe-off techniques. This approach is popular for antiquing or adding depth to cabinets without stripping them first.
What tools do I need for DIY cabinet glazing?
Essential tools include natural bristle brushes for application, lint-free rags or cheesecloth for wiping, sanding supplies (120-150 grit), primer or base coat, your chosen glaze (oil-based or water-based), and a topcoat like polyurethane or lacquer. You'll also need drop cloths, painter's tape, safety equipment including gloves and ventilation, and a tack cloth for dust removal before glazing.
This article was written using GrandRanker