Table of Contents
- Why Preventing Sticky Kitchen Cabinet Doors Matters
- Why Do My Cabinets Feel Tacky After Cleaning?
- How to Remove Grease from Kitchen Cabinets the Right Way
- Surface Preparation: Sanding, Deglossing, and Priming for a Lasting Finish
- Chemical Stripping vs. Heat Gun Removal: Which Method Wins?
- Cabinet Door Alignment Fix: Preventing Sticking from Hinge Issues
- Preventing Sticky Kitchen Cabinet Doors Long-Term: Maintenance Tips
- Conclusion
Last Updated: June 6, 2026
Sticky cabinet doors are one of the most common kitchen complaints homeowners face, and preventing sticky kitchen cabinet doors is almost always easier than fixing damage after it sets in. At Denver Cabinet Painting Colorado, we’ve spent 40 years diagnosing why cabinet surfaces fail, and the answer is rarely what homeowners expect. The five strategies below have helped Colorado homeowners avoid costly cabinet replacements entirely.
Here’s what most guides get wrong: they treat sticky cabinets as a cleaning problem. More often, it’s a surface preparation or coating failure issue, and no amount of wiping will fix a substrate that was never properly primed.
Why Preventing Sticky Kitchen Cabinet Doors Matters
Sticky kitchen cabinet doors are a symptom of underlying surface failure, not just surface dirt. The cabinet door substrate, whether MDF, veneer, or solid wood, reacts to moisture, heat, and chemical exposure in predictable ways. Catching those reactions early prevents delamination, chipping, and full refinishing costs down the road.
Common Causes: Paint Failure, Humidity, and Residue Buildup
Paint peeling and blistering trace back to three sources: inadequate surface preparation, incompatible primer and top coat combinations, or ongoing exposure to steam and cooking grease. Cabinets near the stove and dishwasher take the hardest hit because they cycle through heat and humidity repeatedly.
Residue buildup compounds the problem. Many commercial kitchen cleaners leave a thin film on painted or laminate finishes that becomes tacky over time, attracting more grease until the surface feels almost adhesive.
Thermofoil Delamination vs. Paint Peeling: Know the Difference
Thermofoil is a vinyl laminate heat-pressed onto MDF cabinet doors. It is not paint, and treating it like paint leads to failed repairs.
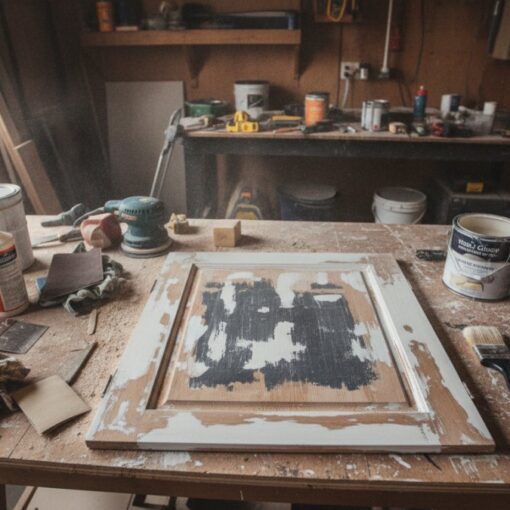
Paint peeling lifts in thin, brittle flakes showing the substrate underneath. Thermofoil delamination peels in larger, flexible sheets, often starting at edges where heat has weakened the adhesive bond. Heat gun removal works on thermofoil; chemical stripping is appropriate for paint failure on wood or veneer. Applying solvent-based stripper to thermofoil can warp the MDF underneath, a repair that costs far more than the original problem.
Never apply a heat gun directly to a painted wood or veneer cabinet door. Heat guns are appropriate for thermofoil removal only. On painted surfaces, excessive heat causes the substrate to swell, creating adhesion problems that no primer can fully correct.
Why Do My Cabinets Feel Tacky After Cleaning?
Cabinets feel tacky after cleaning primarily because the cleaner left behind a residue that interacts with the existing finish. The wrong pH level can partially dissolve a water-based enamel top coat, leaving the surface chemically softened, which is why cleaning more often makes the problem worse.

Wrong Cleaners and Residue Left on the Substrate
Oil-based cleaners, diluted dish soap, and multi-surface sprays are the most frequent offenders. Dish soap leaves a glycerin film that dries tacky and bonds with the top coat. The correct approach is a purpose-formulated cabinet cleaner or diluted TSP (trisodium phosphate) solution, which cuts grease without leaving a film. After cleaning, wipe with a damp cloth, then a dry cloth, leaving moisture on MDF accelerates delamination.
According to the Environmental Protection Agency’s guidance on household cleaning products, many all-purpose cleaners contain surfactants that leave residue on non-porous surfaces, making them the primary culprit behind post-cleaning tackiness on painted cabinet doors.
Environmental Factors: Humidity, Heat, and Poor Ventilation
Kitchens with poor ventilation trap steam that condenses on cabinet surfaces, softening water-based enamel over time. Colorado’s dry winters cause wood to contract while humid summers and cooking steam cause expansion, that repeated cycling stresses adhesion between top coat and primer, eventually causing chipping and peeling at the edges.
The fix: run the range hood during and after cooking, ensure the dishwasher door seal is intact, and maintain indoor humidity between 35% and 50% year-round. A whole-house humidifier in winter prevents the extreme drying that cracks paint films and opens veneer seams.
How to Remove Grease from Kitchen Cabinets the Right Way
Removing grease correctly means degreasing the substrate completely before any repair or refinishing, not just cleaning visually. Grease contamination beneath the paint film is the leading cause of adhesion failure after repainting.
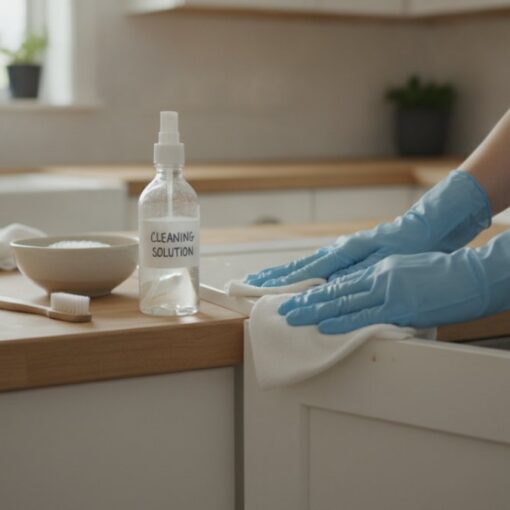
Step-by-Step Degreasing Process Before Any Repair or Refinishing
A thorough degreasing takes about 45 minutes for a full set of cabinet doors. Skipping any step compromises every coat of primer and paint applied afterward.
What You’ll Need:
- TSP substitute or dedicated cabinet degreaser
- Rubber gloves and eye protection
- Microfiber cloths (minimum 4)
- Warm water in a bucket
- Tack cloth
Steps:
- Remove all cabinet hardware and set doors flat on a clean work surface. [Time: 10 minutes]
- Mix TSP substitute with warm water per package directions. Apply with a damp microfiber cloth, working in the direction of the wood grain or laminate texture.
- Scrub lightly in circular motions on heavily soiled areas, then wipe clean with a separate damp cloth.
- Follow immediately with a dry cloth pass to remove all moisture.
- Allow the surface to dry completely, at least 30 minutes in a ventilated space, before sanding or priming.
- Wipe with a tack cloth immediately before applying primer to capture remaining dust or residue.
Expected Result: The surface should feel clean and slightly rough, with no oily or slick sensation. If tackiness persists, repeat the degreasing step.
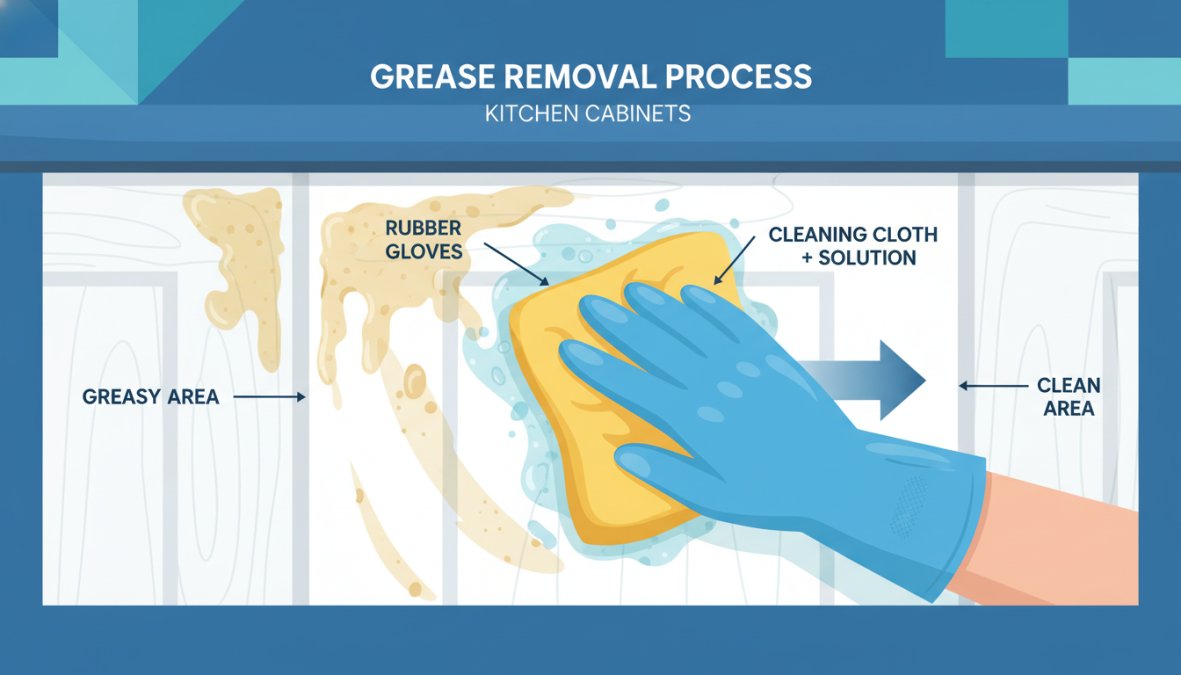
Add a small amount of white vinegar to your rinse water during the final wipe-down. Vinegar neutralizes alkaline residue left by TSP-based degreasers and leaves the surface at the correct pH for primer adhesion.
Surface Preparation: Sanding, Deglossing, and Priming for a Lasting Finish
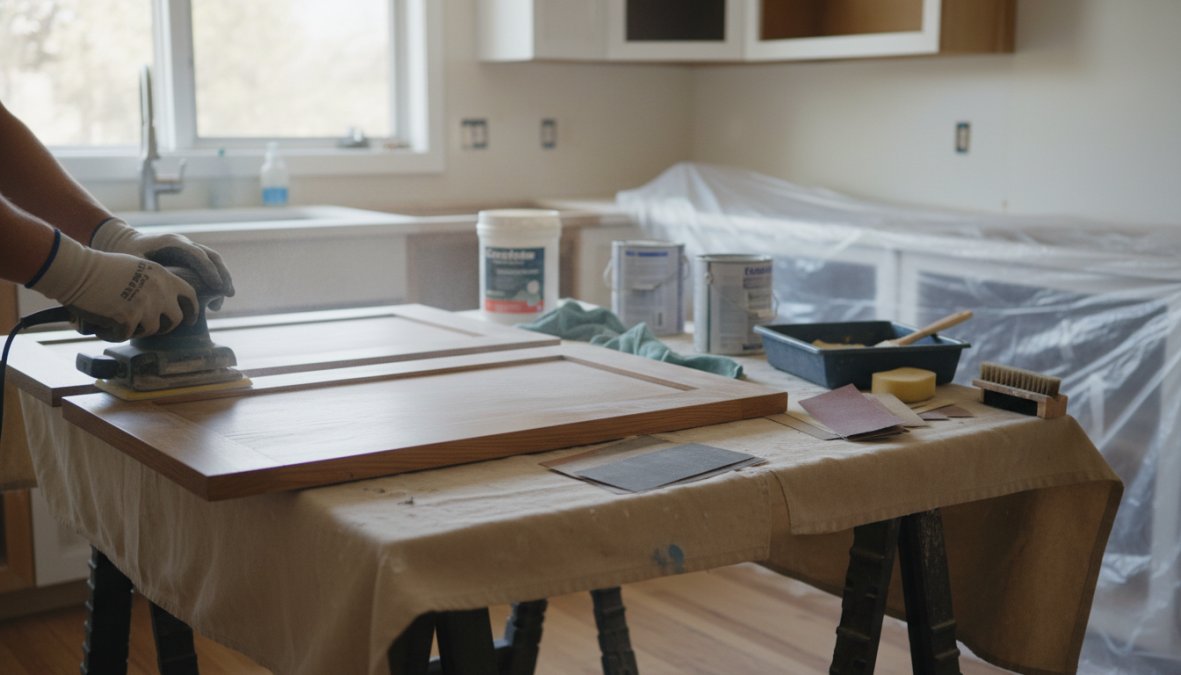
Surface preparation is where professional cabinet finishes are won or lost. A proper prep sequence, scuff sanding, deglossing, and priming in that order, creates the mechanical and chemical adhesion that prevents future peeling, chipping, and stickiness. Most DIY refinishing failures skip at least one step, looking fine for six months before peeling at the edges.
Surface Preparation Checklist:
- Degrease all surfaces with TSP substitute
- Allow complete drying (minimum 30 minutes)
- Scuff sand with 220-grit sandpaper in the direction of the grain
- Wipe with tack cloth to remove all sanding dust
- Apply deglossing agent if skipping wet sanding
- Apply bonding primer in thin, even coats
- Allow full primer cure time before top coat application
- Lightly sand between coats with 320-grit for a professional finish
Choosing the Right Primer: Bonding Primer vs. Oil-Based Primer
Bonding primer is formulated with adhesion promoters that grip slick, non-porous surfaces, thermofoil, laminate, and previously painted surfaces. It’s water-based, dries quickly, and compatible with both acrylic enamel and alkyd top coats. For most MDF or laminate cabinet doors, bonding primer is the correct choice.
Oil-based primer penetrates wood grain more deeply and provides superior stain blocking on tannin-rich woods like honey oak that bleed through water-based products. The trade-off is longer dry time (4-8 hours) and solvent cleanup.
Selecting a Durable Top Coat: Acrylic Enamel vs. Alkyd Paint
Acrylic enamel cures to a hard, durable film with good moisture resistance, cleans up with water, and is the standard choice for most residential cabinet refinishing in 2026. Alkyd paint produces an exceptionally hard, high-gloss finish that levels better than water-based products, fewer brush marks, more professional result, but requires 7-14 days to reach full hardness.
| Top Coat Type | Dry Time | Curing Time | Best For | Moisture Resistance |
|---|---|---|---|---|
| Acrylic Enamel | 1-2 hours | 3-7 days | MDF, laminate, most kitchens | Good |
| Alkyd Paint | 6-8 hours | 7-14 days | Solid wood, high-traffic areas | Excellent |
| Water-Based Enamel | 1-2 hours | 3-5 days | Quick turnaround projects | Good |
| Marine Paint | 4-6 hours | 7-10 days | High-humidity kitchens | Excellent |
For kitchens with heavy steam exposure, marine paint formulations offer the highest moisture resistance in a consumer-grade product.
Chemical Stripping vs. Heat Gun Removal: Which Method Wins?
The answer depends entirely on what you’re removing, getting this wrong is an expensive mistake.
Chemical stripping dissolves paint films from solid wood or veneer cabinet doors without mechanical abrasion that can damage fine grain. Working time is 15-30 minutes per application and requires proper ventilation and chemical-resistant gloves.
Heat gun removal uses controlled heat (250-350°F) to soften and lift thermofoil laminate from MDF substrates. It’s faster than chemical stripping for thermofoil but completely inappropriate for painted surfaces.
The practical decision framework:
- Thermofoil delamination on MDF: use a heat gun
- Paint failure on solid wood or veneer: use chemical stripping
- Paint failure on MDF: use chemical stripping with a water-based stripper (solvents can swell MDF)
- Multiple paint layers on any substrate: chemical stripping is safer than mechanical sanding, which risks cutting through veneer
According to the Consumer Product Safety Commission’s guidance on chemical strippers, methylene chloride-based strippers carry significant health risks and have been restricted for consumer use. Use NMP-free or water-based stripping products for interior cabinet work.
Chemical stripping is the safer, more controlled method for painted cabinet surfaces. Heat guns are specifically for thermofoil delamination. Using the wrong method for the wrong surface type creates substrate damage that compounds the original problem.
Cabinet Door Alignment Fix: Preventing Sticking from Hinge Issues
A cabinet door alignment fix is often the simplest and most overlooked solution for sticky kitchen cabinet doors. Many doors that appear to have a surface problem are actually sticking because a shifted hinge causes the door edge to drag against the cabinet frame.
Most modern kitchen cabinets use European-style concealed hinges with three adjustment screws: depth (in/out), lateral position (left/right), and vertical height. A door that drags on one side typically needs a lateral adjustment of 1-2mm; a door that catches at the top or bottom needs a vertical adjustment.
Quick alignment check:
- Open the door and check that the gap between door edge and cabinet frame is consistent top to bottom.
- Close the door slowly and watch for where it catches, that identifies which adjustment is needed.
- Turn the relevant screw in quarter-turn increments and recheck after each adjustment.
Humidity is the most common cause of hinge shift in Colorado kitchens, wood frames expand in humid conditions, pushing hinges out of alignment. If your cabinets stick seasonally, hinge adjustment is almost certainly the fix. If a mounting screw spins without gripping, fill the hole with a wooden toothpick and wood glue, cure overnight, then re-drive the screw to restore full grip without replacing the hinge or cabinet frame.
Preventing Sticky Kitchen Cabinet Doors Long-Term: Maintenance Tips
Long-term prevention requires a consistent maintenance routine, not just a one-time repair. The cabinets that hold up best are cleaned correctly, protected from steam, and inspected annually for early signs of adhesion failure.
Annual maintenance checklist:
- Degrease all cabinet surfaces with TSP substitute each spring
- Check hinge alignment and adjust as needed
- Inspect edges and corners for early signs of peeling or delamination
- Lightly scuff sand and apply a fresh top coat to areas showing wear
- Verify range hood is functioning and venting properly
Between annual deep cleans, wipe cabinet surfaces weekly with a damp microfiber cloth and dry immediately. For polyurethane-finished solid wood cabinets, apply a thin coat of paste wax twice per year, wax creates a sacrificial barrier between the finish and cooking residue, reducing the rate at which the top coat degrades.
DIY Maintenance vs. Hiring a Professional: Cost-Benefit Analysis
Most maintenance tasks, degreasing, hinge adjustment, and minor touch-ups, are well within DIY capability. The line shifts when surface failure is widespread or the substrate has been damaged by moisture.
DIY refinishing makes sense when fewer than 20% of cabinet doors show visible wear and the substrate is intact. Professional refinishing makes sense when widespread paint failure or thermofoil delamination affects most doors, the substrate shows moisture damage or warping, or you want a factory-quality finish with professional spray equipment, which produces a smoother, more even top coat than brush or roller application.
As documented in the National Kitchen and Bath Association’s remodeling cost guide, professional cabinet refinishing typically costs a fraction of full cabinet replacement while achieving a comparable visual result.
Request a sample door finish before committing to a full cabinet refinishing project. A reputable professional will paint one door in your chosen color and sheen level so you can evaluate finish quality before the full project begins.
Sticky, peeling, or tacky cabinet doors don’t have to mean full cabinet replacement, but they do require the right diagnosis and approach. Denver Cabinet Painting Colorado brings 40 years of cabinet refinishing experience to every project, with meticulous surface preparation and professional spray application built to last in Colorado kitchens. Their team serves residential and commercial clients across the Denver metro area and offers free quotes to help you understand your options. Get started with Denver Cabinet Painting Colorado and transform your kitchen without the cost and disruption of full cabinet replacement.
Frequently Asked Questions
Why do kitchen cabinet doors get sticky?
Kitchen cabinet doors become sticky due to several causes: grease and cooking residue buildup, cleaning products that leave a film, high humidity causing paint or thermofoil to soften, or a finish that never fully cured. Cabinets painted with low-durability paint or finished without a proper bonding primer are especially prone to tackiness. Preventing sticky kitchen cabinet doors starts with identifying the root cause, whether it's surface contamination, paint failure, or a moisture and adhesion issue.
Why do my cabinets feel tacky after cleaning?
Tacky cabinets after cleaning usually mean a cleaning product left behind a residue, or the cleaner stripped away the top coat, exposing a softer layer underneath. Multi-surface sprays and dish soap can both leave films. To fix this, wipe cabinets down with a diluted TSP solution or a dedicated degreaser, then rinse with clean water and dry thoroughly. If tackiness persists, the finish itself may need scuff sanding and a fresh coat of water-based enamel.
Can I use vinegar to clean sticky kitchen cabinets?
Diluted white vinegar can cut through light grease on painted cabinet surfaces, but it should be used cautiously. Straight vinegar is acidic enough to dull or damage certain finishes, particularly acrylic enamel or polyurethane top coats. A safer everyday option is a few drops of dish soap in warm water, or a dedicated cabinet degreaser. For heavy grease buildup before refinishing, a TSP substitute solution is more effective and less likely to compromise the substrate.
Does humidity cause kitchen cabinets to stick?
Yes, humidity is a major contributor to sticky cabinet doors, especially on MDF or wood-grain substrate cabinets. Moisture causes wood to expand, which can make doors bind against frames. It also softens paint finishes that weren't sealed with a moisture-resistant top coat. Preventing sticky kitchen cabinet doors in humid kitchens means ensuring proper ventilation, using a primer with moisture resistance, and choosing a durable acrylic enamel or alkyd paint with adequate curing time before regular use.
How do you fix cabinets that stick due to paint buildup or misalignment?
For paint-related sticking, lightly sand the contact points on the cabinet door and frame with fine-grit sandpaper, clean with a tack cloth, and apply a thin, even coat of durable enamel. For a cabinet door alignment fix caused by sagging hinges, tighten or replace the hinge screws, use longer screws if the holes are stripped. Adjustable European-style hinges allow micro-adjustments up, down, left, and right without removing the door, making alignment fixes straightforward.
What is the best way to lubricate cabinet hinges to prevent sticking?
For hinges that squeak or bind, a thin application of dry PTFE lubricant or a silicone-based spray works well without attracting dust or grease. Avoid WD-40 as a long-term solution, it evaporates quickly and can leave a residue that attracts grime. For cabinet doors that stick against the frame rather than at the hinge, lubrication won't help; the issue is usually paint buildup or misalignment that requires sanding or a cabinet door alignment fix.
This article was written using GrandRanker